18
3. Gas requirements
Only use propane or butane.
The pressure regulator and gas hose must match the local directives.
Setup of the heater must correspond to the local gas directives. If no gas directives are known,
the standard for storage and handling of liquid gases must be applied.
A dented, rusty or damaged gas tank may be dangerous and should be examined by the dealer.
A gas tank with a damaged valve should never be used.
The heater must be set up to ensure vapour extraction in the cylinder.
Never connect a gas tank to the heater without a controller.
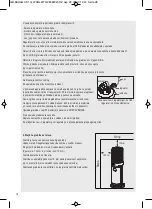
4. Leakage test
The gas connections are examined for leaks before the heater is delivered. A complete leak test must be performed
after delivery, however, due to the risk of wrong handling of devices during delivery.
Produce a soapy solution of one part cleaning agent and one part water. The soapy solution can be applied with a
spray bottle or a brush. Bubbles will form if there are any leaks.
The entire system must be tested with a gas cylinder filled at least to 80%.
First turn the controller OFF and then turn it ON.
In case of a leak, the gas supply must be switched off again at once.
Tighten all leaking connections and perform the test again.
Never smoke during the test.
5. Operation and storage
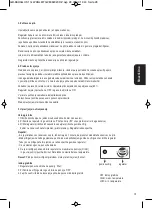
Switching on the heater
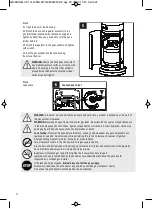
1. Open the gas valve of the gas supply cylinder completely.
2. Push in the variable control knob and turn it to the PILOT position (counter-clockwise by 90°).
3. Keep the variable control knob pushed in for 60 seconds and press the igniter button several times until the pilot
flame lights up. The variable control knob can now be released.
Note:
- If a new gas tank has been connected, it may take up to 1 minute
before the remaining air has flowed out through the gas tube.
- When lighting the pilot flame make sure that the variable control knob
is continously kept pushed while pressing the igniter button.
Variable control knob can be released after the pilot flame lights up.
- If the pilot flame does not light or goes out, repeat step 3.
4. After the pilot flame lights, turn the variable control knob to maximum
(HIGH) position and leave it there for 5 minutes or more before you turn
the control knob to the desired temperature position.
Note: A 5-minute complete shut off period is necessary before re-lighting.
Switching off the heater
1. Turn the control knob back to PILOT position.
2. Press and turn the variable control knob to OFF position.
3. Turn the gas valve of the gas supply cylinder off again.
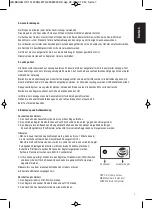
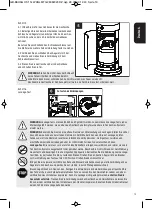
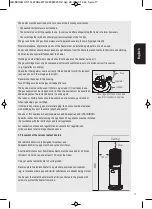
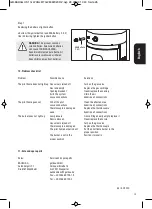
OFF:
the heater stops to work
HIGH:
maximum temperature position
LOW:
minimum temperature position
igniter
control knob
GB-BAHAG HS 11kW ANLEITG 29092020 RZ.qxp 29.09.20 14:40 Seite 18
Содержание 25679582
Страница 2: ...2 GB BAHAG HS 11kW ANLEITG 29092020 RZ qxp 29 09 20 14 40 Seite 2...
Страница 48: ...48 1 2 3 4 5 1 2 25 3 31 8 c x 58 c 15 GB BAHAG HS 11kW ANLEITG 29092020 RZ qxp 29 09 20 14 40 Seite 48...
Страница 49: ...49 1 2 3 4 5 6 7 8 9 10 11 1 OFF GB BAHAG HS 11kW ANLEITG 29092020 RZ qxp 29 09 20 14 40 Seite 49...
Страница 50: ...50 2 100 c 100 c 100 cm 100 cm GB BAHAG HS 11kW ANLEITG 29092020 RZ qxp 29 09 20 14 40 Seite 50...
Страница 52: ...52 1 2 3 4 6 7 460 880 1360 370 GB BAHAG HS 11kW ANLEITG 29092020 RZ qxp 29 09 20 14 40 Seite 52...
Страница 56: ...56 M5 x 8 3 4 M5 x 8 DD M6 4 M6 CC EE GB BAHAG HS 11kW ANLEITG 29092020 RZ qxp 29 09 20 14 40 Seite 56...
Страница 57: ...57 5 5 1 5 2 5 3 5 4 6 OFF GB BAHAG HS 11kW ANLEITG 29092020 RZ qxp 29 09 20 14 40 Seite 57...
Страница 59: ...59 GB BAHAG HS 11kW ANLEITG 29092020 RZ qxp 29 09 20 14 40 Seite 59...
Страница 60: ...GB BAHAG HS 11kW ANLEITG 29092020 RZ qxp 29 09 20 14 40 Seite 60...

