7
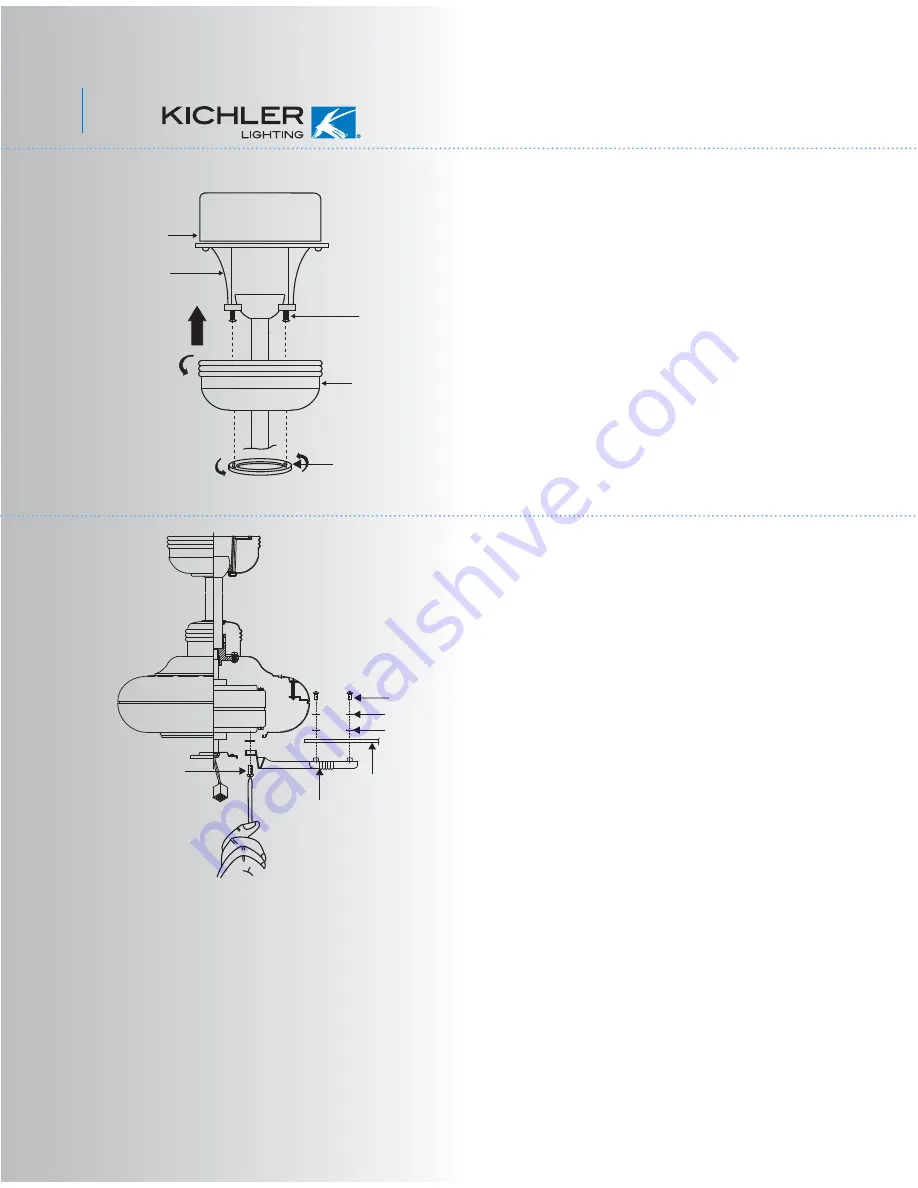
Fig. 13
Step 1. Tuck all the connections neatly into the
ceiling outlet box.
Step 2. Slide the canopy up to ceiling and over
the two screws on hanger bracket. Rotate
canopy clockwise, next, while holding the
canopy with one hand, slide the canopy cover
over the screws and rotate clockwise until
tight.
NOTE:
Adjust the canopy screws as
necessary until the canopy and canopy cover
are snug. (Fig.13)
8. FINISHING THE INSTALLATION
Outlet box
Ceiling mounting
bracket
Canopy
Canopy cover
Screws
9. ATTACHING THE FAN BLADES
Fig. 14
CAUTION:
Remove the five rubber shipping
blocks attached to the face of the motor.
These blocks keep the motor from shifting
during shipping and MUST be removed during
installation.
Step 1. Attach a blade to a blade bracket using
the screws, metal washers and fiber washers
provided. (Fig. 14)
Make sure the blade is straight when set on
the blade bracket. Tighten each mounting
screw and then repeat this procedure for each
blade.
Step 2. Attach each blade assembly to the
motor using the "Pre-Installed" mounting
screws in the blade bracket. (Fig. 14)
Screws
Washers
Set of blade brackets
blades
Screws
Fiber
washers


