INSTALLATION
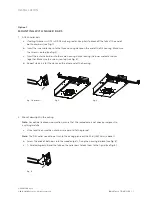
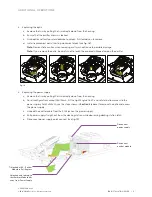
2. Attach butterfly brackets
a. Outside the housing, undo the red wing nut and washer attached to the first butterfly
bracket’s bolt.
b. Run the bracket’s bolt through the hole in the side of the housing (see
fig. 7
).
c. Reaching into the housing, thread the washer and red wing-nut back onto the bolt, fixing the
bracket in place.
d. Repeat steps a-c for the second butterfly bracket.
fig. 7
2b
3. Restore the original emitter module conditions
a. Return the emitter chassis to its original position, locking the tilt and rotation locks.
b. Wall-wash downlight only: Reattach the optic. Press it flush to the base of the emitter chassis and
turn it clockwise until it engages the shoulder screws on either side of the emitter.
Note:
The opening in the C-shaped kick reflector should face the wall.
c. Reinsert the cardboard plug to protect the optic from dust during the rest of the installation.
continued on next page
D3
INSTALLATION GUIDE | 9
P/N 3662360 Rev C
© 2019-2020 Ketra, Inc. All rights reserved.

