27
DNX4280BT/5180/5280BT/5380/5380M
/5380BT/5580BT/6040EX/6180/6480BT/6980
PS automatic determination when selecting station
q
Select a station and receive the PS.
w
Turn off the P_ANT and P_CON terminals if the received
PS is “RDS_TEST” or “KENWOOD_” (_: Space).
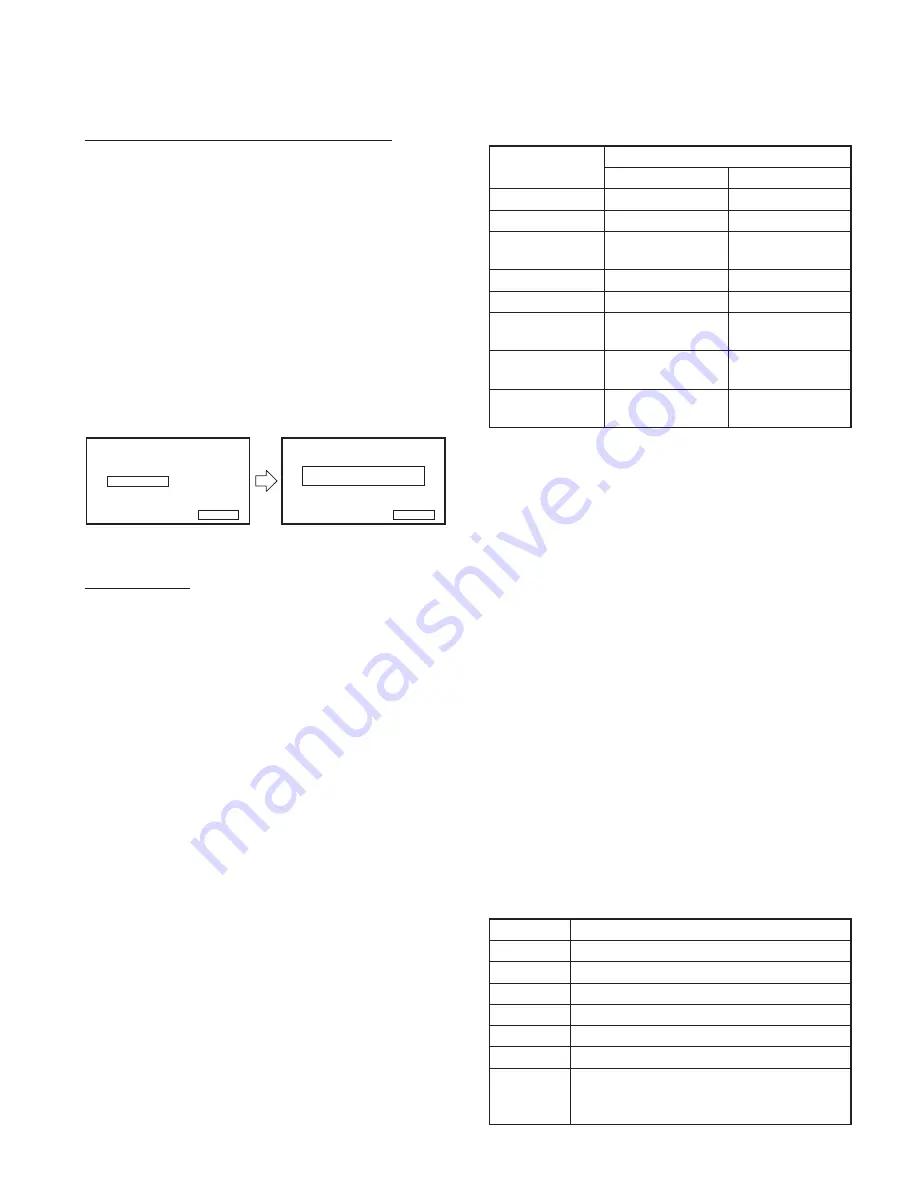
2.2.13.5 Unit ID screen
Copy the Unit ID, Unlock Code, and GMA in the uSD to the
NAND memory.
Prohibit transfer to the Unit ID screen in the release version
(Vx.x.0).
This screen is a screen for designing purposes, so copy
the Unit ID, Unlock Code, and GMA unconditionally to the
NAND memory.
Figure 2.2.13.5 shows the display contents of the Unit ID
screen.
Cancel
Copy
Unit ID
Unit ID
Write OK/NG
Return
Figure 2.2.13.5 Unit ID screen
Key Speci
fi
cation
Copy
: Start copying Unit ID, Unlock Code, and GMA.
Cancel : Transfer to Navigation Test screen.
Return : Transfer to Navigation Test screen.
2.3 Functional speci
fi
cation
This section describes the test mode speci
fi
cation in each
function.
2.3.1 Display
During the test mode, other than the screen described in
2.2, it is possible to transfer to the screen displayed nor-
mally, such as Source Control screen, Audio Control screen,
Setup screen, etc.
(Press [Direct Select] key in the Test Mode Main screen to
transfer)
Do not perform Touch cursor display on the 11 Visual Mid/
Entry model.
2.3.2 Key
Even in the Test mode, the speci
fi
cations of the hard key
shall be the same as while in normal operation. (Except for
[MENU] key)
For your reference, the multiple pressing speci
fi
cations of
the key are described in Table 2.3.2.
(For original documents of multiple key pressing speci
fi
ca-
tion, refer to the “11 Function speci
fi
cation_hard key”)
Operation
Multiple press key
Mid
Entry
Test Mode ON
MENU + ATT + Reset Eject + SCRN + Reset
Span switching
Eject + NAV + Reset
Eject + ATT + Reset
DC Offset/ Service/
Memory Other Clear
MENU + AUD + Reset MENU + ATT + Reset
Retailer mode: ON
Eject + AUD + Reset MENU + SCRN + Reset
Retailer mode: OFF
MENU + Reset
MENU + Reset
RDS test drive
mode ON
Eject + Volume Down
+ Reset
Eject + TEL + Reset
Opening screen
customization
MENU + Volume Down
+ Reset
MENU + TEL + Reset
Bluetooth authenti-
cation mode ON
NAV + AUD + Reset
Eject + NAV + Reset
Table 2.3.2 (for reference) Multiple pressing key speci
fi
cations
∗
Due to the restriction of the electrostatic touch sensor IC
(PSoC), perform multiple press + Reset operation as de-
scribed below for the Mid model.
q
Perform the key operation while the set is Powered
ON. (When Backup ON is performed while pressing
the key or key is operated in the Power OFF status,
key data cannot be acquired.)
w
In case of [MENU] key + other key ([ATT], [AUD], [Vol-
ume Down]), press the other key
fi
rst, then the [MENU]
key, and then the [Reset] key, or press [MENU] key
+ other key while holding down the [Reset] key, and
then release the [Reset] key. (Because it will transfer
to Power OFF after the [MENU] key is pressed for 1
second)
2.3.3 Remote controller
The remote controller key speci
fi
cation is listed in Table 2.3.3.
(Note that the keys that are not listed in the table have con-
ventional functions.)
Remote controller key speci
fi
cation shown in Table 2.3.3 is
when the SW at the side of remote controller is set to AU-
DIO.
Key
Operation
FM
DVD video inspection mode
AM
DVD audio inspection mode
Tenkey #0
Transfer to the Flicker Adjustment screen
Tenkey #2
Set the Volume value as Step26
Tenkey #4
Transfer to Test Mode Main screen
Tenkey #5
Forcible Navigation Voice Interruption ON/OFF
Tenkey #6
Transfer to the Screen Adjustment screen (Screen
adjustment screen is cancelled when the Screen
adjustment screen is displayed)
TEST MODE


