background image

D-S3 0 0  (En)

2

Before applying pow er

Caution : Read this section carefully to ensure safe operation.

Units are designed for operation as follow s.

U.S.A. and Canada ................................................................ AC 120 V only
Australia .................................................................................. AC 240 V only

Europe and U.K. ..................................................................... AC 230 V only
China ......................................................................................... AC 220 V only
* Other countries ............................ AC 110-120 / 220-240 V sw itchable

The marking is located on the rear panel and says that the compo-
nent uses laser beams that have been classified as Class 1. It means
that the unit is utilizing laser beams that are of a w eaker class. There
is no danger of hazardous radiation outside the unit.

CLASS 1

LASER PRODUCT

The marking of products using lasers

(Except for some areas)

Introduction

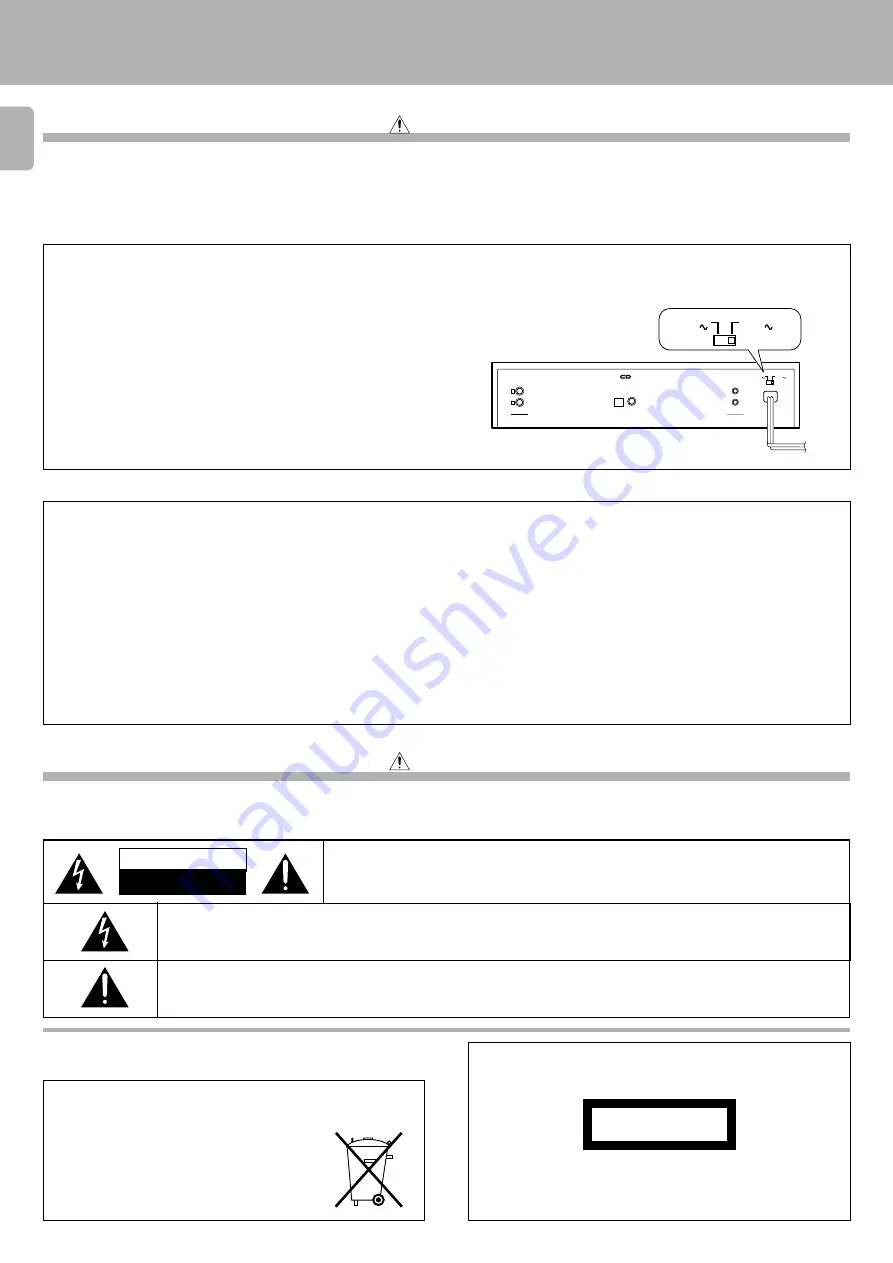
* AC voltage selection

The AC voltage selector sw itch on the rear panel is set to the voltage that
prevails in the area to w hich the unit is shipped.  Before connecting the
pow er cord to your AC outlet, make sure that the setting position of this
sw itch matches your line voltage.  If not, it must be set to your voltage in
accordance w ith the follow ing direction.

M ove sw itch lever to m atch your line voltage
w ith a sm all screw driver or other pointed tool.

AC voltage selector sw itch

Note:
Our w arranty does not cover damage caused by excessive line volt-
age due to improper setting of the AC voltage selector sw itch.

For the United Kingdom

Factory fitted moulded mains plug

1. The mains plug contains a fuse. For replacement, use only a 13-Amp ASTA-approved (BS1362) fuse.
2. The fuse cover must be refitted w hen replacing the fuse in the moulded plug.
3. Do not cut off the mains plug from this equipment. If the plug fitted is not suitable for the pow er points in your home or the cable is too short to reach

a pow er point, then obtain an appropriate safety approved extension lead or adapter, or consult your dealer.
If nonetheless the mains plug is cut off, remove the fuse and dispose of the plug immediately, to avoid a possible shock hazard by inadvertent
connection to the mains supply.

IM PORTAN T

The w ires in t he m ains lead are coloured in accordance w it h t he f ollow ing code:

Blue

: Neut ral

Brow n : Live

Do not connect those leads to the earth terminal of a three-pin plug.

WARNING

 :

TO PREVENT FIRE OR ELECTRIC SHOCK, DO NOT EXPOSE THIS
APPLIANCE TO RAIN OR M OISTURE.

Safety precautions

THE LIGHTNING FLASH W ITH ARROW HEAD SYM BOL, W ITHIN AN EQUILATERAL TRIANGLE, IS INTENDED TO ALERT
THE USER TO THE PRESENCE OF UNINSULATED “ DANGEROUS VOLTAGE”  W ITHIN THE PRODUCT’S ENCLOSURE
THAT M AY BE OF SUFFICIENT M AGNITUDE TO CONSTITUTE A RISK OF ELECTRIC SHOCK TO PERSONS.

Caution : Read this section carefully to ensure safe operation.

THE EXCLAM ATION POINT W ITHIN AN EQUILATERAL TRIANGLE IS INTENDED TO ALERT THE USER TO THE
PRESENCE OF IM PORTANT OPERATING AND M AINTENANCE (SERVICING) INSTRUCTIONS IN THE LITERATURE
ACCOM PANYING THE APPLIANCE.

CAUTION

RISK OF ELECTRIC SHOCK

DO NOT OPEN

CAUTION: TO REDUCE THE RISK OF ELECTRIC SHOCK, DO NOT REM OVE COVER (OR
BACK). NO USER-SERVICEABLE PARTS INSIDE, REFER SERVICING TO QUALIFIED
SERVICE PERSONNEL.

L

R

LIN E OUTPUT

DIGITAL OUTPUT

OPTICAL COAXIAL

SISTEM

CON TROL

TEXT

AC 1 1 0 -
1 2 0 V

AC 2 2 0 -
2 4 0 V

AC 1 1 0 -
1 2 0 V

AC 2 2 0 -
2 4 0 V

REQUIREM ENT BY NEDERLAND GAZETTE

Batteries are supplied w ith this product. When

they empty, you should not throw  aw ay.  Instead,

hand them in as small chemical w aste.

Downloaded from: 

http://www.usersmanualguide.com/

Содержание D-S300

Страница 1: ...this model also covers the systems in the KENWOOD System SERIES 21 lineup Since the features vary depending on the combined systems the remote control operation illustrations icons are shown for two typesof remote control units Refer to the instruction manual included with the AV CONTROL CENTER for the basic remote control operations Downloaded from http www usersmanualguide com ...

Страница 2: ...he plug fitted is not suitable for the power points in your home or the cable is too short to reach a power point then obtain an appropriate safety approved extension lead or adapter or consult your dealer If nonetheless the mains plug is cut off remove the fuse and dispose of the plug immediately to avoid a possible shock hazard by inadvertent connection to the mains supply IMPORTANT The w ires i...

Страница 3: ...sic is inter rupted in the middle Auto space function Easy operation functions allow systematic operation with other KENWOOD components connected through the system control connection 5 Special features CD TEXT support Advanced technologies incorporated in pursuit of improved sound quality and stability Convenient features for dubbing CD onto tape Easy operation functions Contents Caution Read the...

Страница 4: ...ions equal to or greater than shown below Left and right panels 10 cm Rear panel 10 cm 1 Connect all cords firmly If connections are loose there could be loss of sound or noise produced 2 When plugging and unplugging connection cords be sure to first remove the power cord from the AC outlet Plugging unplugging connection cords without removal of the power cord can cause malfunctions or damage to t...

Страница 5: ... remote control unit supplied with the AV CONTROL CENTER or receiver Automatic Operation Automatically switches the input selector on the AV CONTROL CENTER or receiver when you start playback from this unit Synchronized Recording Lets you synchronize recording with the start of playback when recording from CD Also the simple CCRS operation and O T E recording lets you make great recordings from CD...

Страница 6: ...ANDBY 2 STANDBY indicator 6 3 Disc tray Load the disc to be played back 4 Open Close key 0 Opens and closes the disc tray When this unit is connected to the system in standby mode pressing this key will automatically turn the unit ON and open the disc tray 5 REPEAT key Press to play the tracks repeatedly The keyswith the same name asthose on the remote control unit operate the same way as the remo...

Страница 7: ...DSP LEVEL VOLUME PRO LOGIC 3 STEREO MULTI CONTROL TEST TONE MODE INPUT TAPE 2 MONITOR FREEZE PAL NTSC RETURN TAPE VIDEO CD SELECT P B C REC ARM O T E LD AUTO DIGITAL CD VIDEO CD LD REPEAT FRAME TIME PTY TA NEWS INFO DISC SKIP EDIT MODE ALL TEXT SEARCH P CALL fi 3 1 4 2 This illustration is only an example 1 ON STANDBY key 2 A B switch Some keys serve two functions Please follow the operating instru...

Страница 8: ...y turns ON STANDBY this unit or the equipment connected with the system control cords 7 CD player operation panel Play Pause icon 6 Stop icon 7 Search icons 1 These icons send the track forward or backward Mode icon This icon is used to select the playback mode Skip icons 4 When selected the next track in the icon direction is played 10key Pad icon This icon switches to the Numeric Icon menu scree...

Страница 9: ...n made Turn the system devices ON BasicOperationsfortheGraphicalRemoteControlUnit GRC Once the settings have been made in Steps 1 to 3 you do not need to repeat these steps until you replace the batteries The GRC operation beginning on page 12 are written assuming that the basic operations below have been completed At the initial screen select the Model Type to be used The arrow shows the directio...

Страница 10: ...neral remote control unit are indicated by RC operation Operations with the graphical remote control unit are indicated by GRC operation Operation of remote control unit 6 P MODE 2 REMOTE CONTROL UNIT RC S0504 1 RC operation GRC operation Text replacement or actual operation Key Icon Press Select Select and press the ENTER key Press the key Select the icon Select the icon and press the ENTER key U...

Страница 11: ...1 1 D S300 En Downloaded from http www usersmanualguide com ...

Страница 12: ...crolled on the display Each press pauses and plays the CD alternately Playing tracks in order from track No 1 To stop playback To pause playback 2Place a disc Lights up Lights up Track NO being played Elapsed time of track being played Turn the unit ON In the case of a CD TEXT disc the track s title is scrolled on the display What is then displayed is in accordance with the TEXT DISPLAY mode Prepa...

Страница 13: ...e previous menu screen level at any time by selecting the Return icon and pressing the ENTER key 4 NEXT PREV To skip backward ENTER To skip backward To skip forward To skip forward Searching Forward search ENTER Backward search Select the desired track No 10 5 4 3 2 1 0 9 8 7 6 GRC operation RC operation GRC operation RC operation GRC operation RC operation GRC operation RC operation Keep the ENTE...

Страница 14: ...he normal play TRACK mode M ULTIPLE CD PLAYER D S300 0 1 A M N O P Q B C D E F G H I J K L M N O P Q To stop the search press the TITLE SEARCH key again Title Search Text Mode ENTER ENTER ENTER TITLE SEARCH A MONI 2 2 0 T T I E L X Z Y Select the name of the track title to be heard If no keys are operated for more than a second the track title is scrolled on the display 3Start playback The track n...

Страница 15: ... for approx 3 seconds In the stop mode When the key is pressed once the 1 Disc Title is scrolled on the display when it is pressed repeatedly the display is changed In the PGM mode the displays are the same as for play mode 1 Disc Title Disc title 2 Disc Artist Singer or performer 3 TIM E Track No time display If the key is released while 2 Disc Artist is displayed 1 Disc Title returns to the disp...

Страница 16: ...mode ENTER Go to step 2 within 8 seconds Tracks can also be selected by pressing the 4 or key Up to 32 tracks can be programmed When FULL is displayed no more tracks can be programmed If you make a mistake press the CLEAR key and enter the track No from the beginning When the total playing time of the programmed tracks exceeds 100 minutes the remaining time on the disc will not be displayed any mo...

Страница 17: ... created if they have different track Nos Press until the track No to be changed is displayed Check ENTER 1 Press the CHECK key To add a track to the program Remote control unit only P mode ENTER P MODE 3 Set the entry 2 Select the new track No 1 2 3 4 5 6 7 8 9 0 10 ENTER 10 5 4 3 2 1 0 9 8 7 6 CHECK To clear tracks from the program Remote control unit only CLEAR Clear ENTER Press to clear tracks...

Страница 18: ... FULL is displayed no more tracks can be programmed To cancel repeated playback Press the REPEAT key twice REPEAT ON OFF 1Press so that the PGM indicator lights P MODE PGM Mode P mode ENTER ENTER ENTER GRC operation RC operation E R E P T A ON 6Start playback PGM ENTER ENTER 6 The current status is displayed when the key is pressed once When it is pressed while the status is displayed the repeat O...

Страница 19: ...on RC operation The current status is displayed when the key is pressed once When it is pressed while the status is displayed the repeat ON status can be set to OFF or vice versa GRC operation To display the current status first select the Repeat icon and press the ENTER key and then select the Repeat icon and press the ENTER key Pressing the ENTER key again while the status is displayed will set ...

Страница 20: ...00 46 minute tape 00006 GRC operation Press the ENTER key after selecting each nu meric icon 30 minute tape 0ENTER 0ENTER 0ENTER ENTER GRC operation RC operation GRC operation RC operation Recording within 99 minutes can be specified in minutes 2 digits If you commit a mistake in time entry press the P M ODE key and restart the procedure from the beginning By pressing the TIM E key the set time le...

Страница 21: ...Remaining time display Notes Notes To clear the edited contents To check the edited contents D E T I A 01 0 Remote control unit only When the CHECK key is pressed track numbers and remaining time in the file A are displayed first then those in the file B P MODE P mode ENTER Clear ENTER Press any one of these keys The edited data is cleared entirely Playing or recording the edited contents Press th...

Страница 22: ...same operation as above is repeated and the track selected next is played Random play stops after all of the tunes have been played once The random playback can also be repeated by pressing the REPEAT key E 2 1 N R M D 0 0 5 The number here changes Check that the unit is in the normal play TRACK mode During track selection and move from the outside to the inside M ULTIPLE CD PLAYER D S300 NEXT RAN...

Страница 23: ...2 3 D S300 En Downloaded from http www usersmanualguide com ...

Страница 24: ...ker has been peeled off is afactor which may cause malfunction If the surfaceisstickyduetoremainingpaste be sure to clean it with alcohole before use Discs which can be played with this unit Beware of condensation When water vapor comes into contact with the surface of cold mate rial water drops are produced If condensation occurs correct opera tion may not be possible or the unit may not function...

Страница 25: ...al lens unit Play mode is not entered Disc is too dirty Disc is cracked The connection cords are inserted loosely Disc is too dirty Disc is cracked Oscillation is applied to this unit In case of difficulty What appears to be a malfunction may not always be serious If your unit should not perform as expected consult the table below to see if the problem can be corrected before seeking help from you...

Страница 26: ...In compliance with Federal Regulations following are reproductions of labels on or inside the product relating to laser product safety KENWOOD CORPORATION 2967 3 ISHIKAWA CHO HACHIOJI SHI TOKYO JAPAN KENWOOD CORP CERTIFIES THIS EQUIPMENT CONFORMS TO DHHS REGULATIONS NO 21 CFR 1040 10 CHAPTER I SUBCHAPTER J Location Back Panel Downloaded from http www usersmanualguide com ...

Страница 27: ...nd to comply with the limits for a Class B digital device pursuant to Part 15 of the FCC Rules These limits are designed to provide reasonable protection against harmful interference in a residential installation This equipment may cause harmful interference to radio communications if it is not installed and used in accordance with the instructions However there is no guarantee that interference w...

Страница 28: ...e unit in the spaces designated on the warranty card and in the space provided below Refer to the model and serial numbers whenever you call upon your dealer for information or service on this product Model Serial Number Downloaded from http www usersmanualguide com ...

Страница 29: ... tv dvd and othes Manual users user manuals user guide manual owners manual instruction manual manual owner manual owner s manual guide manual operation operating manual user s manual operating instructions manual operators manual operator manual product documentation manual user maintenance brochure user reference pdf manual Downloaded from http www usersmanualguide com ...

Отзывы: