background image

13

Fig. 3.9

SAFETY HINTS:

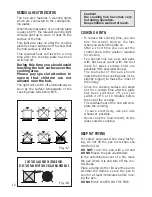
– Before you switch the hob on, make

sure you know which knob controls the
required cooking plate. We advise you
to set the pan over the cooking plate
before switching it on. Remove the pan
after you have switched the cooking
plate off.

– Do not use pots and pans with rough

bases  (pay attention to cookware made
of cast-iron). Rough bases can damage
(scratch) the glass surface of the hob.
Make sure that the bottom of the pan is
dry and clean.

– Pots with aluminium bottoms may leave

silver streaks or spots on the hob.

– Do not leave wet or damp lids on the

hob.

– The glass-ceramic surface and pans

must be clean. Carefully remove any
food debris (especially containing
sugar), dirt etc. with the aid of a cleans-
ing agent.

– Pan handles should never stand out

beyond the kitchen worktop, as there is
a great danger of knocking the pan
over.
This will also ensure that children
cannot reach them.

–  Do not use the hob if the glass sur-

face is broken or cracked in any
way. Please disconnect the appli-
ance from the mains and contact the
after-sales service.

– Do not lean over the cooking plate when

in use.

– Do not lay cooking foil or plastic materi-

als on the ceramic surface when it is
hot.

– Remember that the surface remains hot

for a long time (about 30 min.) after the
cooking plate has been switched off. 

– Follow the cleaning instructions careful-

ly.

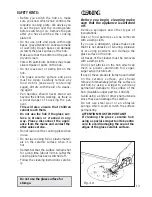
Do not use the glass surface for
storage.

CLEANING

Before you begin cleaning make
sure that the appliance is switched
off.

Remove spillages and other types of
incrustations.
Dust or food particles can be removed
with a damp cloth.
If you use a detergent, please make sure
that it is not abrasive or scouring. Abrasive
or scouring powders can damage the
glass surface of the hob.
All traces of the cleaner must be removed
with a damp cloth.
Do not put articles on the hob which can
melt: i.e plastic, aluminium foil, sugar,
sugar syrup mixtures etc.
If any of these products items have melted
on the ceramic surface, you should
remove it immediately (when the surface is
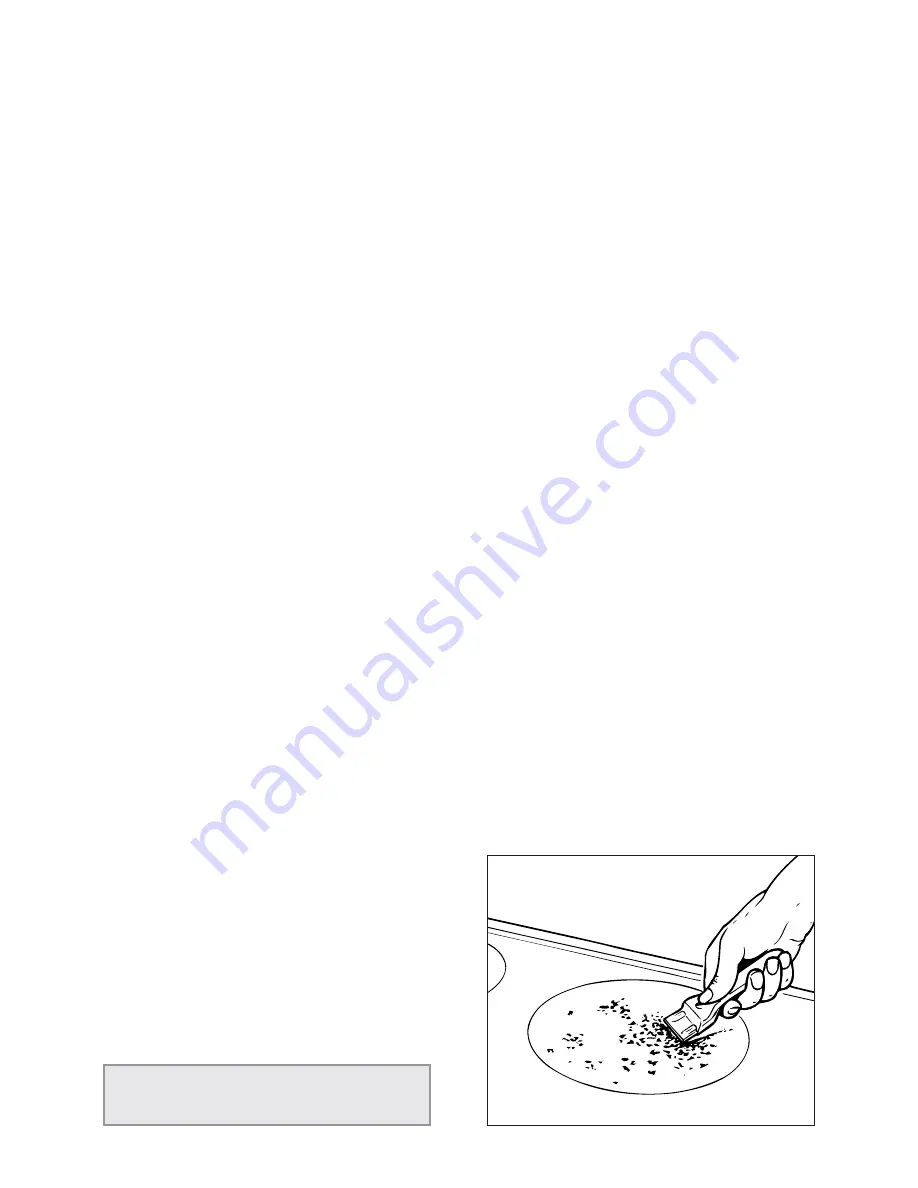
still hot) by using a scraper to avoid any
permanent damage to the surface of the
hob. (Available under part No. 103138).
Avoid using a knife or other sharp utensils
since these can damage the ceramic.

Do not use steel wool or an abrasive
sponge which could scratch the surface
permanently. 

ATTENTION: MOST IMPORTANT!
If cleaning the glass ceramic hob
using a special scraper tool take extra
care to avoid damaging the seal at the
edges of the glass ceramic surface.

Содержание CK 408

Страница 1: ...Instructions for use Installation advice DOUBLE OVEN CERAMIC COOKER CK 408 ...

Страница 2: ...2 ...

Страница 3: ...5 Installation 26 29 Electrical section 30 31 Technical data 32 Guarantee 33 After Sales Service 34 Important This appliance is designed and manufactured solely for the cooking of domestic household food and is not suitable for any non domestic application and therefore should not be used in a commercial environment The appliance guarantee will be void if the appliance is used within a non domesti...

Страница 4: ...l responsibility in the event of damage caused by improper incorrect or illogical use of the appliance Read the instructions carefully before installing and using the appliance IMPORTANT INFORMATION FOR CORRECT DISPOSAL OF THE PRODUCT IN ACCORDANCE WITH EC DIRECTIVE 2002 96 EC At the end of its working life the product must not be disposed of as urban waste It must be taken to a special local auth...

Страница 5: ...h the interior of the oven by placing the wire racks as described in Cleaning and maintenance Insert shelves and tray Empty the oven and close the door Heat the oven at the maximum temperature setting for around two hours to eliminate the odour of grease and fumes from the manufacturing process Make sure that the kitchen is well ventilated and do not remain in the room during this process IMPORTAN...

Страница 6: ...s laid down for this type of product catego ry However special care should be taken around the rear or the under neath of the appliance as these areas are not designed or intended to be touched and may contain sharp or rough edges that may cause injury Fire risk Do not store flammable material in the oven or in the storage compartment Make sure that electrical cords con necting other appliances in...

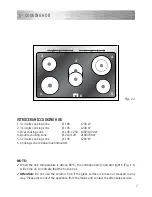
Страница 7: ...0 700 W 5 3 circuits cooking zone Ø 145 1200 W 6 Cooking zone residual heat indicators NOTE When the hob temperature is above 60 C the corresponding indicator light 6 Fig 1 1 will come on to indicate that the hob is hot Attention Do not use the ceramic hob if the glass surface is broken or cracked in any way Please disconnect the appliance from the mains and contact the after sales service 1 COOKI...

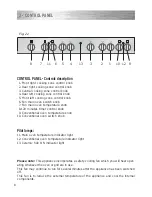
Страница 8: ...Conventional oven temperature knob 10 Conventional oven switch knob Pilot lamps 11 Main oven temperature indicator light 12 Conventional oven temperature indicator light 13 Ceramic hob ON indicator light Please note This appliance incorporates a safety cooling fan which you will hear oper ating whenever the oven or grill are in use This fan may continue to run for several minutes after the applian...

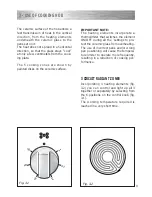
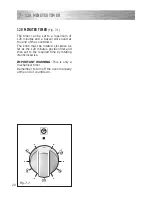
Страница 9: ...he ceramic surface 3 CIRCUIT RADIANT ZONES Incorporating 3 heating elements fig 3 2 you can control and light up all 3 together or separately by selecting from the 6 positions on the control knob fig 3 1 The working temperature required is reached in a very short time IMPORTANT NOTE The heating elements incorporate a thermolimiter that switches the element ON OFF during all the settings to pro tec...

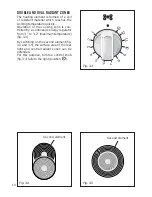
Страница 10: ...s con trolled by a continuous energy regulator from 1 to 12 maximum temperature fig 3 3 By switching on the second element fig 3 4 and 3 5 the surface area of the rear right and central radiant zones can be extended For this purpose turn the control knob fig 3 3 fully to the right position 1 2 3 4 5 6 7 8 9 1 0 1 1 1 2 Fig 3 3 Fig 3 5 Fig 3 4 Second element Second element ...

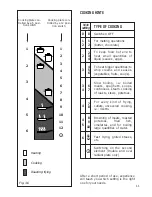
Страница 11: ...isotto Browning of meats roasted potatoes fried fish omelettes and for boiling large quantities of water Fast frying grilled steaks etc Switching on the second element Double and oval radiant plate only 0 Knob setting 1 2 3 4 5 6 2 0 1 2 2 3 4 3 4 6 7 4 7 8 4 5 8 9 10 6 11 12 After a short period of use experience will teach you which setting is the right one for your needs CO0KING HINTS Cooking p...

Страница 12: ...e pots and pans with flat bases pans with the test mark for glass ceramic hobs are available from specialist shops The diameter of the pan should match that of the cooking plate or be slightly bigger to make the most of the energy Since the cooking surface will stays hot for a certain time after the plate has been switched off you can switch it off 5 or 10 minutes before the end of the cooking The...

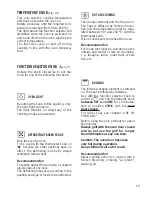
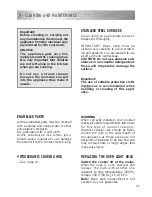
Страница 13: ...plastic materi als on the ceramic surface when it is hot Remember that the surface remains hot for a long time about 30 min after the cooking plate has been switched off Follow the cleaning instructions careful ly Do not use the glass surface for storage CLEANING Before you begin cleaning make sure that the appliance is switched off Remove spillages and other types of incrustations Dust or food pa...

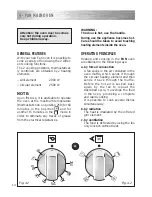
Страница 14: ...ill element c by ventilation The food is defrosted by using the fan only function without heat 1 2 5 1 5 0 1 7 5 2 0 0 2 2 5 1 0 0 5 0 7 5 250 Fig 4 1 Fig 4 2 GENERAL FEATURES With your new Fan oven it is possible to cook a variety of food using the 2 differ ent cooking functions The 2 cooking positions thermostatical ly controlled are obtained by 2 heating elements Grill element 2000 W Circular e...

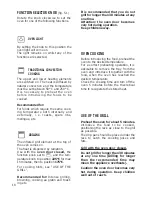
Страница 15: ...15 minutes then to position 175 C with the oven door closed For correct use see chapter USE OF THE GRILL Before using the grill preheat for about five minutes Always grill with the oven door closed and do not use the grill for longer than 30 minutes at any one time Caution The oven door becomes very hot during operation Keep children well out of reach Recommended for Intense grilling action for co...

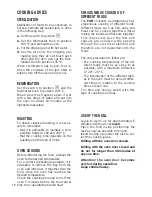
Страница 16: ...ether with the food when the oven has reached the desired temperature Check the cooking time and turn off the oven 5 minutes before the theoretical time to recuperate the stored heat SIMULTANEOUS COOKING OF DIFFERENT FOODS The FAN consents a simultaneous het erogeneous cooking of different foods Different foods such as fish cake and meat can be cooked together without mixing the smells and flavour...

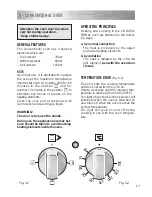
Страница 17: ...The door is hot use the handle During use the appliance becomes hot Care should be taken to avoid touching heating elements inside the oven OPERATING PRINCIPLES Heating and cooking in the CONVEN TIONAL oven are obtained in the follow ing ways a by normal convection The heat is produced by the upper and lower heating elements b by radiation The heat is radiated by the infra red grill element use wi...

Страница 18: ...re the same cook ing temperature both internally and externally i e roasts spare ribs meringue etc OVEN COOKING Before introducing the food preheat the oven to the desired temperature For a correct preheating operation it is advisable to remove the tray from the oven and introduce it together with the food when the oven has reached the desired temperature Check the cooking time and turn off the ov...

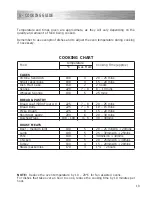
Страница 19: ...Y Bread Loaf 500g Flour wt 225 7 8 20 25 mins Bread Rolls 225 7 8 10 15 mins Pizza Dough 225 8 15 20 mins Shortcrust pastry 200 6 20 30 mins Quiches Flans 180 190 4 5 30 40mins ROAST MEATS Beef medium joint 190 5 20 25 mins lb 20mins Lamb 190 5 25 30mins lb 25mins Pork 190 5 30mins lb 30mins Chicken 190 5 20 25mins lb 30mins Turkey 180 4 15 20mins lb 20mins Stews Casseroles 170 3 11 2 2hours Tempe...

Страница 20: ...l sound at the end of the countdown The knob must be rotated clockwise as far as the 120 minutes position first and then set to the required time by rotating it anticlockwise IMPORTANT WARNING This is only a mechanical timer Remember to turn off the oven manually at the end of countdown 4 0 60 8 0 2 0 1 0 0 Fig 7 1 ...

Страница 21: ...crew and replace the bulb with another one resistant to high temperatures 300 C voltage 230 V 50 Hz 15 W E14 Note Oven bulb replacement is not covered by your guarantee VITROCERAMIC COOKING HOB See page 13 WARNING When correctly installed your product meets all safety requirements laid down for this type of product category However special care should be taken around the rear or the underneath of ...

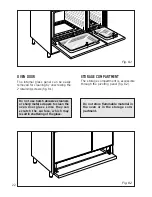
Страница 22: ...store flammable material in the oven or in the storage com partment STORAGE COMPARTMENT The storage compartment is accessible through the pivoting panel fig 8 2 Fig 8 1 Do not use harsh abrasive cleaners or sharp metal scrapers to clean the oven door glass since they can scratch the surface which may result in shattering of the glass ...

Страница 23: ...OVEN The oven should always be cleaned after use when it has cooled down The cavity should be cleaned using a mild detergent solution and warm water Suitable proprietary chemical cleaners may be used after first consulting with the manufacturers recommendations and testing a small sample of the oven cavity Abrasive cleaning agents or scouring pads cloths should not be used on the cavity surface NO...

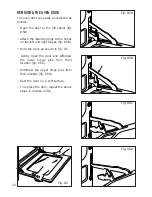
Страница 24: ...t hinges fig 8 5B Hold the door as shown in fig 8 5 Gently close the door and withdraw the lower hinge pins from their location fig 8 5C Withdraw the upper hinge pins from their location fig 8 5D Rest the door on a soft surface To replace the door repeat the above steps in reverse order Fig 8 5D Fig 8 5C Fig 8 5B Fig 8 5A REMOVING THE OVEN DOOR Fig 8 5 ...

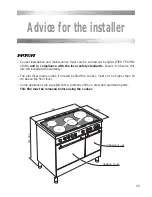
Страница 25: ...ance with the local safety standards Failure to observe this rule will invalidate the warranty The electrical mains outlet if located behind the cooker must not be higher than 18 cm above the floor level Some appliances are supplied with a protective film on steel and aluminium parts This film must be removed before using the cooker Advice for the installer ...

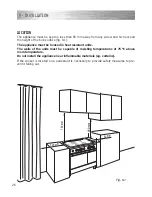
Страница 26: ...ppliance must be housed in heat resistant units The walls of the units must be capable of resisting temperatures of 75 C above room temperature Do not install the appliance near inflammable materials eg curtains If the cooker is located on a pedestal it is necessary to provide safety measures to pre vent it falling out 50 mm 750 mm 450 mm Fig 9 1 500 mm ...

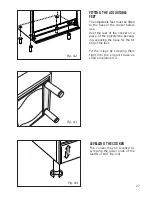
Страница 27: ... the rear of the cooker on a piece of the polystyrene packag ing exposing the base for the fit ting of the feet Fit the 4 legs by screwing them tight into the support base as shown in picture 9 3 Fig 9 3 LEVELLING THE COOKER The cooker may be levelled by screwing the lower ends of the feet IN or OUT fig 9 4 Fig 9 4 ...

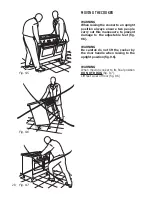
Страница 28: ...people carry out this manoeuvre to prevent damage to the adjustable feet fig 9 5 Fig 9 6 Fig 9 7 WARNING Be careful do not lift the cooker by the door handle when raising to the upright position fig 9 6 WARNING When moving cooker to its final position DO NOT DRAG fig 9 7 Lift feet clear of floor fig 9 5 ...

Страница 29: ...n fig 9 8 can be purchased from most plumbers merchants and do it yourself D I Y shops Wall fixing Floor fixing Brackets Existing slot in rear of cooker Dotted line showing the position of cooker when fixed Dimension is in millimetres 3 Outline of cooker backplate at the engagement slot Fig 9 8 ...

Страница 30: ...ontacts of 3 mm between the appliance and the mains The power supply cable must not touch the hot parts and must be posi tioned so that it does not exceed 75 C at any point Once the appliance has been installed the switch must always be accessible 10 ELECTRICAL SECTION IMPORTANT The cooker must be installed in accordance with the manufacturer s instructions Incorrect installation for which the man...

Страница 31: ...r cable and block it with the cable clamp D Re mount shield A N B The earth conductor must be left about 3 cm longer than the others A D B Fig 10 1 PE 1 2 3 4 5 N L2 L1 230 V Fig 10 2 2 3 4 5 1 230 V N L2 PE L1 Red or Brown Live Black or Blue Neutral Green and Yellow Earth Fig 10 3 PE Earth N Neutral L Live FEEDER CABLE SECTION Type H05RR F or H05VV F 230 V 3 x 4 mm2 240 V 3 x 6 mm2 Connection wit...

Страница 32: ... 70 kW Bottom element 0 80 kW Grill element 1 45 kW Vitroceramic hob Front left 1 70 kW Rear left 1 20 kW Front right 1 20 kW Rear right 2 10 0 70 kW Central 1 80 1 00 kW Maximum power rating Fan oven 2 50 kW Conventional oven 1 50 kW Oven lamp 0 015 kW 300 C miniature edison screw Maximum power usable simultaneusly 12 085 kW ...

Страница 33: ... not misused neglected or damaged it it has not been modified it is not second hand it has not been used commercially you have not fitted a plug incorrectly and you supply your receipt to show when you brought it The appliance has been installed as per the instructions contained within this booklet This guarantee does not affect your statutory rights GUARANTEE ...

Страница 34: ...criptions and illustrations in this booklet are given as simply indicative The manufacturer reserves the right considering the characteristics of the models described here at any time and without notice to make eventual necessary modifications for their construction or for commercial needs Ser Nr AFTER SALES SERVICE ...

Страница 35: ...35 ...

Страница 36: ...code 1103064 ß2 ...

Отзывы: