background image

Access the router’s graphical interface

17

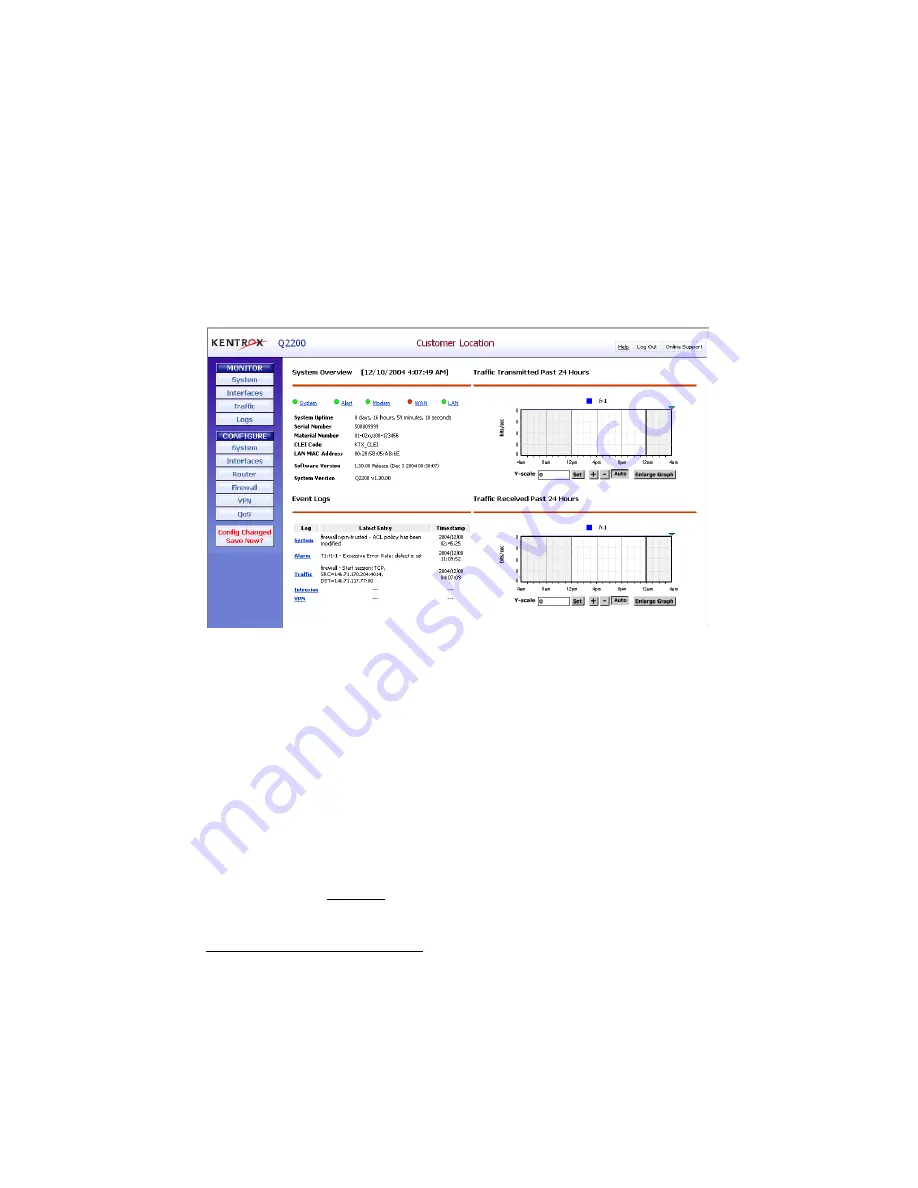
Step 3: Access the router’s graphical interface

Start the computer’s Internet browser. Ignore any messages that may appear about 
the browser being unable to display your default web page, and enter 

192.168.1.1


in the browser’s Address field. This is the default LAN-side address of the router. 
When prompted for User Name and Password, enter the user name “admin” at the 
login prompt, but no password. Your browser will display the router’s home page,

4


Monitor > System

, similar to 

Figure 5

.

Figure 5:

The home page displays the router’s status

If this page does not appear in your browser, the most likely causes are:

A bad cable connection—check to see that you have appropriate cables 
(see the 

User’s Guide

) and that they are securely attached.

The client computer is not properly configured as a DHCP client (i.e., it 
must be set to obtain an IP address automatically)—restart the computer 
after checking its configuration and/or LAN connection.

Step 4: Set a password for the default user

The default user name, “admin,” has full system access, but is not password-
protected. You should assign a password immediately for security reasons.
Navigate to the 

Configure > System > Users

 page, which initially contains only the 

“admin” user. Click Password in the table to open the User Configuration page, and 
assign a password for the admin user. Click the 

OK

 button to make your changes 

take effect.

4

The graphs on the 

Monitor > System

 page require Macromedia Flash Player 

(

www.macromedia.com

) be installed on your computer.

Содержание q2200

Страница 1: ...Model Q2200 T1 QoS Access Router Model Q2201 T1 QoS Access Router with Modem Document 650 00318 03 QoS Access Router SETUP GUIDE...

Страница 2: ...eriod Additional copyrights applicable to portions of this product Copyright 2003 GlobespanVirata Inc Copyright 2003 2004 Ashley Laurent Inc Copyright 1989 2001 SNMP Research Inc Copyright 1995 1998 E...

Страница 3: ...essionals 13 Step 1 Mount the router on a wall or in a rack 14 Step 2 Set up a computer to access the router 16 Step 3 Access the router s graphical interface 17 Step 4 Set a password for the default...

Страница 4: ...4 Contents...

Страница 5: ...ister All Kentrox Q Series routers carry a 1 year warranty beginning on the date of purchase Units found to be defective within that warranty period will be repaired or replaced under the terms of the...

Страница 6: ...g a lightning storm Always disconnect all communication lines at the network interface and power connections from the wall outlets before servicing or disassembling this equipment All wiring external...

Страница 7: ...on site readiness Subsequent router installations can go much faster NOTE Your router may have already been pre configured by your network administrator which would further simplify your installation...

Страница 8: ...talog 930xx210 xx denotes length of cable Spare AC DC power adapter Kentrox catalog 77911 Prepare the installation site The router requires the following for safe operation Grounded 100 240 volts AC 5...

Страница 9: ...55 255 255 0 See Default LAN interface configuration on page 18 for further information For settings related to Frame Relay installations select Switch to Frame in the T1 port Controls list and enter...

Страница 10: ...user The password should be set to restrict access to authorized users To enter a new password go to Configure System Users and click Password in the table The password may be up to 16 characters lon...

Страница 11: ...No No Allow icmp Yes No No Allow snmp Yes No No Allow ssh Yes No No Allow telnet Yes No No Allow ospf Yes No No Allow rip Yes No No Modem operation disabled cliDialIn Disabled NOTE The Modem operation...

Страница 12: ...uld this happen restart the router by unplugging the power adapter momentarily If this does not clear the problem note whether any other LEDs are red and contact your network administrator or place of...

Страница 13: ...N side IP address of the router Enter the user name admin at the login prompt but no password The router s home page opens as shown in Figure 5 on page 17 Step 4 To prevent unauthorized access to the...

Страница 14: ...You will need longer screws at least 1 25 if attaching to a stud through drywall Wall mounting instructions a Drill two starter holes for the screws or anchors 7 apart 3 Align the screw holes vertical...

Страница 15: ...n the spacing between the holes on the ends of the brackets are 1 and 1 to accommodate different rack types b With the orientation of the brackets in mind attach them to the sides of the router using...

Страница 16: ...pically it is a TCP IP configuration option Consult your operating system s online help or user manual for details b Connect the computer to one of the router s 10 100 Ethernet LAN ports as shown in F...

Страница 17: ...ection check to see that you have appropriate cables see the User s Guide and that they are securely attached The client computer is not properly configured as a DHCP client i e it must be set to obta...

Страница 18: ...to the Configure System Management Access page and in the Enable column of the untrusted inbound zone select the http telnet and or any other check boxes specified by the administrator Do not allow re...

Страница 19: ...h the router under one of the following scenarios If you disabled DHCP in the router because the LAN has an existing DHCP server you can now connect another LAN port on the router to the existing LAN...

Страница 20: ...ck OK This enables the router to provide the DNS addresses to computers on the LAN System clock configuration To ensure that system logs and charts display the correct time of alarms and other events...

Страница 21: ...s those changes in RAM Your changes will be lost if you lose power or restart the system without first saving those changes to non volatile memory a Take a few minutes now to save the changes you have...

Страница 22: ...ng to see that the WAN STAT LED on the front panel is green If all else fails reset Should you encounter unexpected behavior after configuring the Kentrox router and you are unable to determine the ca...

Отзывы: