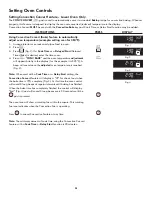
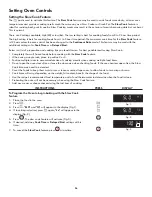
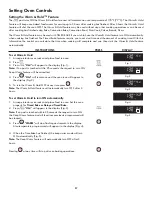
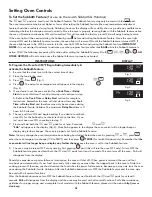
background image

39

Master Protection Agreements

Congratulations on making a smart purchase. Your new
Kenmore

® 

product is designed and manufactured for years of

dependable operation. But like all products, it may require
preventive maintenance or repair from time to time. That’s when
having a Master Protection Agreement can save you money
and aggravation.

The Master Protection Agreement also helps extend the life of
your new product. Here’s what the Agreement* includes:

;

Parts and labor 

needed to help keep products operating

properly 

under normal use

, not just defects. Our coverage

goes 

well beyond the product warranty. 

No deductibles,

no functional failure excluded from coverage – 

real

protection.

;

Expert service 

by a force of more than 

10,000 authorized

Sears service technicians

, which means someone you

can trust will be working on your product.

;

Unlimited service calls and nationwide service, 

as

often as you want us, whenever you want us.

;

«No-lemon» guarantee 

– replacement of your covered

product if four or more product failures occur within twelve
months.

;

Product replacement 

if your covered product can’t be

fixed.

;

Annual Preventive Maintenance Check 

at your request –

no extra charge.

;

Fast help by phone 

– we call it 

Rapid Resolution 

phone support from a Sears representative on all products.
Think of us as a «talking owner’s manual».

;

Power surge protection 

against electrical damage due to

power fluctuations.

;

$250 Food Loss Protection 

annually for any food

spoilage that is the result of mechanical failure of any
covered refrigerator or freezer.

;

Rental reimbursement 

if repair of your covered product

takes longer than promised.

;

10% discount 

off the regular price of any non-covered

repair service and related installed parts.

Once you purchase the Agreement, a simple phone call is all
that it takes for you to schedule service. You can call anytime
day or night, or schedule a service appointment online.

The Master Protection Agreement is a risk free purchase. If you
cancel for any reason during the product warranty period, we
will provide a full refund. Or, a prorated refund anytime after the
product warranty period expires. Purchase your Master
Protection Agreement today!

Some limitations and exclusions apply. For prices and
additional information in the U.S.A. call 1-800-827-6655.

* Coverage in Canada varies on some items. For full details
call Sears Canada at 1-800-361-6665.

Sears Installation Service

For Sears professional installation of home appliances, garage
door openers, water heaters, and other major home items, in
the U.S.A. or Canada call 

1-800-4-MY-HOME

®

.

PROTECTION AGREEMENTS

Acuerdos maestros de protección

Enhorabuena por haber hecho una compra inteligente. Su nuevo producto
Kenmore

® 

está diseñado y fabricado para brindarle años de funcionamiento

fiable. Pero, como cualquier producto, puede necesitar mantenimiento
preventivo o reparaciones periódicas. Es por eso que tener un Acuerdo maestro
de protección podría ahorrarle dinero y molestias.

El Acuerdo maestro de protección también sirve para prolongar la durabilidad
de su nuevo producto. El acuerdo* incluye lo siguiente:

;

Piezas y mano de obra 

necesarias para contribuir a mantener el

funcionamiento adecuado de los productos 

utilizados en condiciones

normales de uso

, no sólo en caso de defectos de los productos. Nuestra

cobertura va 

mucho más allá que la garantía del producto. 

No se

aplican deducibles ni exclusiones por fallas del funcionamiento: es decir,

verdadera protección.

;

Servicio técnico por expertos 

(más de 

10000 técnicos autorizados de

Sears

), lo cual significa que quien repare o realice el mantenimiento de su

producto será un profesional de confianza.

;

Servicio técnico a escala nacional y número ilimitado de llamadas de
solicitud de servicio técnico: 

se puede poner en contacto con nosotros

cuantas veces lo desee y cuando lo desee.

;

Garantía «sin sorpresas»:

 se reemplaza el producto cubierto por el

acuerdo si ocurren cuatro o más fallas del producto en un periodo de 12
meses.

;

Reemplazo del producto: 

en caso de que no se pueda reparar el

producto cubierto por el acuerdo.

;

Revisión anual preventiva de mantenimiento del producto: 

puede

solicitarla en cualquier momento, sin costo alguno.

;

Rápida asistencia telefónica

, la cual denominamos 

Solución rápida: 

es

decir, asistencia telefónica a través de cualquiera de nuestros
representantes de Sears, sobre cualquiera de nuestros productos. Piense
en nosotros como en un «manual parlante del usuario».

;

Protección contra fallas eléctricas, 

contra daños debidos a fluctuaciones

de la corriente eléctrica.

;

$250 al año para cubrir cualquier posible deterioro de alimentos

 que

haya tenido que desechar debido a una falla mecánica de cualquiera de
nuestros refrigeradores o congeladores cubiertos por este acuerdo.

;

Devolución de gastos de alquiler de electrodomésticos 

si la reparación

de su producto asegurado toma más que el tiempo prometido.

;

10% de descuento 

aplicable tanto a los costos del servicio de reparación,

como de las piezas instaladas relacionadas que no hayan quedado
cubiertos por este acuerdo.

Una vez que haya realizado el pago de este acuerdo, bastará una simple
llamada telefónica para concertar una visita de servicio. Puede llamar a
cualquier hora del día o de la noche, o bien concertar una visita de servicio por
Internet.

La adquisición del Acuerdo maestro de protección es una inversión exenta de
riesgos. Si por cualquier motivo decide cancelar dicho acuerdo durante el
periodo de garantía del producto, le haremos un reintegro total del valor. O bien
un importe proporcional si cancela el acuerdo en cualquier otro momento
posterior al vencimiento del periodo de garantía del producto. ¡Adquiera hoy
mismo su Acuerdo maestro de protección!

Algunas limitaciones y exclusiones podrían aplicarse. Para solicitar
precios e información adicional, llame al 1-800-827-6655 (en los EE.UU.).

* La cobertura en Canadá varía en el caso de algunos artículos. Para
obtener detalles completos al respecto, llame al 1-800-361-6665 de Sears
de Canadá.

Servicio de instalación de Sears

Para solicitar la instalación por profesionales de Sears de electrodomésticos,
abridores de puertas de garaje, calentadores de agua y otros artículos de uso
prioritario en el hogar, 

llame al 1-800-4-MY-HOME

 en los EE.UU. o Canadá.

Содержание 790.7890

Страница 1: ...n un doble horno Color number número de color Use Care Guide Manual de Uso y Cuidado English Español TM Models Modelos 790 7890 790 7892 P N 318205251B 1105 Sears Brands Management Corporation Hoffman Estates IL 60179 U S A www kenmore com www sears com ...

Страница 2: ...n material and workmanship Sears will NOT pay for 1 Cracks in a ceramic glass cooktop that are not a result of thermal shock 2 Stains and scratches on a ceramic glass cooktop resulting from accident or improper operation or maintenance 3 Expendable items that can wear out from normal use including but not limited to filters belts light bulbs and bags 4 A service technician to instruct the user in ...

Страница 3: ...al code requirements Install only per installation instructions provided in the literature package for this appliance In case of an emergency know how to disconnect the electrical power to the appliance at the circuit breaker or fuse box User Servicing Do not repair or replace any part of the appliance unless specifically Important Safety Instructions Read all instructions before using this applia...

Страница 4: ...ts should never be worn while using the appliance Do not let clothing or other flammable materials contact hot surfaces Do Not Use Water or Flour on Grease Fires Smother the fire with a pan lid or use baking soda a dry chemical or foam type extinguisher When heating fat or grease watch it closely Fat or grease may catch fire if allowed to become too hot Use Only Dry Potholders Moist or damp pothol...

Страница 5: ...ow dripping fat to drain and be kept away from the high heat of the broiler Do not cover the broiler grid or oven bottom with aluminum foil Exposed fat and grease could ignite Do not touch a hot oven light bulb with a damp cloth Doing so could cause the bulb to break Disconnect the appliance or shut off the power to the appliance before removing and replacing the bulb IMPORTANT INSTRUCTIONS FOR CL...

Страница 6: ...This appliance is equipped with a 3 prong grounding plug for your protection against shock hazard and should be plugged directly into a properly grounded receptacle DO NOT cut or remove the grounding prong from this plug Do not under any circumstances cut remove or bypass the grounding prong Power supply cord with 3 prong grounding plug Grounding type wall receptacle Conversion to Liquefied Petrol...

Страница 7: ...pt Cooktop 8 Burner Grates 9 One Piece Handle 10 Glass Oven Door 11 Lower Oven Self Clean Door Latch 12 Self Clean Convection Lower Oven 13 Oven Interior Light 14 Adjustable Porcelain Oven Rack 15 Lower Oven Convection Fan Cover 16 Decorative Bottom trim 17 14 200 BTU Power Burner 18 5 000 BTU Simmer Burner 19 9 500 BTU Burner 20 9 500 BTU Oval Burner 21 18 200 BTU Power Burner NOTE The features o...

Страница 8: ...d left rear burner positions on the cooktop Regardless of size always select cookware that is suitable for the amount and type of food being prepared Select a burner and flame size appropriate to the pan Never allow flames to extend beyond the outer edge of the pan Assembly of the surface burner caps and burner grates It is very important to make sure that all of the Surface Burner Caps and Surfac...

Страница 9: ...tart on the highest control setting and then turn to a lower one to complete the process Use the recommendations below as a guide for determining proper flame size for various types of cooking The size and type of utensil used and the amount of food being cooked will influence the setting needed for cooking Improper flame size Proper flame size Flame Size Type of Cooking High Flame Start most food...

Страница 10: ...ks with flat bottoms suitable for use on your cooktop are available in most cookshop or hardware stores Round bottomed woks with a support ring that does not extend beyond the burner circumference may also be used The metal ring was designed to support the wok safely when it is filled with large amounts of liquids soup making or fat frying Wire trivets Do not use wire trivets Cookware bottoms must...

Страница 11: ... placed in oven prior to preheat cycle completion Rack positions RECOMMENDED RACK POSITIONS FOR BAKING Food Rack Positions Lower Upper Broiling meats chicken or fish N A 1 or 2 Baking To bake on 1 rack 3 or 4 3 2 racks 3 8 N A Frozen pies angel food cake yeast bread casseroles small cuts of meat or poultry 1 or 2 1 or 2 Turkey roast or ham 1 N A Pizza 3 or 4 3 Note Always use oven mitts when remov...

Страница 12: ...r Min Delay Time 12 Hr 1 00 Hr Min 12 59 Hr Min Delay Time 24 Hr 0 00 Hr Min 23 59 Hr Min Oven Control Keypads 1 Timer Set Off Used to set or cancel Timer The minute timer does not start or stop cooking 2 Add 1 Minute Used to add additional minutes to Timer 3 Cook Time Used to enter the length of the cook time desired 4 Delay Start Used to set the desired start time for baking or cleaning May be u...

Страница 13: ...display Fig 1 2 Press 1 3 0 pads to set the time of day to 1 30 Fig 2 Press The time of day will appear in the display Fig 3 Changing between 12 or 24 hour time of day display 1 Press and hold for 7 seconds until 12Hr or 24Hr appears in the display 2 Press to switch between the 12 and 24 hour time of day display The display will show either 12Hr Fig 4 or 24Hr Fig 5 3 Press to accept the change or ...

Страница 14: ...ture that will shut off the oven if the oven control is left on for more than 11 hours and 59 minutes The oven can be programmed to override this feature for Continuous Baking To set the control for Continuous Bake or 12 Hour Energy Saving features 1 Press and hold for 7 seconds Fig 1 After 7 seconds 12Hr OFF or STAY On will appear in the display and the control will beep once Fig 2 or 3 2 Press t...

Страница 15: ... oven lockout feature is on Consumer Defined Control Note The Consumer Defined Control features are adjustments to the control that will not affect cooking results These include the Oven Lockout Temperature Display and Silent Control Operation features Fig 1 Setting Silent Control Operation The and pads control the Silent Control operation feature The Silent Control operation feature allows the ov...

Страница 16: ...on the rear wall of the oven interior and are covered with a glass shield The glass shield protects the bulb from high temperatures and should always be in place whenever the oven is in use To replace the interior oven lights see Replacing oven lights in the Care and Cleaning section To change display from Fahrenheit to Celsius or Celsius to Fahrenheit 1 Press and hold for 7 seconds A beep will so...

Страница 17: ...en is preheating example changing from 350 to 425 F If it is necessary to change the preheat temperature while the oven is preheating to the original temperature 1 While preheating press Fig 5 2 Enter the new preheat temperature Press 4 2 5 Fig 6 3 Press PRE will appear in the display until the desired temperature here 425 F is reached Fig 7 At that time the display will show 425 A long beep will ...

Страница 18: ...o Know Before Setting any Basic Oven Cooking Function This appliance has been factory pre set to start any BAKE CONV BAKE CONV ROAST PREHEAT CAKES or BREADS function with the oven set temperature automatically set for 350 F However if desired the oven set temperature may be adjusted at any time during the cooking process You may also choose to add a COOK TIME or DELAY START with any of the functio...

Страница 19: ...the selected temperature before placing food in the oven Use proper rack position for baking needs Set oven temperature 25 F 12 C lower than recommended Cakes not done in the center Oven too hot Incorrect pan size Pan not centered in oven Set oven temperature 25 F 12 C lower than recommended Use pan size suggested in recipe Use proper rack position and place pan so there is 5 1 cm to 10 2 cm 2 to ...

Страница 20: ...e by pressing 3 0 Fig 4 Note Baking time can be set for any amount of time between 1 minute to 11 hours and 59 minutes 8 Press The display returns to the time of day Fig 5 Note After the Timed Bake feature has been activated press to display the bake time remaining in the Timed Bake mode Once Timed Bake has started baking a beep will sound when the oven temperature reaches the set temperature Pres...

Страница 21: ...ime using the number pads 5 3 0 Fig 7 11 Press The current time of day will appear in the display Fig 8 12 When the desired start time is reached the oven icon will appear in the display and the oven will start to bake at the previously selected temperature Press when baking has completed or at any time to cancel the Delayed Time Bake feature When the set bake time runs out 1 End will appear in th...

Страница 22: ...he desired temperature before continuing to step 6 6 Press Fig 2 The oven will begin to broil 7 Broil on one side until food is browned turn and cook on the second side Season and serve Note Always pull the rack out to the stop position before turning or removing food 8 To cancel broiling or if finished broiling press Fig 3 Electric Range Broiling Table Recommendations Food Rack Temp Cook Time Ite...

Страница 23: ...ert with aluminum foil 2 Position food fat side up on the roasting rack Fig 5 3 Place the broiler pan on the oven rack Supplied with some models Fig 5 Benefits of Convection Bake Multiple rack baking Some foods cook faster saving time and energy No special pans or bakeware needed Instructions PRESS DISPLAY Setting Oven Controls The pad lower oven only combines a cook cycle with the convection fan ...

Страница 24: ...also gives better baking results when using 2 or 3 racks at the same time Breads and pastries brown more evenly Convection bake cooks most foods faster and more evenly than conventional baking General Convection Bake Instructions 1 When using Convection Bake decrease your normal cooking times Adjust the cook time for desired doneness as needed Time reductions will vary depending on the amount and ...

Страница 25: ...aking has finished When the bake time has completely finished the control will display End Fig 4 and will sound 3 long beeps every 30 seconds until the pad is pressed The oven icon will show a rotating fan within the square This rotating fan icon indicates when the Convection Fan is operating Press to cancel Convection feature at any time Note The minimum amount of cook time using the Convection C...

Страница 26: ...When using a single rack place in position 2 or 3 Position multiple racks to accommodate size of cooking utensils when cooking multiple food items Do not open the oven door often or leave the door open when checking foods If the oven heat escapes often the Slow Cook time may need to extended Cover the foods to keep them moist or use a loose or vented type cover to allow foods to turn crisp or brow...

Страница 27: ...ks and place food in oven 2 Press 3 Press HLd will appear in the display Fig 1 Note If no pad is touched within 25 seconds the request to turn ON Keep Warm feature will be cancelled 4 Press HLd will remain on and the oven icon will appear in the display Fig 2 5 To turn the Warm Hold OFF at any time press Note The Warm Hold feature will automatically turn OFF after 3 hours To set Warm Hold to turn ...

Страница 28: ...erefore may only be used once during the Sabbath Jewish Holidays The maximum Delay Start time is 11 hours 59 minutes 6 The oven will turn ON and begin heating If you desire to set both oven ON for the Sabbath you should set both at this time If you just want one oven ON so continue to step 7 7 Press and hold both the and pads for at least 3 seconds SAb will appear in the display Fig 3 Once SAb app...

Страница 29: ...tored recipes Accent Light brightness setting Please remember the if you choose to restore ALL of the above preferences will be restored to factory default settings the oven temperature offset will reset and any stored information will be cleared 1 Press and hold 7 keypad until one beep sounds about 6 seconds 2 Press Fig 1 4 2 5 for 3 seconds and then To Program the Oven to Begin Baking Immediatel...

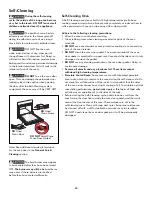
Страница 30: ...he oven door gasket is essential for a good seal Care should be taken not to rub damage or remove the gasket DO NOT use any cleaning materials on the oven door gasket Doing so could cause damage Remove all utensils and any aluminum foil These items cannot withstand high cleaning temperatures Porcelain Coated Racks Some ovens come with lubricated porcelain oven racks which can remain in the oven du...

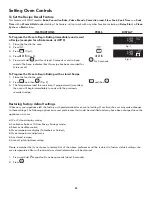
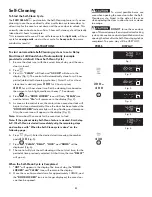
Страница 31: ...t self cleaning cycle time Note If a 2 or 4 hour clean time is desired press 2 0 0 for 2 hour or press 4 0 0 for a 4 hour clean time Set the cleaning time based on the amount of soil light medium or heavy See above 4 Press The DOOR LOCKED icon will flash CLEAN icon and the letters CLn will remain on in the display Fig 2 5 As soon as the control is set the motor driven oven door lock will begin to ...

Страница 32: ...actory When first using the oven be sure to follow recipe times and temperatures If you think the oven temperature is cooking too hot or too cool for the temperature you select you can adjust the actual oven temperature to be more or less than what is displayed Before adjusting test a recipe by using a temperature setting that is higher or lower than the recommended temperature The baking results ...

Страница 33: ...soapy water and a dishcloth Rinse with clean water and a cloth Do not use cleaners with high concentrations of chlorides or chlorines Do not use harsh scrubbing cleaners Only use kitchen cleaners that are especially made for cleaning stainless steel Always be sure to rinse the cleaners from the surface as bluish stains may occur during heating that cannot be removed Porcelain Enamel Broiler Pan an...

Страница 34: ...perate the surface burners without the burner caps Your appliance is shipped with the burner heads and burner caps in the correct locations Before using your gas appliance be sure to Follow installation instructions before operating Remove all packing tape from cooktop area Figure 1 Cooktop regular burner head Slots Ignition port Orifice port Do not use a cooktop cleaner on a hot cooktop The fumes...

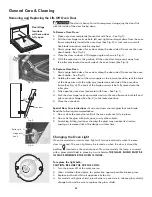
Страница 35: ...tal with floor See Fig 1 4 Push the door hinge locks up towards and into the oven frame on both left and right oven door hinges See Fig 2 to the locked position 5 Close the oven door Special Door Care Instructions Most oven doors contain glass that can break Read the following recommendations 1 Do not close the oven door until all the oven racks are fully in place 2 Do not hit the glass with pots ...

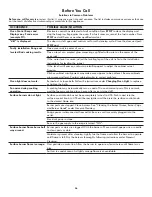
Страница 36: ... Contact cabinet maker to correct problem Oven light does not work Burned out or loose bulb Follow the instructions under Changing Oven Light to replace or tighten the bulb Fan noise during cooking operation A cooling fan may automatically turn on and off to cool internal parts This is normal and the fan may continue to run even after oven is turned off Surface burners do not light Surface control...

Страница 37: ...er pan wrong side up Grease does not drain into broiler pan Always place the grid on the broiler pan with the ribs up and the slots down to allow grease to drip into the pan Broiler pan used without grid or grid cover with foil DO NOT use the broiler pan without the grid or cover the grid with foil Oven needs to be cleaned Grease has built up on oven surfaces Regular cleaning is necessary when bro...

Страница 38: ...38 Notes ...
Страница 39: ...r la durabilidad de su nuevo producto El acuerdo incluye lo siguiente Piezas y mano de obra necesarias para contribuir a mantener el funcionamiento adecuado de los productos utilizados en condiciones normales de uso no sólo en caso de defectos de los productos Nuestra cobertura va mucho más allá que la garantía del producto No se aplican deducibles ni exclusiones por fallas del funcionamiento es d...

Страница 40: ...d owner s manuals that you need to do it yourself For Sears professional installation of home appliances and items like garage door openers and water heaters 1 800 4 MY HOME 1 800 469 4663 Call anytime day or night U S A and Canada www sears com www sears ca Our Home For repair of carry in items like vacuums lawn equipment and electronics call anytime for the location of your nearest Sears Parts R...

Отзывы: