Kelvinator Air Conditioning
remote control features/installation instructions 9
Air Filter
The ai lter behind the inlet grille should be checked and
cleaned at least once every 2 weeks (or as necessary) to
maintain optimal performance of the air conditioner.
SEAL
DRAIN
JOINT
RUBBER
PLUG
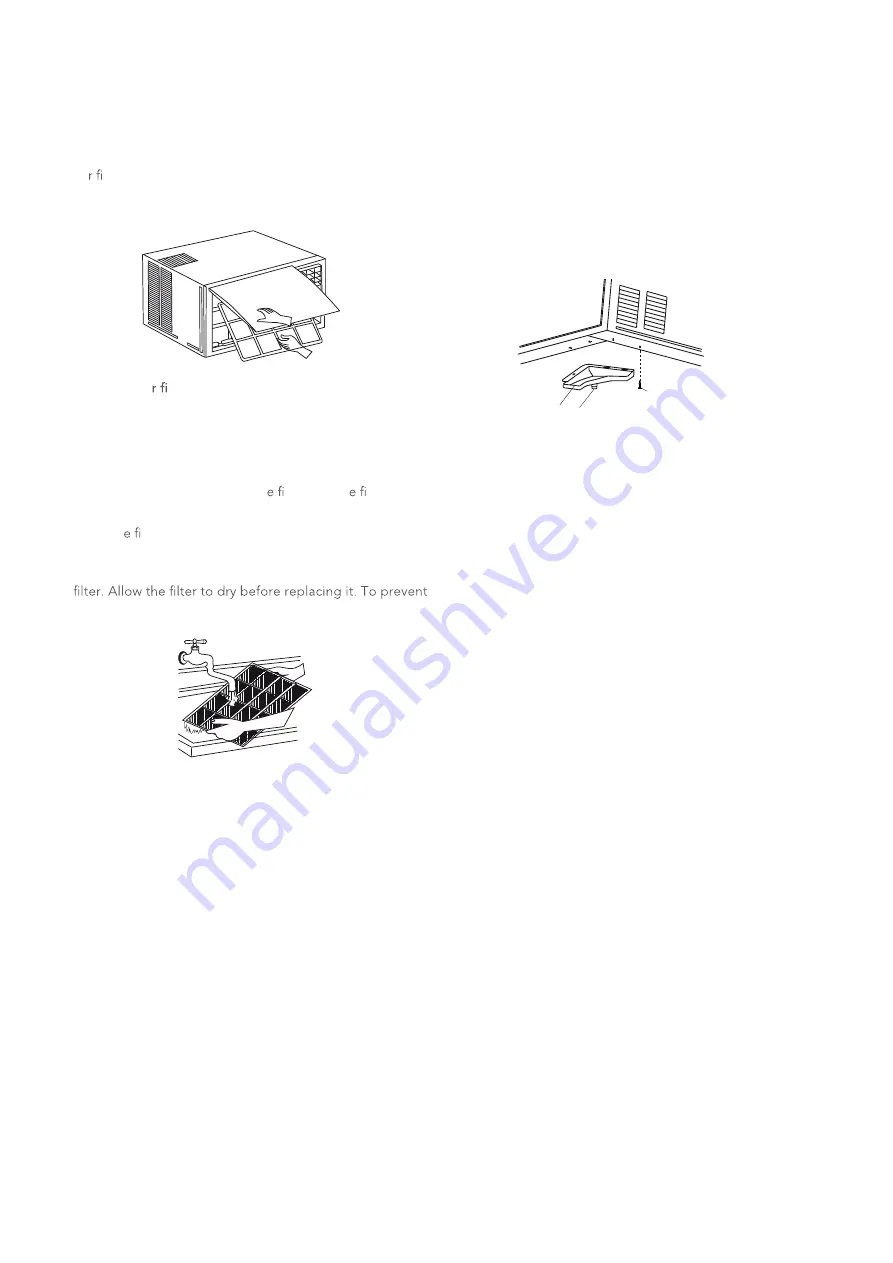
Removing the ai
lter
1 The grille can be opened from the bottom for easy
maintenance after installation.
2 Open the inlet grille by pulling on the openings in the
bottom of the grille
3 Pull the tab slightly to release th
lter. Pull th
lter
forward to remove it.
4 Clean th
lter with warm soapy water. The water should
be below 40°C to prevent damage.
5 Rinse off and gently shake off any excess water from the
damage, do not dry in direct sunlight.
SEAL
DRAIN
JOINT
RUBBER
PLUG
AUTO restart
During a power failure, the air conditioner will stop
completely. When the power is restored, the air conditioner
will start automatically with all the previous settings
preserved in the memory.
The treatment of condensed water
1 Take out the drain pan and screws (provided within your
air conditioner accessories bag).
2 Install the drain pan at the bottom of the unit and secure
it with the screws provided.
3 Connect a suitable sized drain hose (not supplied) to the
drain outlet located on the underside of the drain pan.
drain
pan
screw
drain
outlet
Maintenance
Drain plug (Cooling only models)
The drain plug is fitted from the factory to capture
condensed water to maximise the cooling efficiency of
this product. There may be some sound of splashing
water under some conditions. This configuration is used
for testing the capacity and efficiency of this product for
performance rating purposes.
The drain plug can be removed to drain water to a
specific location and/or reduce noise but drain plug
removal can reduce performance.
Содержание KWH53CRF
Страница 13: ...Kelvinator Air Conditioning Specifications 13 Notes...
Страница 14: ...14 notes Kelvinator Air Conditioning Notes...
Страница 15: ...Kelvinator Air Conditioning warranty 15...


