background image

QuNexus is connected and powered using the Micro USB port on the left side of the QuNexus. 
It is a class compliant USB device and does not require a driver. This allows for maximum 
compatibility with an extremely wide range of other devices.

QuNexus has 3 virtual MIDI ports that communicate with the computer. Port 1 is the main port 
on which the QuNexus sends and receives MIDI data to and from the computer or iPad. Port 2 
and 3 can be used for this purpose as well but are also used for communication with other 
devices. Port 2 is used for the KMI MIDI Expander (sold separately) and Port 3 is used for CV.

A computer or iPad can control the QuNexus LEDs by sending MIDI data into the QuNexus on 
Port 1 (see the 

Controlling LEDs

 heading for more information).

MIDI

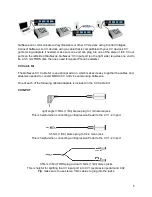
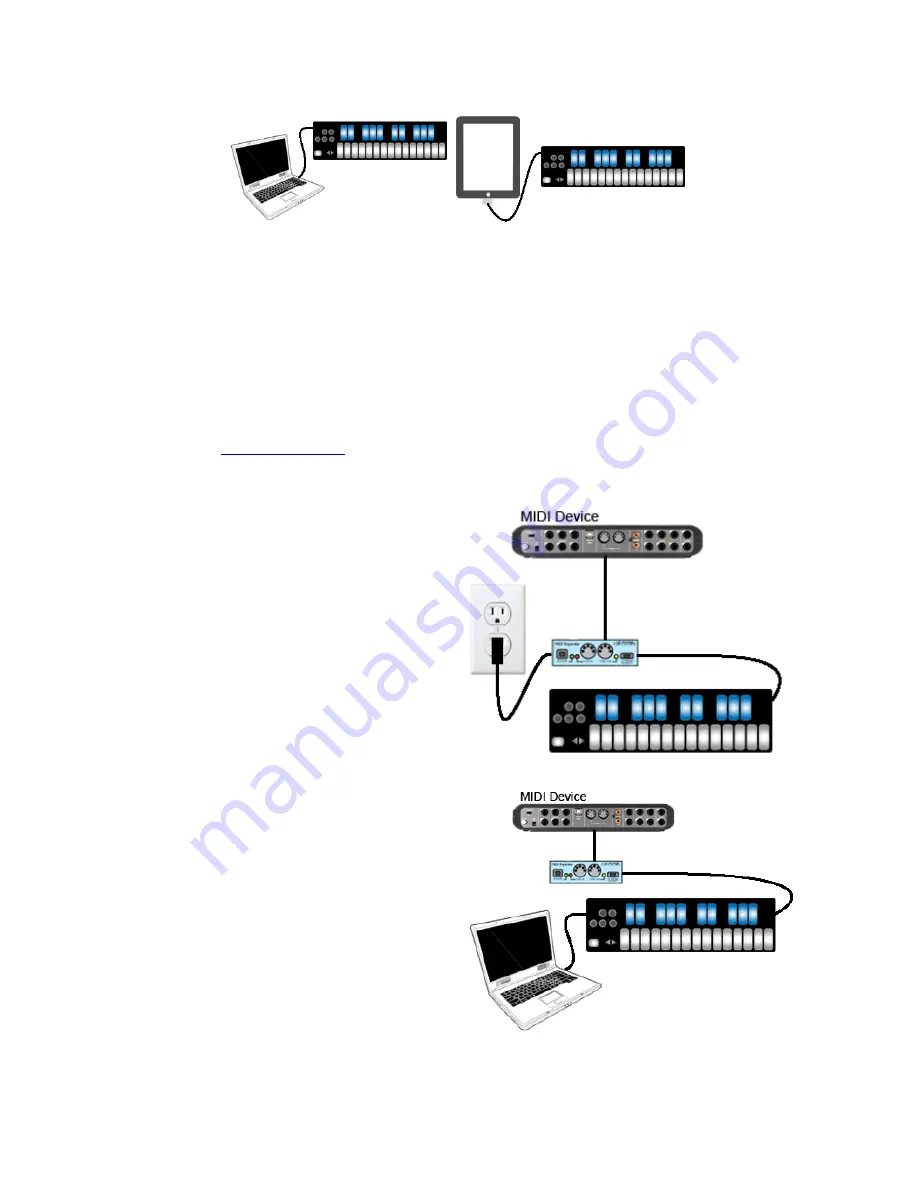
Connect QuNexus to MIDI hardware:

The image shows QuNexus connected to a 

hardware MIDI device via our MIDI Expander 

(sold separately):

1. Use a USB A-to-Mini cable to connect 

the QuNexus Mini port (on the right side 

of the QuNexus) to the USB “Expand” 

port on the MIDI Expander.

2. Connect the power supply to the MIDI 

Expander USB “Power” port.

3. Connect the MIDI Out on the Expander 

to the MIDI In on a synth or other MIDI 

device.

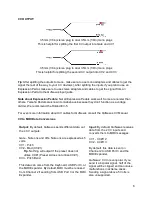
Connect QuNexus to MIDI hardware

(Powered by Computer):

The image shows QuNexus connected to a 

Computer and a hardware MIDI device via our 

MIDI Expander (sold separately):

1. Use a USB A-to-Mini cable to connect 

the QuNexus Mini port (on the right side 

of the QuNexus) to the USB “Expand” 

port on the MIDI Expander.

2. Use a USB A-to-Micro cable to connect 

the QuNexus micro port to a USB port on 

a computer. QuNexus will receive power 

from the computer.

3. Connect the MIDI Out on the Expander 

to the MIDI In on a synth or other MIDI 

device.

2

Содержание QuNexus

Страница 1: ...are to function Out of the box QuNexus has everything needed to get started This document is a quick guide to getting started using QuNexus out of the box USB Connect QuNexus to a computer This image...

Страница 2: ...MIDI Connect QuNexus to MIDI hardware The image shows QuNexus connected to a hardware MIDI device via our MIDI Expander sold separately 1 Use a USB A to Mini cable to connect the QuNexus Mini port on...

Страница 3: ...gged into a power outlet If connected to a computer or iPad and a MIDI Expander power is supplied to the QuNexus from the Micro USB port instead of the Expander The KMI MIDI Expander Dimensions 4 x 1...

Страница 4: ...the QuNexus 3 Plug your cable into the Gate CV1 Out port on the left side of the QuNexus Plug the other end into the desired destination on your CV device Powered by KMI MIDI Expander 1 Use a USB A to...

Страница 5: ...optional add on which makes it easy to gather the cables and adapters needed to convert MIDI to CV and vice versa using QuNexus One of each of the following cables adapters is included in the CV Cabl...

Страница 6: ...ider We recommend the Roland EV 5 For even more information about CV cables for QuNexus consult the QuNexus CV Manual CV to MIDI Data Conversions Output By default QuNexus sends different data out the...

Страница 7: ...oftware use different note number to note name conversions Below is a chart that will help convert note numbers to note names and vice versa The Octave buttons will increment or decrement the QuNexus...

Страница 8: ...right is used for 2 different purposes to get into Live Edit Mode and to get into Preset Select Mode Hold down the Shift Button for approximately 2 5 seconds to enter Live Edit Mode Tap the Preset Bu...

Страница 9: ...in Keyboard Layer Togl A is off by Default Hold Togl A for 1 sec to turn Toggle On Legato Pressing a key sends a note on but releasing doesn t send a note off When a different key is pressed the previ...

Страница 10: ...locity Pressure Tilt and Expression Pedal Listed below are definitions for each of these Key Velocity for notes only The value between 0 and 127 that represents the overall pressure on the QuNexus key...

Страница 11: ...ntrol is on Channel Rotation is off Pitch Bend Range is set to 1 semitone Controller Layer is not active on any keys Control Voltage CV output and input are enabled with pitch gate and bend all being...

Страница 12: ...sure all being sent out of the CV outputs Preset D Drums Clips This preset was designed for playing drum sounds samples and launching clips in Ableton Live This preset is most useful when paired with...

Страница 13: ...part of Controller Layer CV does not convert MIDI Messages from Controller Layer Channel Rotation Channel Rotation is a feature that causes the order of keys pressed at one time to rotate through chan...

Отзывы: