background image

INSTALLATION 

Spirit installation manual 


page 12 

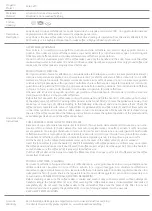
Upon arrival 

Parts included in standard shipment 


Spirit espresso machine 

Accessories 


2* water pumps with electric motors 


2* high-pressure, steel webbed, hoses, each 1.5 m (5 ft) 


3* high-pressure, steel webbed, hoses, each 0.5 m (1 ft 8 in) 


1* T-fitting (3/8M connections) 


2 discharge hoses, inner diameter 

15 mm (5/8”) with stainless steel hose clamps 


Filter holders with filter baskets: Duette 2x; Triplette 3x 


Stainless steel “Kees van der Westen” tamper; compliant with VST specifications 


Blind filter: Duette 2x, Triplette 3x 


Jar with cleaning powder 


Group brush 


“Kees van der Westen” shot glasses 


1 T-

shirt “Spirit” 


Kit with consumable parts to facilitate service and routine maintenance, composition depends on 
whoever is responsible for installation and maintenance 

* Machines ordered with an individual pump per group have different amounts  of these items. 

Extra materials needed 


Water treatment system (at least an effective de-scaler) 


Materials to connect the water treatment system to the T-fitting on the hoses to the water pumps 


Coffee grinder 


Knock box 


Pitcher 


… 

Unpack and place 

Tools needed 


Phillips screw driver no. 2, preferably a power tool. 

Procedure 

1.  Remove the lid of the crate. 
2.  Remove the four side panels of the crate. 
3.  Lift the machine by its legs and place on the countertop.  

 Caution! 

Lifting the machine other than by its legs may cause damage. For that reason you have to 

remove the side panels from the crate. 

 Warning!

 The machine has a considerable weight. Make sure you have assistance while lifting the 

Spirit to its place. 

4.  When necessary, adjust the feet such that the machine is level and all feet are firmly touching the 

countertop. The rubber feet can be individually lowered: loosen the cover nut first, then “unscrew” 
the foot from the leg. When correct height is achieved, tighten the cover nut (see Figure 7a). 

Содержание spirit

Страница 1: ...Installation manual Spirit Document ID Sup Rim Eng Date of issue October 22 2014 Revision date May 31 2016 ...

Страница 2: ...nal temperature 5 Set dosages for brew shots and hot water 5 Welcome 6 Parts identification 6 Note on this manual 7 Prior to installation 8 Area preparation 8 Upon arrival 12 Parts included in standard shipment 12 Extra materials needed 12 Unpack and place 12 Installation 14 Precaution 14 Connect water supply 15 Connect water discharge 18 Connect electrics 19 Single versus three phase machines 19 ...

Страница 3: ...which you can find in a following section page 14 onwards of this manual or contact your local installation technician 1 Connect water Install water treatment system not in shipment and connect water treatment system to both pumps Lay out is different for machine with individual pumps per group T fitting inlet outlet Spirit tap pumps water treatment adjust pump pressure ...

Страница 4: ... markings L C R and S L left coffee boiler C centre coffee boiler Triplette only R right coffee boiler S steam boiler Connect high pressure hoses of both pump outlets to Spirit 2 Connect water disposal Attach both drain hoses to Spirit 3 Open water mains Check for leaks at all connections just made coffee boilers steam boiler discharge pipe on drip tray machine waste e ...

Страница 5: ...es point down 5 Connect electricity Connect coffee pump cable s to coffee pump s and steam boiler pump cable to steam boiler pump Double check that steam boiler cable and steam boiler hose are connected to the same pump idem for coffee system blue black yellow green controller switches coffee system pump mains supply steam boiler pump back light switch ...

Страница 6: ...utes pump s will disengage Turn mains switch to OFF and back to NO HEAT repeatedly Repeat 3 6 times until pumps stop before 2 minutes have past Switch machine ON And switch back light on Flip controller switches upwards Boilers will heat up this takes about 20 30 minutes Set coffee brewing pressure By adjusting coffee system pump pressure use coffee puck not blind filter Set hot water temperature ...

Страница 7: ...t group 4 Steam boiler temperature controller 5 Steam boiler heating on off switch 6 Volume switch left group 7 Program button left group 8 Group indicator light left group 9 Group brewing lever left group 10 Pressure gauge coffee boiler left group 11 Group left 12 Hot water spout 13 Hot water lever 14 Steam power adjustment lever right 15 Steam lever right 16 Steam wand right 17 Steam tip right w...

Страница 8: ...ons are added and or improved sometimes as result of readers making comments If you have suggestions for improvements do not hesitate to send them to support keesvanderwesten com The printed version of the manual only comprises the installation manual For more information we refer you to the manual on the USB stick that came with the machine If the manual on the USB stick does not give enough info...

Страница 9: ...f 7200 Watts 31 5 Amps Duette or 9300 Watts 40 5 Amps Triplette You may want to have the water drain and power fed through one or more openings in the countertop see Figure 4 Footprints of the Duette and Triplette As the Spirit has full free space underneath the opening s in the countertop can be positioned anywhere For a visually pleasing result we recommend feeding the pump and drain hoses throu...

Страница 10: ...d locations for openings behind front feet to feed connections through the countertop Minimum sizes of countertop openings Pump hoses 35 mm connector diameter is 22 mm hose is 12 mm 2 drain hoses 40 mm 20 mm each Pump drain hoses 40 mm insert pump hoses first Electric cables 20 mm mains cable plus 2 pump cables no plug All feeds through 1 opening 55 mm insert pump hoses first hoses hoses cables ca...

Страница 11: ... installation manual page 10 Figure 5 Measurements of Spirit Duette Note that the rubber feet are not present these are 20 mm high and have a diameter of 50 mm WITHOUT RUBBER FEET 20 mm high WITHOUT RUBBER FEET 20 mm high ...

Страница 12: ...nstallation manual page 11 Figure 6 Measurements of Spirit Triplette Note that the rubber feet are not present these are 20 mm high and have a diameter of 50 mm WITHOUT RUBBER FEET 20 mm high WITHOUT RUBBER FEET 20 mm high ...

Страница 13: ...idual pump per group have different amounts of these items Extra materials needed Water treatment system at least an effective de scaler Materials to connect the water treatment system to the T fitting on the hoses to the water pumps Coffee grinder Knock box Pitcher Unpack and place Tools needed Phillips screw driver no 2 preferably a power tool Procedure 1 Remove the lid of the crate 2 Remove the...

Страница 14: ...t is reached then tighten cover nut Figure 7b right Location of water supply connections between left legs of machine C coffee system S steam boiler Machines with individual pumps per group have 3 Duette or 4 Triplette water connections marked L C Triplette only R and S left boiler centre boiler right boiler and steam resp cover nut rubber foot coffee boilers steam boiler ...

Страница 15: ...ed personnel Caution Always ensure water supply to the machine is in perfect working order before connecting electric power Parts needed included in shipment Machine 2 high pressure hoses 1 5 m 5 ft 3 high pressure hoses 0 5 m 1 ft 8 in 1 T fitting 3 8M 2 pumps with motor 30x20x25 cm length x width x height 12x8x10 inch 2 discharge hoses with stainless steel clamps more for machines with individua...

Страница 16: ... group these are marked L C Triplette only R and S left group centre group right group and steam 2 Attach the other ends of the long high pressure hoses to the outlet of an individual pump 3 8 connections No need for gaskets Note The outlet of the pump is marked with an arrow pointing up away from the pump housing see Figure 8 3 Attach the loose ends of two of the short high pressure hoses to the ...

Страница 17: ...ystem on right is connected to the pumps on left Flow is shown by the short arrows Water supply tap is right of figure Spirit will be to left of figure The water treatment system and the rightmost hose are not included in your shipment Note The coffee boilers will start to fill immediately when the tap is opened even when there is no power yet to the machine Filling will stop as the air inside the...

Страница 18: ...tem and for Spirits with an individual pump for each group 2 steam group L group M group R Water faucet Water filter steam group L group R Water faucet Water filter pump T fitting Not in shipment Standard Duette and Triplette Duette with individual pumps Triplette with individual pumps 0 5m hose 1 5m hose 1 1 2 3 2 3 5 4 1 1 2 3 4 1 1 2 3 steam all groups Water faucet Water filter ...

Страница 19: ...pe see Figure 11 and tighten the hose clamp 2 Do the same with the discharge hose of the drip tray 3 Insert the other ends of the discharge hoses into the drain or a discharge container Note To prevent sedimentation of sludge the discharge hoses should slope down to your drain or discharge container over the entire length of the hoses 4 If necessary cut the discharge hoses to desired length Figure...

Страница 20: ...ins voltage is in fact 230VAC e g Australia New Zealand the blue wire in the mains cable is connected to the neutral in the machine the brown wire in the mains cable is powering the different circuits in the machine The yellow green lead in the mains cable is the earth lead In other countries where our single phase machines are used the mains voltage is in fact 120VAC or 115VAC e g USA Canada the ...

Страница 21: ...ed to the pump that feeds the coffee system and the cable for the steam hot water boiler pump is connected to the pump that feeds the steam hot water boiler Figure 13 Pump cables must be mounted on the connector inside the black installation box on top of the pump motor In this picture the lid of the installation box has been removed and the capacitor has been laid aside for better view Caution Wh...

Страница 22: ... a qualified electrician connect your Spirit to the mains The yellow green or green lead must be connected to earth to properly ground the machine This is essential to work safely with the machine Note If your machine is equipped with a 5 wire cable 3 phases 230VAC with 120 phase shift blue is neutral grey brown and black are phases hot live yellow green is earth If your machine is equipped with a...

Страница 23: ...AC If your location is powered with three phase 120VAC with a 120 degrees phase shift we suggest to use a 10 booster a so called auto transformer or buck booster on two leads of the three phase mains which will raise 208VAC to 239VAC and 201VAC to 221VAC Have a qualified electrician install the necessary equipment as the booster must be able to supply 37 41 Amps The 120VAC three phase may lead to ...

Страница 24: ...ature controller switches PID s for all groups plus the controller for the steam boiler are in the off position lever pointing down see Figure 15 3 Make sure that coffee pressure gauges indicate line pressure If not check water connections 4 Turn the mains switch on the machine to NO HEAT The mains switch is mounted on the right hand side of the machine see Figure 12a The machine will wait for app...

Страница 25: ...ler controller on lever pointing up The display will light up after about 3 seconds and the steam boiler heating elements are now engaged 9 You may now switch the coffee boiler temperature controllers on levers pointing up The displays will light up after about 3 seconds and the coffee boiler heating elements are now engaged Check if the machine is leaking Expel air from coffee system You now have...

Страница 26: ...tart flowing from the hot water spout After the set amount of time the flow will stop automatically The delivered quantity of water depends on pressure in the steam hot water boiler and the flow of added cold water Because these may fluctuate slightly the quantity of water delivered in the set time may vary a little as well You can adjust the amount of time that the water will run from the hot wat...

Страница 27: ...ressure in the boilers is 12 Bar Above this value an expansion valve on the machine will open such that excess pressure is relieved until the maximum value is no longer exceeded this occurs when water with a lower temperature than the set value enters the coffee boiler heats up and thus expands A restrictor in the coffee system reduces the flow when a group is activated This restrictor is placed i...

Страница 28: ...water temperature Hot water from the steam hot water boiler is mixed with some cold water before it is dispensed Water temperature at the hot water spout depends on the temperature and amount of the mixed in cold water The temperature of the incoming cold water differs from place to place and possibly by season as well The amount of cold water inflow is related to the pressure and can thus be adju...

Страница 29: ...ture of around 95 C 5 If the temperature is too low decrease pump pressure of the steam hot water boiler pump If the temperature is too high increase pump pressure see Figure 17 6 After adjusting the pump pressure make sure that the boiler is at operational temperature and measure the hot water temperature again 7 When the required temperature is reached reset the hot water timer to the desired am...

Страница 30: ...ser manual pdf Please check the Spirit parts list for spare parts http www keesvanderwesten com assets spirit parts list pdf Contact information Kees van der Westen Espressonistic Works B V Van Elderenlaan 6 5581WJ WAALRE The Netherlands Telephone 31 40 2223433 Email support keesvanderwesten com Website www keesvanderwesten com Ordering replacement parts Order spare parts via spareparts keesvander...

Отзывы: