


10
REMOTE CONTROL USE
CAUTION : Avoid dropping the remote control.
NOTES :
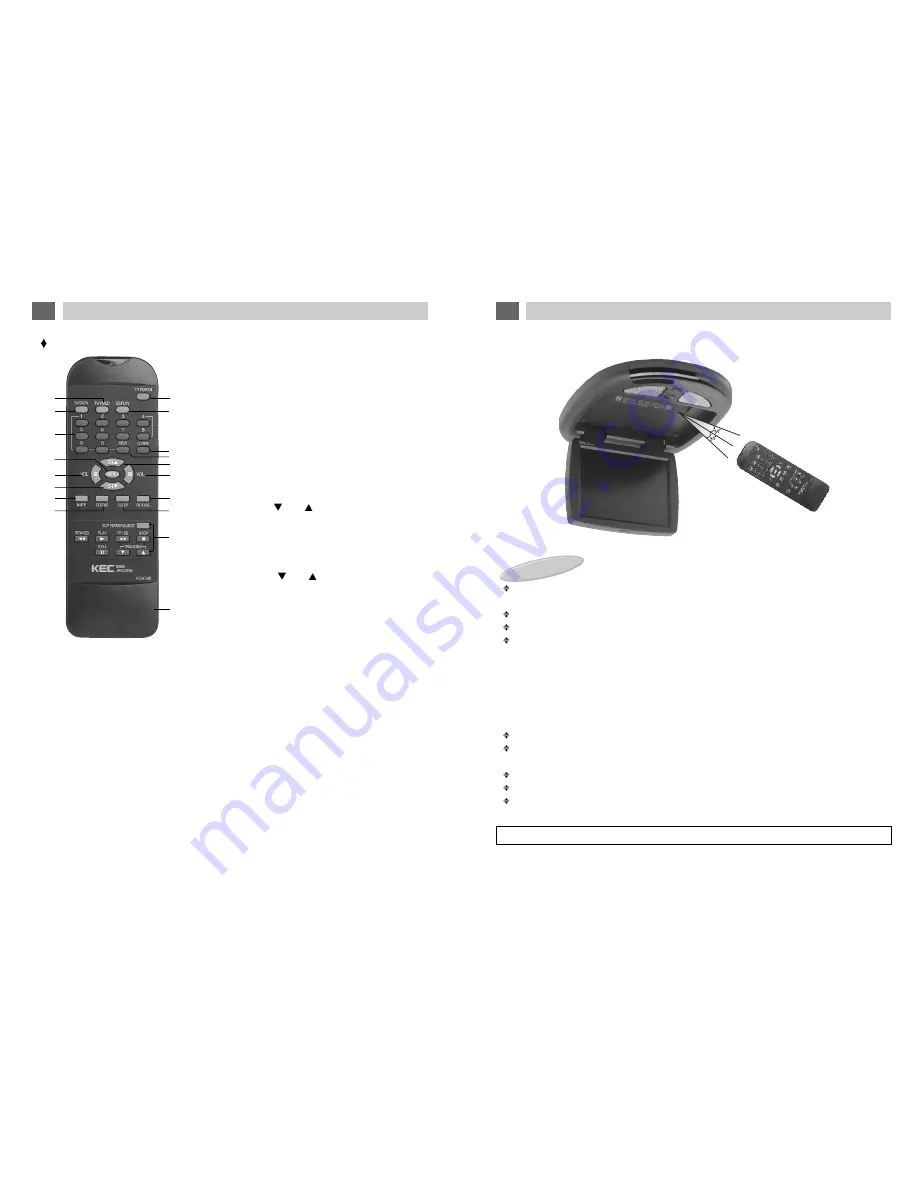
The Remote control should be directed at the Remote Control sensor just below the LCD Screen as
shown above.
The maximum operating distance of the Remote Control is about 10 feet.
The Remote Control should be kept away from UV exposure which may disrupt its operation.
It may be difficult to receive Remote Control signal when UV is present. If this occurs, it will be nec-
essary to operate it closer to the Remote Control Sensor.
It is time to replace the batteries when the remote control is not working properly.
( Alkaline batteries usually last for 6 months to 1 year. )
Press down and push the battery compartment cover in the direction of the arrow and lift off.
Install new batteries in the compartment. Be sure to observe the correct polarity (+/-) as indicated in
the compartment.
Use only new AAA batteries of the same type.
If batteries become exhausted, remove them immediately to avoid leakage.
Should battery leakage occur, clean the battery compartment with a soft cloth and replace with new
batteries.
REMOTE CONTROL BATTERY INSTALLATION
Remote control sensor
1. TV/VIDEO BUTTON
Press repeatedly to cycle program source selection between TV,
A/V1 IN & A/V2 IN & A/V3 IN. This button is duplicated on the
LSM104's Control Panel.
2. TV/CATV BUTTON
Used to choose between regular broadcast television reception and
cable broadcast reception. Pressing repeatedly cycles between "TV"
and "CATV. The system must be in TV mode for this to function.
3. DIRECT CHANNEL SELECTION (0 ~ 9) BUTTONS
Used for the direct selection of broadcast channels.
4. MENU BUTTON
Press to call up an on-screen menu. Press again to advance to the
next menu item. The selected item will be displayed in MAGENTA. If
the final item in the menu list is selected, pressing again will remove
the menu from the screen. This button is duplicated on the
LSM104's Control Panel.
5. VOLUME DOWN ( ), UP ( ) BUTTONS
These 2 buttons are primarily used in conjunction with the MENU
(#4) and PICTURE (#13) buttons.
However, if speakers are connected to the EXTERNAL SPEAKERS
OUTPUT CONNECTOR, these buttons will also work to adjust their
volume. These buttons are duplicated on the LSM104's Control
Panel.
6. CHANNEL DOWN ( ), UP ( ) BUTTONS
Press to view the next higher or lower channel stored in memory.
These buttons are duplicated on the LSM104's Control Panel.
7. MUTE BUTTON
Press to temporarily reduce sound to minimum level. Press again to
restore sound.
8. STATUS BUTTON
Press repeatedly to cycle between a user-adjustable picture and 3
different preset picture balances.
Remote Control
10
REMOTE CONTROL USE
9
2
6
5
13
15
14
3
5
1
10
4
6
7
11
8
12
16
9. TV POWER BUTTON
Press to turn the LCD Panel ON/OFF. This button is duplicated on the LSM104's Control Panel.
10. DISPLAY BUTTON
Press to display the Program Source (A/V1, A/V2, A/V3 or Channel #) you are viewing and the setting of the SLEEP
TIMER.
11. QUICK VIEW BUTTON
Press to cycle between the current and the previously viewed channel. The system must be in TV mode for this but-
ton to function.
12. 100 BUTTON
Used with Direct Channel Selection buttons for CATV channel numbers 100 and above.
13. PICTURE BUTTON
Press to call up the on-screen Picture Menu. Press repeatedly to select Contrast, Brightness, Sharpness, Color, Tint
or Display Off. The selected item will be displayed in MAGENTA. Adjust the desired item with the VOLUME buttons.
14. SLEEP BUTTON
Sets the TV to automatically power off in 15-180 minutes.
15. VCP CONTROL BUTTONS
These 8 buttons will control any KEC Mobile Applications Video Cassette Player.
16. BATTERY COVER