background image


-5- 


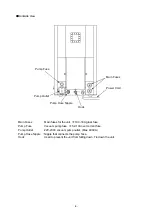
Backside View 


                                  Pump Fuse 
 
                                                                                                                                              Main Fuses 
 
 
                                                                                                                                              Power Cord 
 
                                Pump Outlet 
 
                                                        Pump Hose Nipple 

Hook 


  Main 

Fuses    

Main fuses for the unit. 

Φ

10.3-30A glass fuse. 

    Pump Fuse       

Vacuum pump fuse. 

Φ

5.2-10A over current fuse. 

  Pump 

Outlet 


220-230V vacuum pump outlet. (Max. 400VA) 

  Pump 

Hose 

Nipple 

Nipple that connects the pump hose. 

    Hook             

Used to prevent the unit from falling down. Tie down the unit. 


Содержание MASTER PLUS

Страница 1: ...ontents Safety Precautions ꞏꞏꞏꞏꞏꞏꞏꞏꞏꞏꞏꞏꞏꞏꞏꞏꞏꞏꞏꞏꞏꞏꞏꞏꞏꞏꞏꞏꞏꞏ 1 Standard Accessoriesꞏꞏꞏꞏꞏꞏꞏꞏꞏꞏꞏꞏꞏꞏꞏꞏꞏꞏꞏꞏꞏꞏꞏꞏꞏꞏꞏ 3 Descriptions of Component Partsꞏꞏꞏꞏꞏꞏꞏꞏꞏꞏꞏꞏ 4 Precautions before useꞏꞏꞏꞏꞏꞏꞏꞏꞏꞏꞏꞏꞏꞏꞏꞏꞏꞏꞏꞏꞏꞏꞏꞏꞏ 6 Operation ꞏꞏꞏꞏꞏꞏꞏꞏꞏꞏꞏꞏꞏꞏꞏꞏꞏꞏꞏꞏꞏꞏꞏꞏꞏꞏꞏꞏꞏꞏꞏꞏꞏꞏꞏꞏꞏꞏꞏꞏꞏꞏ 9 Periodic Machine Cleaningꞏꞏꞏꞏꞏꞏꞏꞏꞏꞏꞏꞏꞏꞏꞏꞏꞏꞏꞏꞏ 23 Maintenance Part Replacements ꞏꞏꞏꞏꞏꞏꞏꞏꞏꞏꞏꞏ 24 Error Messages ꞏꞏꞏꞏꞏꞏꞏꞏꞏꞏꞏꞏꞏꞏꞏꞏꞏꞏꞏꞏꞏꞏꞏꞏꞏꞏꞏꞏꞏ...

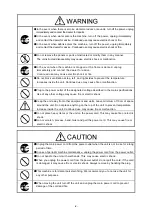
Страница 2: ...of the directions may cause severe injury or death Failure to follow or ignorance of the directions may cause injuries or damages to material properties This mark means prohibited actions as shown inside or around it The illustration on the left means Do not disassemble This mark means forced action and directions to follow as shown inside or around it The illustration on the left means Unplug the...

Страница 3: ... voltage described in the main specifications Use of any other voltage may cause fire or electric shock Keep the unit away from other equipment and walls Leave minimum of 10cm of space around the unit Do not place anything on the top of the unit to prevent temperature increase inside the unit Continued use may cause fire or malfunction Do not place heavy items or the unit on the power cord This ma...

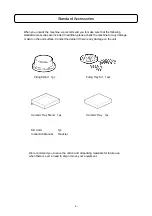
Страница 4: ... the machine for any damage or dent on the unit surface Contact the dealer if there is any damage on the unit Firing Stand 1pc Firing Tray Kit 1set Ceramic Tray Stand 1pc Ceramic Tray 1pc SD Card 1pc Instruction Manual 1booklet We recommend you to save the carton and all packing materials for future use when there is ever a need to ship or move your equipment ...

Страница 5: ...ring Table A table used to place the firing stand move up down Start Stop Key A key used to start stop firing and return from night mode to dry mode Power Switch The power switch for the unit LCD Panel A LCD panel that allows you to process the unit Arrow Keys Keys used to change functions of modes move the table up down stop and change courses values and settings Function Key Keys used to move to...

Страница 6: ...ook Main Fuses Main fuses for the unit Φ10 3 30A glass fuse Pump Fuse Vacuum pump fuse Φ5 2 10A over current fuse Pump Outlet 220 230V vacuum pump outlet Max 400VA Pump Hose Nipple Nipple that connects the pump hose Hook Used to prevent the unit from falling down Tie down the unit ...

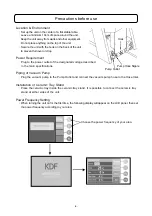
Страница 7: ...he designated voltage described in the main specifications Pump Hose Nipple Pump Outlet Piping of Vacuum Pump Plug the vacuum pump to the Pump Outlet and connect the vacuum pump hose to the Hose Inlet Installation of Ceramic Tray Stand Place the ceramic tray inside the ceramic tray stand It is possible to connect the ceramic tray stand at either sides of the unit Power Frequency Setting When turni...

Страница 8: ...g Dry type vacuum pump as water puts in a pump In case of using an oil sealed vacuum pump change its oil after unloaded muffle firing When first purchasing the unit or when the unit has not been in use for a long period of time there may be some moisture in the muffle that may cause bad effects during firing Please follow the unloaded muffle firing process listed below Power on the unit when it go...

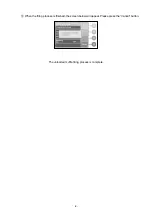
Страница 9: ... 8 When the firing process is finished the screen below will appear Please press the Cancel button The unloaded muffle firing process is complete ...

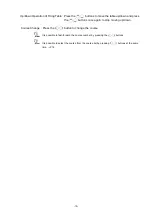
Страница 10: ...ys the current start temperature inputted into the course number 6 Final Temperature Displays the current final temperature inputted into the course number 7 Function Keys Press the F1 button to go to the program mode P11 Press the F2 button to go to the manual mode P18 Press the F3 button to go to the default set mode P20 Press the F4 button to go to the dry mode P20 Holding Start Temperature Thi...

Страница 11: ...wn and press the buttons once again to stop moving up down Course Change Press the button to change the course It is possible to fast forward the course number by pressing the buttons It is possible to select the course from the course list by pressing buttons at the same time P14 ...

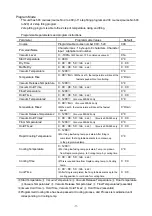
Страница 12: ...en set 0 the temperature will rise at the fastest speed 0 min Vacuum Release Temperature2 0 1200 course 500 529 only 0 Vacuum Hold Time2 0 00 99 59 min sec course 500 529 only 0 00 Final Temperature2 0 1200 course 500 529 only 0 Hold Time2 0 00 99 59 min sec course 500 529 only 0 00 Rapid Cooling Temperature 0 1200 For firing low fusing temp porcelain After firing is completed the firing table des...

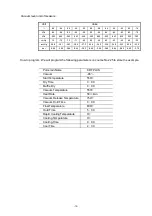
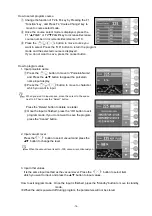
Страница 13: ... 2 23 6 23 0 bar 0 99 0 98 0 96 0 94 0 92 0 90 0 88 0 86 0 84 0 82 0 80 0 78 How to program We will program the following parameters on course No 225 to store the example Porcelain Name KDF PLUS Vacuum 96 Start Temperature 550 Dry Time 3 00 Muffle Dry 0 00 Vacuum Temperature 550 Heat Rate 58 min Vacuum Release Temperature 750 Vacuum Hold Time 0 00 Final Temperature 800 Hold Time 5 30 Rapid Cooling...

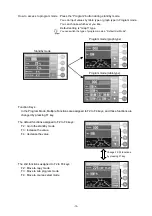
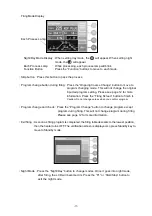
Страница 14: ...ram mode graph type Standby mode Program mode table type Function Keys In the Program Mode Multiple Functions are assigned to F2 to F4 keys and those functions are changed by pressing F1 key The default functions assigned to F2 to F4 keys F2 Go to the standby mode F3 Increase the value F4 decrease the value The 2nd functions assigned to F2 to F4 keys F2 Move to copy mode F3 Move to sub program mod...

Страница 15: ...lay Press the button to move to character which you want to input When you want to input space move the cursor to the space next to 9 Then press the Select button Press the Delete button to delete one letter Once the input is finished press the OK button to exit program mode If you do not want to save the program press the Cancel button 2 Input vacuum level Press the button to select vacuum and pr...

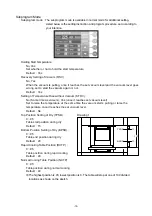
Страница 16: ...Temperature Rise without Vacuum STRV No Same time as vacuum Yes once it reaches set vacuum level Set to raise the temperature at the same time the vacuum starts pulling or raise the temperature once it reaches the set vacuum level Default No Top Position Setting of Dry TPSD Drawing 1 0 95 Table start position during dry Default 15 Bottom Position Setting of Dry BPSD 0 95 Table end position during ...

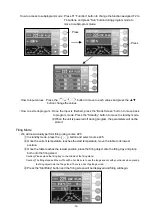
Страница 17: ...ill not be stored Firing Mode We will now actually perform firing using course 225 In standby mode press the button and select course 225 Once the current temperature reaches the start temperature move the table to its lowest position Once the table reaches the lowest position place the firing object onto the firing tray and place both onto the firing stand Caution Please place the firing tray on ...

Страница 18: ... page 12 for more information Press the Firing Screen button to finish it Caution Do not change values when you confirm program Program change and check Press the Program Change button to change program except program during firing This will not change program during firing Please see page 12 for more information Exit firing As soon as firing program is completed the firing table descents to the l...

Страница 19: ...he display time is remaining time before the firing temperature is reached Once it is reached the display time is elapsed When the current temperature is higher than inputted temperature the is displayed Press the Vacuum On Off button to start stop a vacuum operation Vacuum is started when the table is at the Vacuum Operation highest position When the Vacuum Off button is pressed during vacuum ope...

Страница 20: ...ec Firing Temperature 0 1200 0 Vacuum Level 0 100 0 Temperature Rise 0 99 min 0 min Vacuum Operation Vacuum ON Vacuum OFF Vacuum OFF Release Operation Release ON Release OFF Release OFF Copy Mode How to access to copy mode Press the Copy button during program mode to move to copy mod The course being copied The course being copied to How to use copy mode We will copy the course 225 to course 210 a...

Страница 21: ...y except the table is at highest position Press the Start Stop button to cancel this mode Default Set Mode Default Set Mode This mode is to set each operation default value and operation process It is also possible to move to maintenance mode and SD card mode from this mode How to access default set mode Press the Default button during standby mode to move to default set mode The screen shown belo...

Страница 22: ...er you like Graph type or Table type Start Temperature Range Set 20 of start temperature Once the unit is reached at 20 range of start temperature it will go to dry process The default is 5 Maintenance Mode Maintenance Mode It is possible to check the unit usage condition and maintenance check How to access maintenance mode Press the Maintenance button during default set mode P20 to access mainten...

Страница 23: ...mo to 0 When exchangingmuffle keep record of when to change the muffle next Then clear the firing cycle memo SD Card Mode On SD Card Mode This is to write firing program data s from the unit to the SD Card or to read firing program data s from SD Card to the unit It is possible to edit firing program data s with a computer How to enter SD Card Mode Press SD Card key to enter Default Set Mode P20 a...

Страница 24: ...a weekly basis In case of a periodic machine cleaning unplug the power cord from power outlet If cleaning the exterior of unit dilute mild detergent and blot with soft cloth Firing Table When the muffle and firing stand is cold remove the firing stand and wipe with alcohol ...

Страница 25: ...drawing 3 to remove the red and white line connected to the temperature sensor 4 Remove the 2 nuts shown on drawing 4 to remove the temperature sensor 5 Install the new temperature sensor We will complete installation by following the previous direction in reverse order Caution The temperature sensor has polarity Re connect the red line to the terminal and re connect the white line to another term...

Страница 26: ...n by following the previous directions in reverse order Caution Be sure to plug in the line securely to the end when re connecting the line back to the heater terminal If the line is not securely plugged in it will become hot and dangerous 6 Once the replacement is complete re plug the power cord into the electric outlet and power on the unit 7 Check to see if the temperature rises If the temperat...

Страница 27: ... No 3 Abnormal air release Displayed when it takes more than 20 seconds from vacuum atmosphere to air release No 4 Abnormal movement of firing table Displayed when the abnormal up down movement of the firing table occurs No 5 Abnormal temperature rise Displayed when the temperature does not rise or the temperature sensor is not working properly No 6 Abnormal temperature sensor Displayed when the t...

Страница 28: ...ory Ⅱ Max muffle temperature 1200 Inner muffle size φ93 62mm Programs storable Auto 500 courses Manual 1 course Safety Function Cooling fan Abnormal temperature monitoring circuit 8 abnormal operation detection apparatuses Option Oil vacuum pump Dry vacuum pump Accessories Firing Stand 1pc Firing Tray Set 1set Ceramic Tray Stand 1pc Ceramic Tray 1pc SD Card 1pc Instruction Manual 1booklet 24 3 Kis...

Отзывы: