background image

IT 

47 


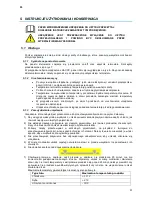
4.  ISTRUZIONI DI INSTALLAZIONE 


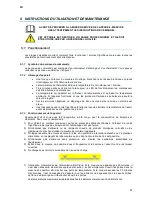
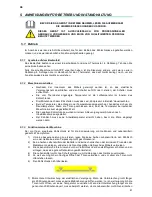
La  collocazione,  l'installazione,  le  riparazioni  o  le  modifiche,  devono  essere 
realizzate sempre da un TECNICO AUTORIZZATO, rispettando la legislazione in 
vigore in ogni paese. 
L'installazione,  la  riparazione,  il  servizio  o  la  manutenzione  inappropriati 
dell'apparecchiatura,  così  come  la  manipolazione  della  stessa  possono 
provocare danni materiali e lesioni.  

4.1  Disimballaggio 

Disimballare il macchinario e comprovare che non abbia subito danni durante il trasporto, altrimenti 
comunicarlo  immediatamente  al  fornitore  e  allo  spedizioniere.  In  caso  di  dubbi,  non  utilizzare  il 
macchinario fino ad aver verificato la portata dei danni. 


Gli elementi dell'imballaggio (parti in plastica, poliuretano espanso, punti metallici, 
ecc...) non devono essere lasciati alla portata dei bambini perché posseggono un 
potenziale pericolo. 

 
L'armadio non  deve essere capovolto.  In  caso di  necessità, alcuni armadi  si  possono  capovolgere 
per  il  lato  indicato  nell'imballaggio.  Se  non  è  indicato,  non  si  può  capovolgere.  Bisogna  aspettare 
almeno 2 ore da quando è stato collocato in posizione verticale per il suo avvio.  
Lo  spostamento  del  macchinario  deve  realizzarsi  con  un  carrello  elevatore  (muletto),  per  non 
danneggiare  la  struttura  del macchinario.  Trasportare  il  macchinario fino  al luogo di installazione e 
disimballarlo. 
Gli  elementi  utilizzati  per  l'imballaggio  sono  completamente  riciclabili  e  vanno  gettati  negli  appositi 
contenitori. 

4.2  Posizionamento e livellamento 

La  zona  in  cui  si  posiziona  l'armadio  deve  essere  pulita  e  libera.  Evitare  che  il  ventilatore 
dell'impianto  frigorifero  assorba  materiali  che  si  depositerebbero  nell'alettatura  del  condensatore, 
riducendo l'efficienza del sistema. 
Ritirare  il  pallet,  facendo  attenzione  a  non  danneggiare  il  mobile.  Ora  si  può  livellare  l'armadio, 
avvitando  o  svitando  le  gambe.  Dopo  averlo  livellato,  ritirare  la  pellicola  protettiva  dall'acciaio 
inossidabile usando oggetti non taglienti, non usare taglierini che potrebbero graffiare l'acciaio. 


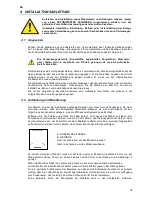
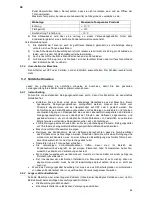
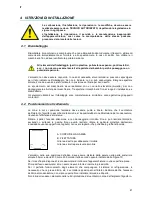
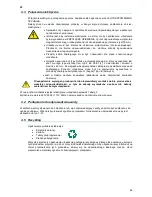
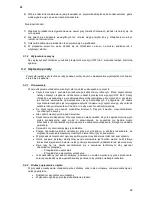
A: CORPO DELLA GAMBA 
B: FILETTATURA: 
Girare a destra per abbassare il mobile 
Girare a sinistra per elevare il mobile 

 
L'armadio,  nella  sua  posizione  definitiva,  deve  essere  distante  dalla  parete  nella  parte  posteriore 
almeno 50 mm e dai lati 30 mm e 500 mm dal tetto secondo quanto indicato dalla Figura 10.  
Se il macchinario dispone di ruote assicurarsi di collocare l'apparecchiatura in una superficie piana.  
Prima dell'avvio assicurarsi di non avere nessuna fonte di calore in prossimità.  
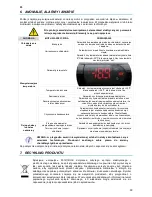
Per  il  perfetto  funzionamento  degli  elementi  che  compongono  il  sistema  di  refrigerazione,  è 
necessario  che  le  prese  d'aria,  sia  il  ventilatore  posizionato  all'interno  dell'armadioche  l'accesso 
dell'aria al condensatore, non siano coperte. Non installare l'armadio all'aperto.  
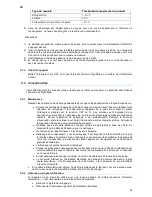
Non introdurre nessun elemento nelle reti di protezione dei ventilatori o zona dell'impianto frigorifero. 


Содержание KU 707

Страница 1: ...www kbs gastrotechnik de Stand Juli 2018 BEDIENUNGSANLEITUNG Edelstahl K hlschrank und Tiefk hlschrank KU TKU 707 1407 KBS Gastrotechnik GmbH Johannes Kepler Str 14 55129 Mainz...

Страница 2: ...IQUES INSTALLATION USE AND MAINTENANCE INSTRUCTIONS REFRIGERATION CABINETS INSTALLATIONS GEBRAUCHS UND WARTUNGSANLEITUNGK HLSCHR NKE ISTRUZIONI PER L INSTALLAZIONE L USO E LA MANUTENZIONEARMADI FRIGOR...

Страница 3: ...G GR NDLICH LESEN SCHUTZ ERDE POTENZIALAUSGLEIC H PRECAUZIONE TENSIONE PERICOLOSA LEGGERE LE ISTRUZIONI TERRA DI PROTEZIONE EQUIPOTENZIALIT OSTRZE ENIE WYSOKIE NAPI CIE NALE Y PRZECZYTA INSTRUKCJ UZIE...

Страница 4: ...GNHC14 GASTRONORM 1400L HC R600a R290a 2 PUERTAS 2 PORTES 2 DOORS 2 T REN 2 PORTE 2 DRZWI 2 NL 2 FIN 2 S Fig 3 3 4 PUERTAS 3 4 PORTES 3 4 DOORS 3 4 T REN 3 4 PORTE 3 4 DRZWI 3 4 NL 3 4FIN 3 4 S Fig 4...

Страница 5: ...ARMARIO EN SALA mm AUFSTELLUNG DES K HLSCHRANKS IM RAUM mm POSE D ARMOIRE EN SALLE mm POSIZIONAMENTO DELL ARMADIO NELLA SALA mm LOCATION OF CABINET IN THE ROOM mm UMIESZCZENIE SZAFY W POMIESZCZENI mm...

Страница 6: ...FIN S 4 Estatus salida auxiliar no activada Estatus sortie auxiliaire non activ e Status auxiliary output not activated Status Hilfsausgang und nicht aktiviert Modalit uscita ausiliaria non attivo St...

Страница 7: ...4 3 Conexi n el ctrica 16 4 4 Conexi n del desag e 16 4 5 Reciclaje 16 5 INSTRUCCIONES DE USO Y MANTENIMIENTO 17 5 1 Funcionamiento 17 5 1 1 Simbolog a del panel de mando 17 5 1 2 Encendido de la m q...

Страница 8: ...o transformaciones deben realizarse siempre por un T CNICO AUTORIZADO atendiendo a la reglamentaci n en vigor en cada pa s no haci ndose responsable el fabricante por una mala instalaci n de la misma...

Страница 9: ...entes calientes as como productos qu micos corrosivos o medicamentos y evitar el uso inadecuado del mueble Dependiendo del armario que usted haya adquirido podemos establecer distintas clasificaciones...

Страница 10: ...lizados para el embalaje son totalmente reciclables con lo que deben tirar en su contenedor correspondiente 4 2 Emplazamiento y nivelaci n La zona donde se ubique el armario debe estar despejada y lim...

Страница 11: ...B Am rica Si en la instalaci n de la m quina detecta alg n fallo h galo saber a su proveedor inmediatamente No cumplir con las especificaciones del fabricante o una instalaci n inadecuada exime al mis...

Страница 12: ...cione hasta alcanzar la temperatura de trabajo antes deproceder a la carga del g nero 5 1 3 Funcionamiento de la m quina El armario que usted ha adquirido est concebido para la conservaci n de bebidas...

Страница 13: ...tap n del desag e y limpiar ste para evitar la obstrucci n por arrastre de elementos s lidos Se pretende que los l quidos que pueda haber no se estanquen No utilice productos abrasivos corrosivos cido...

Страница 14: ...robar que no existe cerca una fuente de calor Parametros termostato Comprobar que el punto de corte del termostato est en un valor cercano a 0 C en frigor ficos y 20 C en congeladores Para comprobarlo...

Страница 15: ...lling 23 4 3 Electrical connection 24 4 4 Drainage connection 24 4 5 Recycling 24 5 USE AND MAINTENANCE INSTRUCTIONS 25 5 1 Operation 25 5 1 1 Control panel symbols 25 5 1 2 Switching on the machine 2...

Страница 16: ...should always be carried out by an AUTHORISED TECHNICIAN in accordance with the applicable legislation of the country The manufacturer does not accept liability if the machine is incorrectly installed...

Страница 17: ...rinks and food We recommend to avoid putting hot food or containers chemical corrosive products or medicines inside the refrigerator and avoiding the incorrect use of the unit Depending on the tempera...

Страница 18: ...to the structure Transport the machine to the installation location and then remove packaging All the packaging can be recycled Dispose of packaging correctly 4 2 Positioning and levelling Make sure...

Страница 19: ...supplied with British type plugs H type or American type plugs B type If any faults are observed during the installation the supplier should be notified immediately The manufacturer will not be held l...

Страница 20: ...ding the cabinet 5 1 3 Performance of the machine This machine is dessigned for an optimum preservation of beverage and food Therefore follow below advises 1 In order to reach a proper performance do...

Страница 21: ...revents accumulated liquids from stagnating Do not use abrasive corrosive or acid products chlorine based detergents solvents or petrol derivatives to clean the machine Do not use pressurized water to...

Страница 22: ...e products Cleaning of the condenser Check that the condenser is clean Consider that the cleaner the refrigerator is the more energy will be saved The cleaning frequency will depend on the conditions...

Страница 23: ...ccordement lectrique 32 4 4 Connexion de l vacuation 32 4 5 Recyclage 32 5 INSTRUCTIONS D UTILISATION ET DE MAINTENANCE 33 5 1 Fonctionnement 33 5 1 1 Symboles du panneau de commande 33 5 1 2 Allumage...

Страница 24: ...oivent toujours tre r alis s par un TECHNICIEN AUTORIS dans le respect de la r glementation en vigueur Le fabricant ne se tient pas pour responsable d une mauvaise installation de l appareil L install...

Страница 25: ...ales En fonction de l armoire dont vous avez fait l acquisition nous pouvons tablir des classifications distinctes selon la temp rature atteindre R FRIG RATION de 8 2 C R 600 a HC Elles sont pr par es...

Страница 26: ...e au d ballage Les l ments d emballage sont enti rement recyclables et doivent donc tre jet s dans le conteneur correspondant 4 2 Pose et mise niveau L espace o est plac e l armoire doit tre d gag et...

Страница 27: ...d alimentation Les armoires peuvent galement tre quip es sur commande de c bles d alimentation de type H Angleterre et type B Am rique Si l installation de l appareil vous d tectez tout d faut faites...

Страница 28: ...mp rature de travail avant de proc der au chargement du produit 5 1 3 Fonctionnement de l appareil L quipement dont vous avez fait l acquisition a t con u pour la conservation de boissons et d aliment...

Страница 29: ...ettoyage ainsi que la sortie d ventuels liquides provenant des aliments Durant l op ration de nettoyage il est indispensable d enlever le bouchon d vacuation et de le nettoyer pour viter l obstruction...

Страница 30: ...te V rifiez que les portes se ferment correctement Nettoyage du condensateur V rifiez que le condensateur est propre il faut savoir que plus l quipement frigorifique est propre plus il conomise de l n...

Страница 31: ...ktrischer Anschluss 40 4 4 Abwasseranschluss 40 4 5 Wiederverwertung 40 5 ANWEISUNGEN F R BETRIEB UND INSTANDHALTUNG 41 5 1 Betrieb 41 5 1 1 Symbole auf dem Bedienfeld 41 5 1 2 Maschine einschalten 41...

Страница 32: ...SIERTEN TECHNIKER vorgenommen werden und die geltenden Vorschriften des jeweiligen Landes sind zu beachten Der Hersteller haftet nicht bei einer falschen Installation der Anlage Unkorrekte Installatio...

Страница 33: ...nachdem welches K hlschrankmodell Sie erworben haben k nnen verschiedene Klassifizierungen aufgestellt werden Diese h ngen von der Temperatur die erreicht werden soll ab K HLUNG 8 bis 2 C R 600 a HC...

Страница 34: ...e Verpackung benutzten Elemente sind vollst ndig recyclierbar und m ssen in die entsprechenden Container gegeben werden 4 2 Aufstellung und Nivellierung Der Bereich an dem der K hlschrank aufgestellt...

Страница 35: ...ne Verl ngerung des Stromeingangskabels verboten Au erdem werden die Schr nke auf Bestellung mit Eingangskabeln vom Typ H England und Typ B Amerika ausgeliefert Wenn Sie an der Installation der Maschi...

Страница 36: ...T ren geschlossen sind sinkt die Temperatur bei laufender Maschine bis zum eingestellten Wert Die negativen K hlschr nke wurden mit einem Abtauvorgang zwei Stunden nach Inbetriebnahme ausgestattet De...

Страница 37: ...as Reinigen zu erleichtern und f r einen eventuellen Abgang von Fl ssigkeiten die aus den Lebensmitteln ausgetreten sind Bei den Reinigungsoperationen muss unbedingt der Stopfen des Abflusses abgenomm...

Страница 38: ...Kondensators Pr fen Sie ob der Kondensator sauber ist Es muss sich vergegenw rtigt werden dass je sauberer das K hlger t ist desto mehr Energie eingespart wird ganz besonders was die Kondensatorfl ge...

Страница 39: ...ssione elettrica 48 4 4 Connessione dello scarico 48 4 5 Riciclaggio 48 5 ISTRUZIONI D USO E MANUTENZIONE 49 5 1 Funzionamento 49 5 1 1 Simbologia del pannello di controllo 49 5 1 2 Accensione della m...

Страница 40: ...ono essere realizzate sempre da un TECNICO AUTORIZZATO rispettando la legislazione in vigore in ogni paese Il fabbricante non responsabile dell installazione inadeguata dell apparecchiatura L installa...

Страница 41: ...mprato possiamo stabilire diverse classificazioni in funzione della temperatura da ottenere REFRIGERAZIONE 8 a 2 C R 600 a HC Sono adatti per la conservazione di prodotti freschi o alimenti precucinat...

Страница 42: ...enti utilizzati per l imballaggio sono completamente riciclabili e vanno gettati negli appositi contenitori 4 2 Posizionamento e livellamento La zona in cui si posiziona l armadio deve essere pulita e...

Страница 43: ...si consegnano con tubi di ingresso della corrente di tipo H Inghilterra e di tipo B America Se durante l installazione del macchinario rileva qualche difetto contatti immediatamente il suo fornitore...

Страница 44: ...eratura si abbasser fino al valore di regime In armadi negativi previsto uno sbrinamento dopo due ore dall avvio necessario che il frigorifero funzioni fino a raggiungere la temperatura di lavoro prim...

Страница 45: ...pulirlo per evitare l ostruzione per il trascinamento di elementi solidi L intenzione che i liquidi che possano esserci non ristagnino Non utilizzare prodotti abrasivi corrosivi acidi detergenti a bas...

Страница 46: ...ntrolla che le porte si chiudano correttamente Pulizia del condensatore Verificare che il condensatore sia pulito Considerare che ad un impianto frigorifero pulito corrisponde un maggiore risparmio en...

Страница 47: ...czenie elektryczne 56 4 4 Pod czenie do odprowadzania wody 56 4 5 Recykling 56 5 INSTRUKCJE U YTKOWANIA I KONSERWACJI 57 5 1 Obs uga 57 5 1 1 Symbole na panelu sterowania 57 5 1 2 Uruchomienie maszyny...

Страница 48: ...dyfikacje powinny by wykonywane zawsze przez AUTORYZOWANEGO TECHNIKA z uwzgl dnieniem lokalnych przepis w w ka dym kraju Producent nie bierze odpowiedzialno ci za nieprawid ow instalacj urz dzenia Mon...

Страница 49: ...kazane dane 3 1 Charakterystyka og lna W zale no ci od nabytej szafy mo na ustali r ne klasyfikacje ze wzgl du na osi gan temperatur CYKL CH ODZENIA od 8 do 2 C R 600 a HC Urz dzenia przeznaczone do p...

Страница 50: ...e ci maszyn do miejsca instalacji i nast pnie j rozpakowa Elementy wykorzystane do zapakowania s ca kowicie odzyskiwalne w zwi zku z czym nale y je wyrzuci do odpowiedniego pojemnika 4 2 Umieszczanie...

Страница 51: ...cego Ponadto urz dzenie mo e by na zam wienie wyposa one w przewody zasilaj ce z wtyczk typu H Anglia i typu B Ameryka Je li w trakcie monta u zauwa ysz jak kolwiek wad natychmiast zawiadom dostawc Ni...

Страница 52: ...znie odszranianie Urz dzenie ch odz ce powinno osi gn po dan temperatur przed jego za adowaniem 5 1 3 Zasady dzia ania urz dzenia Urz dzenie kt re naby e jest przeznaczone do przechowywania ywno ci i...

Страница 53: ...yczki odp ywu i wyczyszczenie go aby unikn zatkania r nymi elementami Chodzi o to eby ciecz nie zatrzymywa a si Do czyszczenia nie u ywa produkt w ciernych r cych kwas w rozpuszczalnik w i pochodnych...

Страница 54: ...wdzi czy kondensator jest czysty Im czystsze urz dzenie tym wi ksze b d oszcz dno ci energii zw aszcza dotyczy to kondensatora Cz stotliwo czyszczenia zale y od warunk w lokalu Je li zauwa ysz e konde...

Отзывы: