


PRODIGY Technical Manual
31
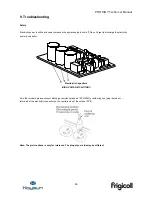
6.7
How to Remove the Chassis assembly
CAUTION:
Because the 24K indoor unit is
relatively large and heavy, it must have two
persons to implement the following steps.
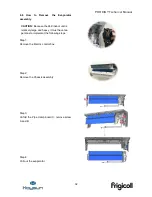
Step1:
Remove the left and right pipe cover.
Step2:
Remove the 5 screws A,B,C,D,E remove
support part F and G.
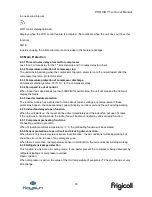
Note:
Screw E is behind the E-box by mistake for this
sample, you need to remove screw X, to lift the
E-box a little, Then you can remove the Screw
E.
This
problem
will
be
solved
before
mass-production.
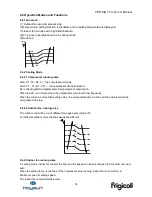
Step3:
Open the E-box, to lose the fan motor and
louver motor connectors from the PCB.
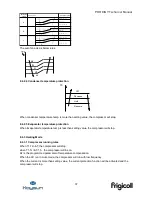
Step4:
Press the locker H and I, to lose the indoor
from the installation plate, lift it a little and
pull out it along the direction indicated in
right image.
Note:
It is not necessary to remove the panel to
remove the Chassis assembly, in order to show
clearly inside, these pictures are without panel
Содержание KAY-26 DN7
Страница 1: ...PRODIGY 3D Inverter Technical Manual...
Страница 11: ...PRODIGY Technical Manual 11 For KAY 26 DN7...
Страница 12: ...PRODIGY Technical Manual 12 For KAY 35 DN7 For KAY 52 DN7...
Страница 13: ...PRODIGY Technical Manual 13 For KAY 71 DN7...
Страница 14: ...PRODIGY Technical Manual 14 3 2 Outdoor Unit...
Страница 15: ...PRODIGY Technical Manual 15 For KAE 26 DN7...
Страница 16: ...PRODIGY Technical Manual 16 For KAE 35 DN7 KAE 52 DN7...
Страница 17: ...PRODIGY Technical Manual 17 For KAE 71 DN7...
Страница 64: ......


