background image

A 9 Maintenance

Repairs and servicing work on the
electrical part of this equipment must

only be undertaken by experts or by
persons trained in our factory who are
aware of the safety regulations. Disconnect
the mains plug from the power supply or
switch off the disconnecting switch before
opening any part of the equipment.

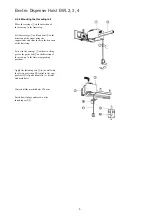
9.1 Maintenance – monthly.

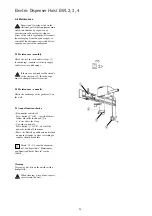
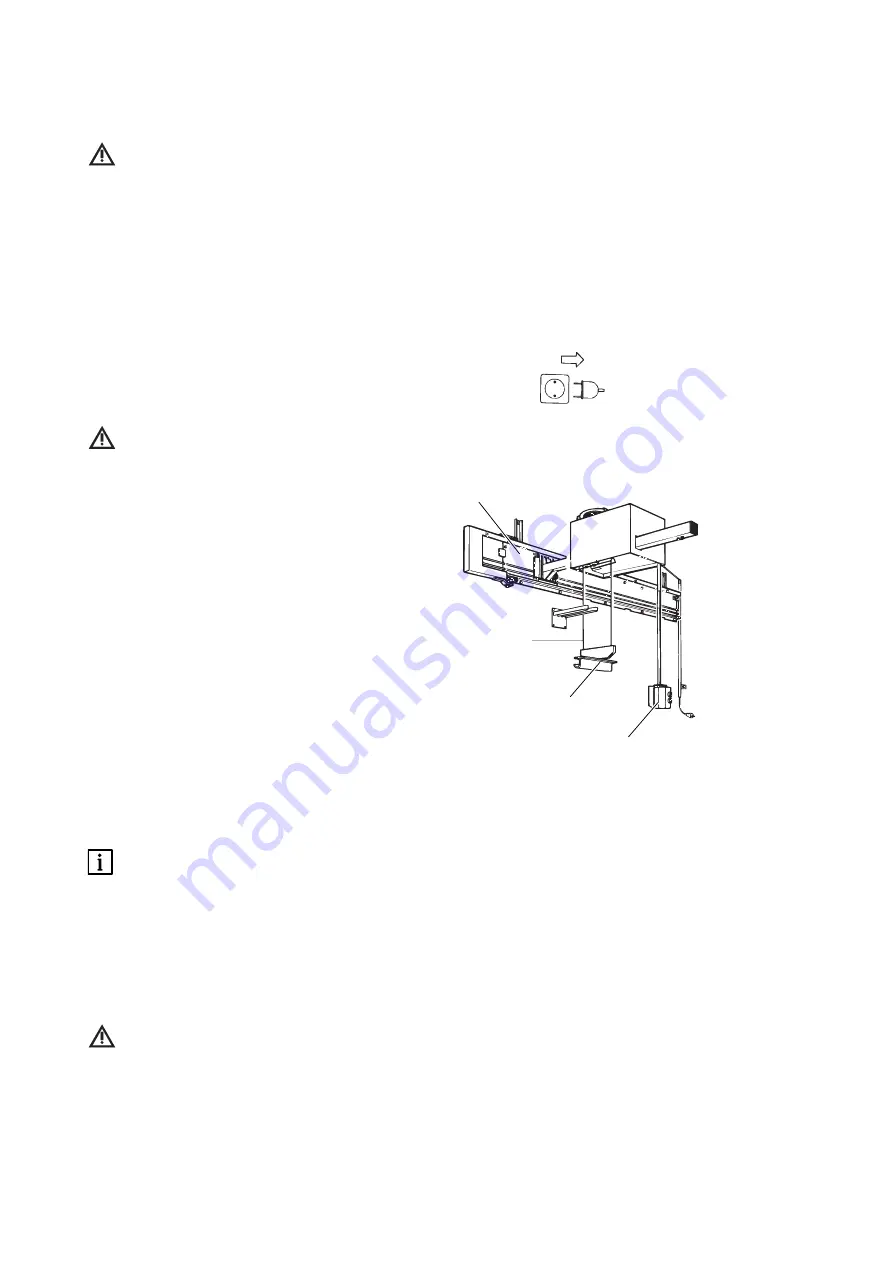
Check the reel-in track and steel rope 

4

for anchorage.-examine electricity supply
cables for wear and damage.

If there are any breaks in the strands
of the steel rope 

4

, then the rope

must be changed for safety reasons!

9.2 Maintenance – annually.

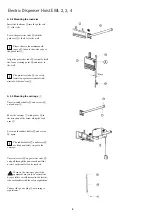
Check the anchorage of the guide rail 1 on
the wall.

9.3 Annual function checks:

• Downwards switch-off 

Press button 

2

“AB“ – switch-off must 

follow when the load hook 

3

is 

4 - 6 cm above the floor.

• Upwards switch-off

Press button 

1

“AUF“, - check if the 

upwards switch-off functions.

• Move the Silolift up and down under load

no unusual sounds, such as screeching or 
similar, should be audible.

Points  9.1 - 9.3 must be documen-
ted, and kept with a “Maintenance

and Function Checks Record“ for the
Silolift.

Cleaning

Wipe away any dirt on the outside with a
damp cloth.

When cleaning , prevent any ingress
of water into the unit.

13

Electric Dispenser Hoist EWL 2, 3, 4

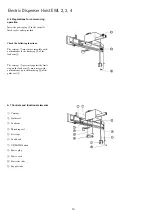
1

4

3

2

Содержание EWL 2

Страница 1: ...Operating instructions Electric Dispenser Hoist EWL 2 3 4 Always on the safe side...

Страница 2: ...KaVo Elektrotechnisches Werk GmbH Wangener Stra e 78 D 88299 Leutkirch Tel 0 75 61 86 150 Fax 0 75 61 86 265...

Страница 3: ...n 5 A 5 Mounting and connection 6 A 5 1 Mounting the guide rail 6 A 5 2 Later mounting of the guide rail with EWL Plaster Dispenser 30 already fitted 6 A 5 3 Mounting on an out of line or un even wall...

Страница 4: ...ion and protection of the unit are ensured only through proper use in accordance with the instructions for use and using the tools approved for the purpose The following should also be observed the wo...

Страница 5: ...e to be found in the operating instructions and Carrying out of the maintenance procedures A 2 Scope of delivery Accessories A 2 1 Scope of delivery Check the equipment schedule for discrepancies EWL...

Страница 6: ...ty supply Category II applies Degree of pollution 2 according to IEC 664 The required dimensions and weights are to be taken into account Check the load bearing capacity of the proposed wall see A 11...

Страница 7: ...610 mm Weight 80 0 kg EWL Electric Dispenser Hoist 4 Min ceiling height 2590 mm Min wall length 3016 mm Weight 85 0 kg EWL Electric Plaster Dispenser 15 Weight empty approx 17 kg Capacity approx 15 kg...

Страница 8: ...ni mum wall distances right 150 mm left 100 mm Centre drill the marked holes 10 x 90 mm and insert dowel plugs Screw on the guide rail except for screw A and align it horizon tally A 5 2 Later mountin...

Страница 9: ...Spacer mm Screws Remarks Washer 0 3 Wood screw 7 x 10⁵ In parts supplied Mat No 0 247 2130 11x3x34 6 12 Mat No 15 24 Wood screw 7 x 120 not in parts supplied Mat No 0 247 2135 0 244 7005 27 33 Group...

Страница 10: ...al of the load arm 3 A 5 5 Mounting the carriage 1 Unscrew rubber buffer u and screws z on load arm 3 Move the carriage 1 with groove i in the direction of the arrow along the load arm 3 Screw on the...

Страница 11: ...tube and slide them in the direction of the limit stop Swivel in the carriage 1 with swi velling part of the guide rail 2 in the direction of the arrow up to the limit stop parking position Apply the...

Страница 12: ...move smoothly with out hindrance to the limit stop a of the load arm 3 The carriage 1 presently against the limit stop on the load arm 3 must move with out hindrance up to the limit stop s of the gui...

Страница 13: ...be q in the direction of the arrow and move the load arm 3 right up to the desired position The load arm 3 engages in the posi tion central to the dispenser Lower the load hook 6 down to the cover sto...

Страница 14: ...the rear limit stop Operate the button d to lower the plaster container in the direction of the console k During the lowering process push the container j against the con sole k The container j must...

Страница 15: ...en the rope must be changed for safety reasons 9 2 Maintenance annually Check the anchorage of the guide rail 1 on the wall 9 3 Annual function checks Downwards switch off Press button 2 AB switch off...

Страница 16: ...ble pulley l defective Remedy a Remove obstacle to the power cord 9 b Check cable pulley l and replace if necessary Steel 5 rope does not coil Possible causes a Steel rope 5 twisted b Button 7 or moto...

Страница 17: ...N Static load Working load 500 N 300 N plaster 200 N dispenser weight 300 N hoist weight Silolift Total weight 800 N FGD1 1000 N Dynamic shock load during operation FGD1 1000 N Rated voltage Voltage r...

Страница 18: ...N Gesamtgewicht FGS1 Dynamische Sto belastung w hrend des Betriebes FGD1 1000N FGS1 800N FGD1 1000N FS2 2000N stat FD2 2500N dyn A 12 Dimension sheet for silo lift Static load Working load 500 N 300 N...

Страница 19: ...17 Electric Dispenser Hoist EWL 2 3 4 2322 mm 2480 mm 2137 mm 2540 mm SK 01 574...

Страница 20: ...parts free of charge KaVo EWL is not liable for defects and their consequences caused by or which could be caused by normal wear misuse improper cleaning or maintenance failure to follow the operating...

Страница 21: ...19 Electric Dispenser Hoist EWL 2 3 4...

Страница 22: ...enser Hoist EWL 2 3 4 0 245 1518 0 659 3291 0 220 0401 0 223 2121 0 225 2050 0 223 2101 0 223 2101 0 221 3197 100 127 V 0 658 3311 220 240 V 0 247 6011 0 221 1217 100 127 V 0 221 1216 220 240 V 0 247...

Страница 23: ...21 Electric Dispenser Hoist EWL 2 3 4...

Страница 24: ...03 GB 04 06 D D 8 88 82 29 99 9 L LE EU UT TK KI IR RC CH H T Te el le ef fo on n 0 07 75 56 61 1 8 86 6 1 15 50 0 F Fa ax x 0 07 75 56 61 1 8 86 6 2 26 65 5 I In nt te er rn ne et t w ww ww w k ka a...

Отзывы: