61
1.3
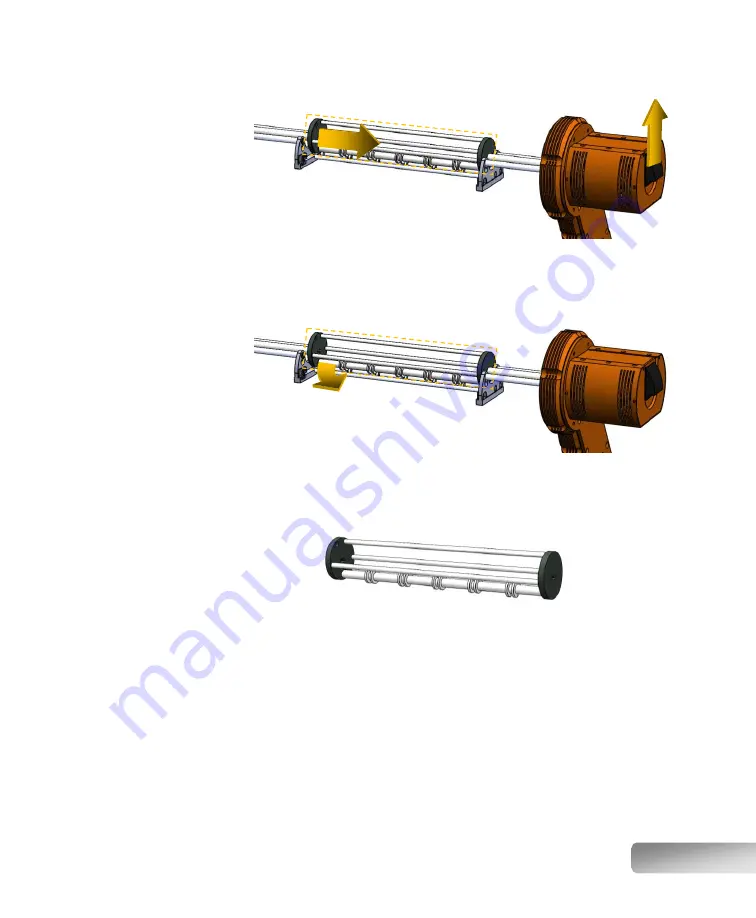
Gently push the left-hand BlackDisk towards the right, to free it from its
driving axle. At some point, you will feel that the motion cannot go
further, as the assembly reaches an internal stopper. Pull the locking
handle up, to allow the assembly to continue moving to the right.
1.4
The left-hand side BlackDisk is now free from its driving axle.
1.5
Then, while maintaining the crucible holder middle section gently
compressed, rotate the left-hand side horizontally towards you, to clear
the driving axle completely.
1.6
Now pull the middle section to the left, to completely remove it from its
axles. A little jiggling may help free the middle section.
1.7
You now have in your hands the crucible holder’s middle section.
1.8
Refer to the following pages to know how to disassemble this sub-
assembly and replace any damaged or flux-soiled parts.
2.
Crucible holder removal – rocking shafts
2.1
Now that the crucible holder middle section is removed, you can
disassemble the two ceramic rocking shafts (i.e. the parts that normally
hold the crucible holder’s middle section). However, unless the rocking
shafts are damaged or need cleaning, it is not necessary to remove
those parts, which need special care to properly re-install afterwards.
2.2
The rocking shafts are held in collars. These collars can be seen as
divided into two halves: the half nearest the furnace holds the ceramic
shaft, while the half away from the furnace is holding the motor shaft.
Содержание K2 Prime
Страница 1: ...Automatic fluxer 2...
Страница 2: ......


