background image

13

 Operations

Equipment Set-Up

1. Insert hose (90° swivel cuff end) into top of unit.  

Attach desired cleaning tool.

2. Unclip waist and sternum straps.  Loosen 

shoulder straps and hip belt.

3. Put on unit by placing arms through shoulder 

straps and secure and tighten the hip belt. 

(For the most comfort, adjust unit so that the hip belt 
covers the front hipbones and the bowed-out portion 
of the back padding rests on the small of the back.)

4. Tighten the shoulder straps to the point where the 

unit's weight just starts to pull down on the shoul-
ders. Ideally most of the unit's weight will remain 
on the waist.

5. Adjust the sternum strap position to be high on 

the chest and tighten till comfortable.

6. Plug in power cord from machine into properly 

grounded wall outlet (see grounding instructions).

Machine Operation

The unit is a commercial vacuum designed for dry 
pick-up only.

1. Place a paper bag inside the cloth bag in the 

vacuum chamber.  Be sure the pleated filter is in 
place at the bottom of the chamber.

2. Attach the accessories to be used.

3. Put unit on back and adjust straps.

4. Plug unit into properly grounded wall outlet (see 

grounding instructions).

5. Turn machine on or off using switch on left side of 

machine.

6. To empty, remove the cover and dump paper bag 

into trash receptacle.  Shake cloth bag vigorously 
each time paper bag is emptied to prevent soil 
build-up, which would clog filter.

86394670 - VacPac

The straps are easily adjusted while the unit is 
being worn.

1. To loosen lift up on tab

2. To tighten pull on strap

Содержание VP6

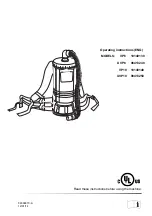
Страница 1: ...Read these instructions before using the machine 86394670 A 12 01 14 Operating instructions ENG MODELS VP6 10140130 UVP6 98413240 VP10 10140140 UVP10 98413250...

Страница 2: ...2 Machine Data Label 86394670 VacPac...

Страница 3: ...y Level 7 Grounding Instructions 9 Safety Label Location 10 Operations Technical Specifications 12 Equipment Set Up 13 Machine Operation 13 Maintenance Daily Maintenance 14 Troubleshooting 15 Service...

Страница 4: ...n The PARTS LIST section contains assembled parts illustrations and corresponding parts list The parts lists include a number of columns of information REF column refers to the reference number on the...

Страница 5: ...sharp edges or corners Keep cord away from heated surfaces Do not unplug by pulling on cord To unplug grasp the plug not the cord Do not put any object into openings Do not use with any opening blocke...

Страница 6: ...u des coins Garder le cordon l cart des surfaces chaudes Ne pas d brancher en tirant sur le cordon Tirer plut t la fiche Ne mettez aucun objet dans les ouvertures Ne l utilisez pas avec une ouverture...

Страница 7: ...n of equipment Report machine damage or faulty operation immediately Do not use the machine if it is not in proper operating condi tion Following is information that signals some potentially dangerous...

Страница 8: ...t d une d faillance ou d une d t rioration de la machine Ne pas utiliser la machine si celle ci ne fonctionne pas correctement Lire soigneusement les informations ci dessous signalant certains dangers...

Страница 9: ...to connect this plug to a 2 pole receptacle as shown in Fig B if a properly grounded outlet is not available The temporary adaptor should be used only until a properly grounded outlet Fig A can be in...

Страница 10: ...Safety Safety Label Location NOTE This drawing indicates the location of safety label on the machine If at any time the label becomes illegible promptly replace it WARNING LABEL 86198960 86394670 VacP...

Страница 11: ...11 NOTES 86394670 VacPac...

Страница 12: ...2 2 Cubic Meter Min Waterlift 95 Inches of Water Filter Bag VP6 UVP6 6 Quart VP10 UVP10 10 Quart General Dimensions Weight Vacuum Hose 5 1 5m X 1 5 3 8cm Diameter Weight VP6 UVP6 10 1 Lb 4 6 Kg VP10 U...

Страница 13: ...st and tighten till comfortable 6 Plug in power cord from machine into properly grounded wall outlet see grounding instructions Machine Operation The unit is a commercial vacuum designed for dry pick...

Страница 14: ...without harming filtering capacity Allow to dry completely before using 2 Wipe down exterior of machine 3 Check round pleated filter at bottom of vac chamber and clean if necessary For best results re...

Страница 15: ...r brush clean Hosecuffs loose or hose cracked Tighten cuffs or replace hose Cap loose on top of machine Tighten cap MAINTENANCE DAILY WEEKLY MONTHLY QUARTERLY BI ANNUALLY Check bag and replace if nece...

Страница 16: ...16 Notes 86394670 VacPac...

Страница 17: ...17 86394670 VacPac Parts PARTS...

Страница 18: ...18 VacPac 25 5B 1 7 8 4B 23 9 15 15 21 2 19 14 24 10 11 11A 12 20 3 13 12A 17 4A 5A 16 18 22 6 21A 26 86394670 VacPac...

Страница 19: ...99050 1 RING MTR COMP W SCREWS 11A 86199070 1 SCR MTR COMP RING 4 PKG 12 86198790 1 DIFFUSER AIR W SCREWS 12A 86199080 1 SCR AIR DIFFUSER 2 PKG 13 86198890 1 FILTER AIR SOUND DIFFUSER 14 86198950 1 KI...

Страница 20: ...20 Wiring Diagram 86394670 VacPac 1 SEE VACPAC BOM FOR ALL OTHER PART NUMBERS POWER CORD VAC MOTOR DISCONNECT QUICK CORD SWITCH...

Страница 21: ...21 86394670 VacPac Wiring Diagram REF PART NO QTY DESCRIPTION SERIAL NO NOTES 1 86218010 1 FUSE ASM VP6 10...

Страница 22: ...22 Notes 86394670 VacPac...

Страница 23: ...23 OPTIONS Options...

Страница 24: ...24 Accessory Tools and Kits 1 2 3 4 3 5 6 7 8 9 10 11 14 13 12 15 16 86394670 VacPac...

Страница 25: ...LITE 5 86033020 1 TOOL QUICK SWEEP 6 86286660 1 WAND DOUBLE CURVE 2 PC ALUM INCL 7 8 7 86199060 1 RING BOTTOM WAND 8 86199030 1 NUT BOTTOM WAND 9 86000090 1 TUBE 20 EXTENSION 10 86198760 1 TOOL 16 CR...

Страница 26: ...H BAG FOR VP10 ONLY 86198900 FILTER BAG LINER CLOTH VP6 86198850 FILTER BAG VP10 PAPER PKG 10 86198910 FILTER BAG VP6 PAPER PKG 10 86392850 FILTER DOME VAC MOTOR HEPA 86198890 FILTER AIR SOUND DIFFUSE...

Страница 27: ...27 Serial Numbers REF NO MODEL SERIAL 1 86394670 VacPac...

Отзывы: