-
8
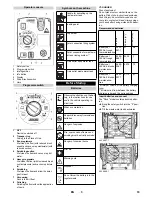
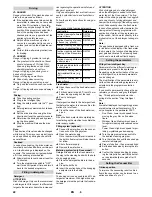
Press Info button - the set value blinks.
Set the desired value by turning the info
button.
Press Info button.
Turn the info button until "Language" is
displayed.
Press Info button.
Turn the info button until the desired
language is highlighted.
Press Info button.
The factory settings of all parameters are
restored.
Parameters that are adjusted with the grey
Intelligent Key, are kept until another set-
ting is selected.
Turn the program selection switch to
the desired cleaning program.
Press the info button - the first adjusta-
ble parameter is displayed.
Press Info button - the set value blinks.
Set the desired value by turning the info
button.
Confirm the changed setting by press-
ing the Info button or wait till the set val-
ue is automatically accepted after 10
seconds.
Select the next parameter by turning
the Info button.
After all desired parameters have been
modified, turn the info button until "Exit
menu" is displayed.
Press the info button - you will exit the
menu.
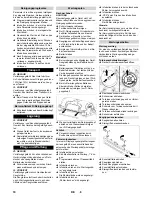
DANGER
Risk of injury! When loading or unloading
the appliance, it may only be operated on
gradients of max. 10% (Adv 15%). Drive
slowly.
몇
CAUTION
Risk of injury and damage! Observe the
weight of the appliance when you transport
it.
When transporting in vehicles, secure
the appliance according to the guide-
lines from slipping and tipping over.
Remove brushes from the brush head.
몇
CAUTION
Risk of injury and damage! Note the weight
of the appliance in case of storage.
This appliance must only be stored in
interior rooms.
Select the storage site for the appliance
taking into consideration the permissi-
ble total weight of the appliance in order
not to impact its stability.
DANGER
Risk of injury! Before working on the appli-
ance, remove the Intelligent Key and the
mains plug of the charger.
Pull out the battery plug.
Drain and dispose of the dirt water and
the residual fresh water.
몇
CAUTION
Risk of injury due to overrun of the suction
turbine.
Suction turbine will continue to run for a
while after switch-off. Carry out mainte-
nance tasks only after the suction turbine
has come to a halt.
ATTENTION
Risk of damage. Do not sluice the appli-
ance with water and do not use aggressive
detergents.
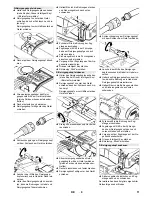
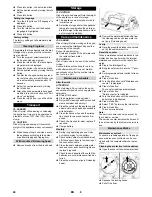
Drain off dirt water.
Clean protective turbine strainer.
Only with R cleaning head Remove bulk
waste container and empty it.
Clean the outside of the appliance with
a damp cloth which has been soaked in
mild detergent.
Clean the vacuum lips and the wiping
lips, check for wear and replace if re-
quired.
Check the brushes for wear, replace if
required.
Charge battery.
During long operating pauses: Carry
out refill charging for the battery.
Check battery poles for oxidation, brush
off if necessary. Ensure firm seating of
the connection cable.
Clean the seals between waste water
tank and cover and check for tightness,
replace if required.
Check the acid density of the cells if the
batteries are not maintenance-free bat-
teries.
Clean the brush tunnel (only R cleaning
head)
Remove the water distribution strip from
the cleaning head and clean water ca-
nal (only R cleaning head).
Have the prescribed inspection carried
out by the customer service.
When a maintenance task indicated in the
display has been performed, the relevant
maintenance counter must be reset after-
wards.
Plug in the Intelligent Key.
Bring the safety switch into the "1" posi-
tion.
Set programme selector switch to trans-
port run.
Press Info button.
Turn the info button until "Maintenance
counter" is displayed.
Press Info button.
The counter readings are displayed.
Press Info button.
"Delete counter" is indicated.
Turn the info button until the counter to
be deleted is highlighted.
Press Info button.
Select "YES" by turning the info button.
Press Info button.
The counter is deleted.
Note:
The service counter can only be reset by
the customer service.
The service counter indicates the time until
the next service by the customer service is
due.
To ensure a reliable operation of the appli-
ance maintenance contracts can be con-
cluded with the competent Kärcher sales
office.
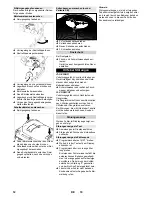
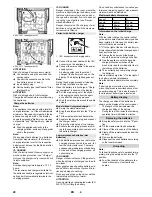
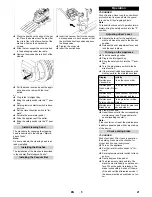
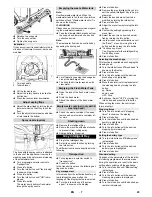
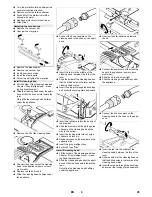
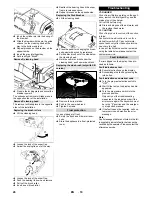
Open the cover of the waste water tank.
Squeeze the locking hooks.
Pull off the float.
Setting the language
Factory setting
Cleaning Programs
Transport
With mounted D cleaning head
Storage
Care and maintenance
Maintenance schedule
After the work
Monthly
Yearly
Reset the counter
Maintenance Works
Maintenance contract
Cleaning the protective turbine strainer
24
EN
Содержание B 150 R
Страница 2: ...2...
Страница 161: ...5 30 0 0 Intelligent Key 1 0 0 Intelligent Key 1 2 0 161 EL...
Страница 164: ...8 up down OFF OFF Intelligent Key 10 10 Adv 15 Intelligent Key R D 164 EL...
Страница 165: ...9 R R Intelligent Key 1 YES K rcher Intelligent Key D 165 EL...
Страница 166: ...10 Intelligent Key Disk Intelligent Key Intelligent Key Brush D D D 166 EL...
Страница 167: ...11 3 3 Intelligent Key OFF 0 SB 167 EL...
Страница 168: ...12 Timeout 0 15 A4 0 5 168 EL...
Страница 169: ...13 1 OFF 10 D OFF 10 Dose Dose 169 EL...
Страница 190: ...5 V 30 0 0 1 0 0 1 190 RU...
Страница 191: ...6 2 0 10 Adv 15 1 15 OFF 60 C 15 RM 746 RM 780 RM 755 es RM 69 ASF RM 753 RM 751 RM 732 PVC RM 752 RM 754 Dose 191 RU...
Страница 192: ...7 3 Dose 0 FACT Fine Clean Whisper Clean Power Clean 10 5 1 2 1 ON 192 RU...
Страница 193: ...8 Yes No up down OFF OFF 10 10 Adv 15 R D 193 RU...
Страница 194: ...9 R R R 1 K rcher D 194 RU...
Страница 195: ...10 Disk Brush R D R 195 RU...
Страница 196: ...11 3 3 OFF 0 SB 196 RU...
Страница 197: ...12 0 15 A4 0 5 197 RU...
Страница 198: ...13 1 OFF 10 R OFF 10 Dose Dose 198 RU...
Страница 317: ...5 30 0 0 1 0 0 1 317 BG...
Страница 319: ...7 FACT Fine Clean Whisper Clean Power Clean 10 5 1 2 ON R 319 BG...
Страница 320: ...8 up down OFF OFF 10 10 Adv 15 R D 320 BG...
Страница 321: ...9 R R 1 YES K rcher D 321 BG...
Страница 322: ...10 Disk Brush R D R 322 BG...
Страница 323: ...11 3 3 OFF 0 SB 323 BG...
Страница 324: ...12 0 15 A4 0 5 324 BG...
Страница 325: ...13 1 OFF 10 R OFF 10 Dose Dose 325 BG...
Страница 374: ...5 V 30 0 0 1 0 0 1 374 UK...
Страница 376: ...7 FACT Fine Clean Whisper Clean Power Clean 10 5 1 2 1 ON R 376 UK...
Страница 377: ...8 Yes No up down OFF OFF 10 10 Adv 15 R D 377 UK...
Страница 378: ...9 R R 1 K rcher D 378 UK...
Страница 379: ...10 Disk Brush R D R 379 UK...
Страница 380: ...11 3 3 OFF 0 SB 380 UK...
Страница 381: ...12 0 15 A4 0 5 381 UK...
Страница 382: ...13 1 OFF 10 R OFF 10 Dose Dose 382 UK...
Страница 385: ...eee PeDraaDr ass 385 AR...
Страница 387: ...9 FOO 95 R FOO 95 esoD esoD 387 AR...
Страница 388: ...FOO 5 5 95 A0 5 5 388 AR...
Страница 389: ...xrpoa e R Bx 389 AR...
Страница 390: ...eaoP R 390 AR...
Страница 391: ...R R 9 SEB RARA ER e 391 AR...
Страница 392: ...95 95 95 e R 392 AR...
Страница 393: ...FO R pC nseF FOO FOO 393 AR...
Страница 394: ...esoD 3 esoD 5 OAAF OaFD AeDeF naaoCDr AeDeF kseDr AeDeF 95 5 1 2 394 AR...
Страница 395: ...6 5 95 95 9 95 FOO R4 402 R4 435 R4 455 Do R4 21 ABO R4 453 R4 459 R4 436 R4 456 R4 450 25 95 395 AR...
Страница 396: ...9 5 5 9 396 AR...
Страница 397: ...1 5 EN 50272 T3 A x 600 ss 396 ss 915 ss 936 ss 645 ss 325 ss V V 5 5 397 AR...
Страница 399: ...1 2 3 4 5 6 7 1 2 3 4 5 6 7 8 399 AR...
Страница 401: ...5 152659 5 5 5 05 9 401 AR...
Страница 402: ......
Страница 403: ......
Страница 404: ...http www kaercher com dealersearch...

