19
NC
series
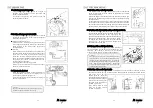
10-5 Position of the thread guide of the spreader thread take-up
When the needle bar is at the top of its stroke, thread any one of parts on the spreader
thread take-up with spreader thread. (see the illustration)
10-6 Position of the thread guide of the looper thread take-up
Align the eyes of thread eyelets B and C with mark A on the guide plate.
Adjustment is made by loosening screws D.
■
To increase the amount of looper thread to be supplied Move the eyes of B and C to the front.
■
To decrease the amount of looper thread to be supplied Move the eyes of B and C to the back.
10-7 Position of the looper thread take-up
When the point of the left needle descending to the back side of the looper has reached the
bottom surface of the looper blade while the looper is moving to the right from the extreme
left end of its travel, the looper thread should be removed properly from position B on the
looper thread take-up.
【
11
】
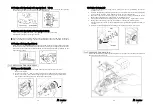
REPLACING THE TIMING BELT
11-1 To remove the timing belt
1.
Loosen the seven arm cover set screws and the four oil reservoir set screws.
Remove each part.
2.
Loosen two screws A. Remove the handwheel to the right while turning it slowly.
3.
Remove the pulley, plates and bearing in sequence by referring to the illustration.
Then remove the timing belt from the hole for the bearing.
20
NC
series
11-2 To place the timing belt
1.
Install the timing belt, bearing, plates, pulley and cover by performing the reverse
procedure of 11-1.
2.
Position the bearing so that the point of the screw is fitted correctly into the positioning
hole on the lower shaft. Then tighten the screw to secure the bearing.
3.
Move the looper to the extreme right end of its travel by turning the machine pulley.
Bring the needle bar down to the bottom of its stroke by hand.
4.
Then place the belt onto the timing pulley on the upper shaft. Tighten two screws A.
5.
Bring the needle bar up to the top of its stroke by turning the machine pulley.
Check to make sure mark "P" on the handwheel is aligned with alignment mark "O" on
the bed.
6.
To make a fine adjustment for the timing of the needle and looper, refer to 5-5.
【
12
】
CLEANING THE MACHINE
At the end of each day, remove the needle plate and clean the slots of the needle plate and
the area around the feed dogs.
Содержание NC Series
Страница 2: ......
Страница 3: ......
Страница 4: ......
Страница 5: ......
Страница 6: ......
Страница 7: ......
Страница 8: ......
Страница 9: ......
Страница 10: ......
Страница 11: ......
Страница 12: ......
Страница 13: ......
Страница 14: ......
Страница 15: ......
Страница 16: ......
Страница 17: ......
Страница 18: ......
Страница 19: ......
Страница 20: ......
Страница 21: ......
Страница 22: ......
Страница 23: ......
Страница 24: ......
Страница 25: ......
Страница 26: ......
Страница 27: ......
Страница 28: ......
Страница 29: ......
Страница 30: ......
Страница 31: ......
Страница 32: ......
Страница 33: ......
Страница 34: ......
Страница 35: ......
Страница 36: ......
Страница 37: ......
Страница 38: ......
Страница 39: ......
Страница 40: ......
Страница 41: ......
Страница 42: ......
Страница 43: ......
Страница 44: ......
Страница 45: ......
Страница 46: ......
Страница 47: ......
Страница 48: ......
Страница 51: ...NC Series Instruction Manual NC1103 4 G series ...
Страница 63: ...NC J SJ Series Instruction Manual NC1001GSJ NC1001GSJF NC1001GJ ...


