background image


Copies  of  the  I/B.  Please  reproduce  them  without  any 
changes  except  under  special  instruction  from  Team 
International  BELGIUM.  The  pages  must  be  reproduced 
and folded in order to obtain a booklet A5 (+/- 148.5 mm 
width  x  210  mm  height).  When  folding,  make  sure  you 
keep  the  good  numbering  when  you  turn  the  pages  of 
the  I/B.  Don’t  change  the  page  numbering.  Keep  the 
language integrity. 

Print only what is inside the frame.


24 

FT 42174 - 160331


Back cover page (last page) 


Assembly page 24/48 


Fax +32 2 359 95 50 


Presione la tecla de encendido/apagado de nuevo para iniciar la 
cocción. 


El icono del ventilador giratorio y la señal de calentamiento (el punto 
rojo dentro del icono del ventilador) se encenderán y la freidora 
comenzará en seguida a generar aire caliente. El medidor de tiempo 
comenzará a contar regresivamente el tiempo que se ajustó. 


La señal de calentamiento se apagara cuando la unidad alcance la 
temperatura seleccionada. 


Durante el proceso de freído de aire, la señal de calentamiento se 
encenderá y apagará intermitentemente. Esto indica que el elemento 
de calor se mantiene en la temperatura ajustada. 


Durante la cocción, parte del aceite y de los jugos de los alimentos se 
acumularán en el soporte de la canasta. Esto es de esperar. 


Algunas recetas requieren que la comida deba ser agitada en la 
canasta en la mitad del tiempo de cocción (ver sección “Ajustes” en 
este capítulo). Para agitar los ingredientes, quite la canasta fuera del 
aparato, usando el asa y suavemente, pero con firmeza, agítelos. 
Deslice nuevamente la canasta dentro del aparato y continúe la 
cocción. 


Nota: 

Debido a que la tecnología de aire rápida calienta 

instantáneamente el aire dentro del aparato, si se retira la canasta 
brevemente durante el freído de aire, el proceso de cocción no se verá 
afectado. 


Consejo:

 En algunos casos es más fácil dividir el tiempo de cocción en 2 

fases, para las recetas que requieren que se agite la canasta en la mitad 
de la cocción. Si usted ajusta el medidor de tiempo en la mitad del tiempo 
requerido de cocción, escuchará la campana del medidor de tiempo 
avisándole que tiene que agitar los ingredientes. Por favor, recuerde que 
luego de agitarlos, debe ajustar el medidor de tiempo nuevamente para el 
tiempo de cocción restante. 


Consejo:

 Si usted ajusta el medidor de tiempo en el tiempo completo, la 

campana no sonará hasta que la cocción haya finalizado. Puede quitar la 
canasta en cualquier momento para verificar el estado de la cocción de 
los ingredientes. El aparato se apagará automáticamente y luego 
continuará luego de que usted vuelva a colocar el soporte de canasta 
nuevamente en la unidad. Recuerde que el medidor de tiempo cesa de 
contar regresivamente automáticamente en esta situación. 


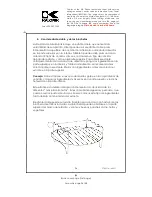
Cuando la campana del medidor de tiempo suena (5 pitidos), significa 
que el tiempo ajustado de cocción ha terminado. Con la ayuda de 
guantes para horno y el asa, retire el soporte de canasta fuera del 
aparato y colóquelo en una superficie 

resistente al calor.


Содержание FT 42174

Страница 1: ...148 5 mm width x 210 mm height When folding make sure you keep the good numbering when you turn the pages of the I B Don t change the page numbering Keep the language integrity Print only what is insi...

Страница 2: ...f parts 7 Do not operate any appliance with a damaged cord or plug or after the appliance malfunctions or has been damaged in any manner Return the appliance to the nearest authorized service facility...

Страница 3: ...functions by pressing the on off button 25 During hot air frying hot steam is released through the air outlet openings Keep your hands and face at a safe distance from the steam and from the air outle...

Страница 4: ...burn The resulting extended cord should be arranged so that it will not drape over the counter top or tabletop where it can be pulled on by children or tripped over KNOW YOUR AIRFRYER Prepare your fa...

Страница 5: ...Keep the language integrity Print only what is inside the frame 5 FT 42174 160331 Assembly page 5 48 Fax 32 2 359 95 50 PARTS AND CONTROLS DESCRIPTION 1 Touchscreen digital control panel 2 Food baske...

Страница 6: ...e new appliance smell Ventilate the room during this period When your airfryer is heated for the first time it may emit slight smoke or odor This is normal with many heating appliances This does not a...

Страница 7: ...sket basket holder or the inside of the Airfryer during and immediately after use as they get very hot Only hold the food basket by its handle Always use oven mitts Unit is hot Determine the required...

Страница 8: ...off when you have to shake the ingredients Tip If you set the timer to the full cooking time the timer bell will not go off until cooking is completed You can pull the basket out at any time to check...

Страница 9: ...mperature settings can be adjusted at any time when using the preset menus 4 Using the dual layer rack and skewers The Kalorik Airfryer includes a dual layer rack that increases the versatility of you...

Страница 10: ...fries follow the steps below Peel the potatoes and cut them into sticks Wash the potato sticks thoroughly and dry them with paper towels Pour 1 2 tablespoon of canola oil in a bowl put the sticks on t...

Страница 11: ...ightly longer preparation time a smaller amount of ingredients only requires a slightly shorter preparation time Shaking smaller ingredients halfway through the preparation time optimizes the end resu...

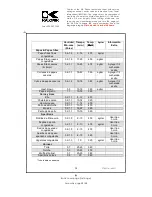
Страница 12: ...6 1 7 18 25 400 shake Add 1 2 tbsp of oil Home made potato wedges 0 6 1 7 18 22 360 shake Add 1 2 tbsp of oil Home made potato cubes 0 6 1 6 12 18 360 shake Add 1 2 tbsp of oil Hashbrown 0 5 15 18 360...

Страница 13: ...g materials to clean them as this may damage the non stick coating Rinse and dry thoroughly after cleaning To remove baked on food fill the basket holder with hot soapy water Put the food basket in th...

Страница 14: ...a type of snack meant to be prepared in a traditional deep fryer Use snacks made to be prepared in the oven or lightly brush some oil onto the snacks for a crispier result I cannot slide the basket i...

Страница 15: ...product upon inspection by KALORIK is proven defective it will be repaired or replaced at Kalorik s option without charge to the customer If a replacement product is sent it will carry the remaining...

Страница 16: ...ment back to the warranty center along with proof of purchase and a return authorization number indicated on the outer package given by our Customer Service Representatives Send to the authorized KALO...

Страница 17: ...o ha sido fabricado para que ser utilizado por ni os 5 Descon ctelo del tomacorriente cuando no est en uso y antes de limpiarlo D jelo enfriar antes de colocar o retirar de l las partes 6 No poner en...

Страница 18: ...freidora de aire con papel de aluminio Esto produce el recalentamiento del aparato 21 No descuidar el aparato mientras est en funcionamiento 22 Se debe tener gran precauci n al retirar la canasta o el...

Страница 19: ...re el enchufe Si aun as no encaja contacte a un t cnico electricista calificado No intente modificar el enchufe de ninguna manera INSTRUCCIONES SOBRE EL CABLE CORTO Se proporciona un cable de alimenta...

Страница 20: ...200 C El rango del medidor de tiempo es de 0 a 30 minutos y est equipado con un sistema de apagado autom tico Una vez que el medidor de tiempo llegue a 0 00 el aparato sonar cinco veces y se apagar Ot...

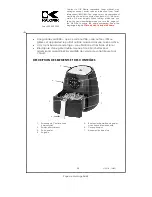
Страница 21: ...y what is inside the frame 21 FT 42174 160331 Assembly page 21 48 Fax 32 2 359 95 50 DESCRIPCI N DE PARTES Y CONTROLES 1 Panel de control digital con pantalla t ctil 2 Canasta de alimentos 3 Soporte d...

Страница 22: ...Esto ayudar a eliminar la grasa que pudiera haberse adherido durante su fabricaci n y eliminar el olor a a nuevo del aparato Ventilar la habitaci n durante esta etapa Cuando su freidora de aire se cal...

Страница 23: ...orte de la canasta Nota Nunca llene la canasta totalmente ni exceda las cantidades recomendados ver secci n Ajustes en este cap tulo ya que esto podr a afectar la calidad de la cocci n Deslice la cana...

Страница 24: ...Para agitar los ingredientes quite la canasta fuera del aparato usando el asa y suavemente pero con firmeza ag telos Deslice nuevamente la canasta dentro del aparato y contin e la cocci n Nota Debido...

Страница 25: ...ta fuera del soporte de la misma deslice la tapa de protecci n y oprima el bot n destinado a ello Cuidado Nunca oprima el bot n de retiro de la canasta si el soporte de canasta no se encuentra en una...

Страница 26: ...ar 2 tipos de comida a la vez cocinando un tipo de comida debajo del estante y otro en la parte superior Para utilizar el estante col quelo dentro de la canasta de alimentos ponga los ingredientes en...

Страница 27: ...e AJUSTES La tabla que damos a continuaci n servir de ayuda para seleccionar los ajustes b sicos seg n los ingredientes que desee preparar Nota Recuerde que estos ajustes son s lo sugerencias Consejos...

Страница 28: ...m 0 6 1 7 18 25 400 agitar Agregar 1 2 cucharada aceite Cortezas de papas caseras 0 6 1 7 18 22 360 agitar Agregar 1 2 cucharada aceite Cubos de papas caseros 0 6 1 6 12 18 360 agitar Agregar 1 2 cuch...

Страница 29: ...dhesivo Enjuague y seque cuidadosamente luego de limpiar Para remover los residuos de comida llene el soporte de canasta con agua caliente jabonosa Ponga la canasta de alimentos en la sart n y sumerja...

Страница 30: ...o de aperitivo que debe ser frito en una sart n freidora tradicional Utilice aperitivos que est n hechos para ser fritos en el horno o trate de eliminar algo de aceite dentro de los aperitivos para qu...

Страница 31: ...ara obtener la aplicaci n de la garant a Durante este per odo si el producto KALORIK despu s de una inspecci n por parte de KALORIK se manifiesta defectuoso ser reparado o remplazado seg n lo que deci...

Страница 32: ...a y dirigirle al servicio post venta m s pr ximo Si fuera el caso traiga el producto o env elo correctamente franqueado con la prueba de compra que mencione el n mero de autorizaci n de devoluci n ind...

Страница 33: ...pareil quand il n est pas utilis et avant de le nettoyer Laisser refroidir avant d y mettre ou d en enlever les pi ces l ments 7 Ne pas faire fonctionner l appareil quand le cordon ou la fiche de cour...

Страница 34: ...e pas laisser l appareil sans surveillance lorsqu on l utilise 23 Une extr me prudence est de mise quand on enl ve le panier ou le porte panier pour retirer la graisse chaude 24 On peut arr ter la fri...

Страница 35: ...ctrique du cordon d extension est trop basse ceci pourrait causer la surchauffe et ou un risque d incendie de l appareil Le cordon d extension doit tre arrang de fa on ne pas pendre du comptoir ou de...

Страница 36: ...ontage 36 48 Fax 32 2 359 95 50 Une grande versatilit que ce soit pour frire cuire au four r tir ou griller cet appareil est le parfait outil de cuisson dans une cuisine active Il n y a pas besoin de...

Страница 37: ...ans de l eau chaude savonneuse et s cher les bien Essuyer l int rieur de la cavit de la friteuse avec un chiffon humide ou une ponge et s cher avec une serviette en papier ou un torchon sec Assurez vo...

Страница 38: ...die Ne jamais utiliser la friteuse air chaud si le panier n est pas correctement plac Assurez vous que les ingr dients soient dans l appareil et qu ils n entrent pas en contact avec l l ment chauffant...

Страница 39: ...nts d 1 minute Presser les touches d ajustement de la temp rature pour augmenter ou diminuer la temp rature de cuisson Une pression courte augmentera ou diminuera temp rature de cuisson de 10 degr s F...

Страница 40: ...isine et la poign e du panier retirer celui ci de l appareil et le mettre sur une surface r sistante la chaleur Note vous pouvez arr ter l appareil tout moment Pour ce faire presser simplement le bout...

Страница 41: ...a grille deux niveaux pour avoir une surface de cuisson plus grande dans votre friteuse soit dans sa partie sup rieure soit la partie inf rieure On peut l utiliser aussi pour cuire ou r chauffer 2 typ...

Страница 42: ...lus de 1 2 livres de frites chaque fois R GLAGES Le tableau suivant vous aidera s lectionner les r glages de base pour les ingr dients que vous voulez pr parer Note N oubliez pas que ces r glages sont...

Страница 43: ...s surgel s 0 6 1 5 9 16 400 Oui Frites paisses surgel es 0 6 1 5 11 20 400 Oui Frites faites maison 8 8mm 0 6 1 7 18 25 400 Oui Ajouter 1 2 cuill re soupe d huile Quartiers de pomme de terre faits mai...

Страница 44: ...les ingr dients brul s ou tenaces remplissez le porte panier avec de l eau chaude et du liquide vaisselle Placer le panier dans le porte panier et laissez les tremper dans l eau pendant au moins 10 m...

Страница 45: ...po le Utilisez des snacks con us pour tre cuits au four ou badigeonnez les avec de l huile pour obtenir des snacks plus croustillants On ne peut pas glisser le panier correctement dans l appareil Il y...

Страница 46: ...uve d achat originelle Une preuve d achat est exig e pour obtenir l application de la garantie Durant cette p riode le produit KALORIK qui apr s inspection par KALORIK s av re d fectueux sera r par ou...

Страница 47: ...rediriger vers notre centre de r paration Le cas ch ant ramenez le produit ou envoyez le d ment affranchi ainsi qu une preuve d achat en mentionnant le num ro d autorisation de retour indiqu par notr...

Страница 48: ...d and folded in order to obtain a booklet A5 148 5 mm width x 210 mm height When folding make sure you keep the good numbering when you turn the pages of the I B Don t change the page numbering Keep t...

Отзывы: