Operating Instructions Powador-proLOG_EN
Page 19
6 Start-Up
6.1 Procedure
1.
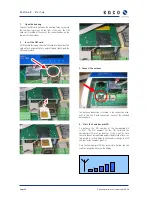
Switch on the Powador-proLOG
Connect the supply voltage to switch on the unit. After
the supply voltage has beenconnected, the “Power”
LED must remain lit.
2.
Check the status LEDs
The status LED provides information about the unit’s
status after it has been started up:
Status LED is off ->System is starting up
Status LED is fl ashing steadily -> System is ready
3.
This is the most important part of start-up. Once
the system has started up (Power LED is lit/Status
LED is fl ashing), you should connect to the Powador-proLOG
with your computer to check whether all inverters
are answering over the RS485 line and whether all
connected sensors are providing data.
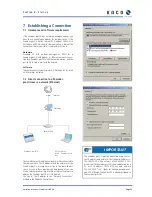
See section 7 (“Establishing a Connection”) of this
manual for information on how to connect to the
Powador-proLOG with your computer.
6.2 Using the Powador-proLOG with
Powador-web
1.
You do not have to confi gure the data logger on site.
You must ensure that the inverters and
sensors have been connected correctly. Make sure
that the telephone connection (analogue, ISDN)
and the Internet connection (Ethernet) or SIM card (GSM/
GPRS) are functioning correctly. It must be possible to access
the data logger using a PC/laptop (assign IP address).
In the case of network devices (Ethernet), you should
also have the free TeamViewer software installed
on your PC/laptop to ensure trouble-free service.
As soon as you have managed to meet these
requirements, please contact the
KACO new energy monitoring service.
2. Once KACO new energy has confi
rmed that
your data logger is communicating with the portal
please send the completed application form
to the monitoring service.
You can download the application form from our
wesite: "www.kaco-newenergy.de".
6.3 Using the Powador-proLOG without
Powador-web
1.
Once you have successfully connected to the
Powador-proLOG, you should confi gure the unit to
meet your requirements (inverter, analogue/digital
channels, alarm notifi cation and data transmission).
2.
You can use the “Installation Wizard”) to confi gure
and check the measured data of the Powador-pro
LOG. It will guide you through the installation process
one step at a time.
You can also use the “Expert page”
to confi gure and check measured data.
For more information, see section 8 (“Menu
Description”).
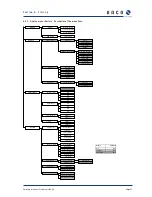
6.4 Display menu and status LEDs
6.4.1 Meaning of the four status LEDs
"Power” LED
Remains lit: the unit is supplied with power
Is not lit: there is a fault in the voltage supply
"Status” LED
Is not lit: the system is just starting up (boot phase)
Flashing: the system loaded successfully (normal operation)
"Connect” LED
Is not lit: currently there is no connection via analogue modem,
ISDN or GSM
Flashing: the connection to the remote station is being estab-
lished
Remains lit: the connection was successfully established
"Alarm” LED
Is not lit: normal operation
Remains lit: the unit issues an alarm signal via alarm output
D0 (provided it was appropriately confi gured)
NOTE
The system needs about two minutes to be completely
initialised. This process is similar to starting up (booting)
a PC. The completion of the boot phase is indicated by
the status LED: The status LED is off during the boot
phase and only starts to fl ash after it is completed.
ATTENTION
Make sure that everything is properly connected
(polarity) and that all inverters are addressed (RS485
address). For more information, see the inverter manual.
S e c t i o n 6 ·
S t a r t - u p
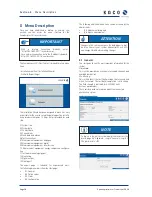
NOTE
You can use what is known as the "posbox" function to
test the connection to the Powador-web. To do this go to
Admin monitoring » Network » Postbox).
Содержание Powador-proLOG
Страница 1: ...Powador proLOG Operating instructions...


