background image

3

4. OPERATION 

UP / DOWN  operation : 
"PUSH button" and "UP / DOWN button" must be pressed SIMULTANEOUSLY.

5. MAINTENANCE AND DEFECTS

–  The table does not require any maintenance by usage as described in chapter 2 in the directions for use. 
–  The table is only to be maintained with a damp cloth.
–  In the event of the occurrence of jarring sounds during operation, STOP using the table.

6. TECHNICAL DATA 

Frame, materials :

Steel, powder lacquered

Weights  ( frame ) :

20 kg

Width :

160 cm

Depth :

80 cm

Height :

68 - 120 cm

V  ( speed ) :

~ 25 mm / sec. – depends on load

Duty cycle :

10 % by 50 % of max. working load on frame or max. 2 min. continuously

Operation :

Micro switches

Voltage :

100 -240  VAC 

|

  50 / 60  Hz

Consumption :

80 Watt

Standby  consumption :

< 0,15 Watt

Max. working load ( on  frame ) :

70 kg

Above specifications may vary depending on local temperature, humidity and input voltage.

7. PARTS

See page 6.

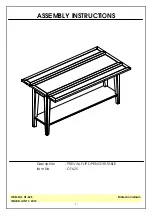
8. ASSEMBLY DIRECTIONS

See pages 7-9.

9. DECLARATION OF CONFORMITY

We hereby declare, under our sole responsibility that the following products : 
–   Sit and stand table product type 

711-177-1021


is in accordance with :

–   Directive 2006 / 42 / EF of The European Parliament and of the Council of 17 May 2006 on machinery  

and on changes of directive 95 / 16 / EF

With reference to the above please be aware that :
–  the sit and stand table is considered a machine and 
–   the sit and stand table may not be used until it has been assembled and installed according to the instructions.

Manufacturer : 
JYSK LINEN'N FURNITURE INC. 
Unit 213 – 19055 Airport Way
Pitt Meadows, BC, V3Y0G4 
CAN

PUSH button

UP / DOWN 

button

Содержание FORSSA 711-177-1021

Страница 1: ...348640 0 FORSSA Assembly instruction Instructions d Assemblage 711 177 1021 711 177 1021 EN Page 2 3 FR Page 4 5 60 min ...

Страница 2: ...ve humidity The table height is infinitely adjustable so that it can be set to the most ergonomically suitable working level They have not been designed for other purposes than those included in this manual e g they are not to be used in areas of high humidity or dampness nor for lifting people Any other use is at one s own risk Do not crawl lie or move around under the table frame and do not sit ...

Страница 3: ...n 80 Watt Standby consumption 0 15 Watt Max working load on frame 70kg Above specifications may vary depending on local temperature humidity and input voltage 7 PARTS See page 6 8 ASSEMBLY DIRECTIONS See pages 7 9 9 DECLARATION OF CONFORMITY We hereby declare under our sole responsibility that the following products Sit and stand table product type 711 177 1021 is in accordance with Directive 2006...

Страница 4: ...a hauteur de la table est réglable en continu de sorte qu elle peut être réglée au niveau de travail le plus ergonomique Ce produit n a pas été conçu à d autres fins que celles incluses dans ce manuel par ex ne doit pas être utilisé dans des zones à forte humidité ni pour élever des personnes Toute autre utilisation est à ses propres risques Ne pas ramper ne pas se déplacer ou s étendre sous le ca...

Страница 5: ...tt Consommation en veille 0 15 Watt Charge de travail Max sur cadre 70kg Les spécifications ci dessus peuvent varier en fonction de la température locale de l humidité et de la tension d entrée 7 PIÈCES Voir page 6 8 INSTRUCTIONS D ASSEMBLAGE Voir pages 7 9 9 DÉCLARATION DE CONFORMITÉ Nous déclarons par la présente sous notre seule responsabilité que les produits suivants Table Debout Assis type d...

Страница 6: ...e B x4 Driveshaft Arbre de Transmission D x1 Power cable Câble alimentation G x1 Controller Contrôleur J x1 3 5 16H screws K x2 Cable clips Clips de câble L x4 Transformer bracket Support transformateur H x1 Cable tie Attache de câble I x2 Transformer Transformateur F x1 Modesty panel Panneau Modestie M x1 Tabletop Surface N x1 Stiffening rail Renforts O x1 ...

Страница 7: ...s Tighten the grub screws with the allen key Do not over tighten grub screws Only very light pressure required D Monter l arbre de transmission télescopique prolonger les deux extrémités sur les ergots de l arbre de transmission Serrer les vis sans tête avec la clé Allen Ne pas trop serrer les vis Seulement une pression très légère requise C x4 ...

Страница 8: ... top is fixed to frame See component positions on page 9 4 Le cadre de bureau et le dessus doivent être parallèles avant de fixer la surface NE PAS démarrer le bureau avant que le haut ne soit fixé au cadre Voir les positions des composantes à la page 9 Voir les positions des composantes à la page 9 Pour assurer l opération correcte de montée et de descente du cadre de bureau il doit être équipé d...

Страница 9: ...ouge Rouge IMPORTANT Only plug leads red to red and black to black Brancher seulement rouge au rouge et au noir au noir Black Black Noir Noir COMPONENTS POSITION AND WIRING POSITIONS DES COMPOSANTES ET CÂBLAGE x4 G I 5 ...

Страница 10: ...10 ...

Страница 11: ...11 ...

Страница 12: ...12 ...

Отзывы: