


69
SEARCH
MENU
REV
SKIP
FWD
HDD
OPERATE
LOCK
VIDEO
AUDIO
OUT
EXECUTE
11.
7.
6.8.9.10.
REV
FWD
MENU
1.BLOCK
2.CAMERA 1 SCENE
MOTION DETECT SETTING
AREA SETTING
MANUAL
MANUAL
MANUAL
3.CAMERA 2 SCENE
AREA SETTING
MANUAL
4.CAMERA 3 SCENE
AREA SETTING
5.CAMERA 4 SCENE
AREA SETTING
1
1.BLOCK
2.CAMERA 1 SCENE
MOTION DETECT SETTING
AREA SETTING
3.CAMERA 2 SCENE
AREA SETTING
MANUAL
MANUAL
MANUAL
MANUAL
4.CAMERA 3 SCENE
AREA SETTING
5.CAMERA 4 SCENE
AREA SETTING
1
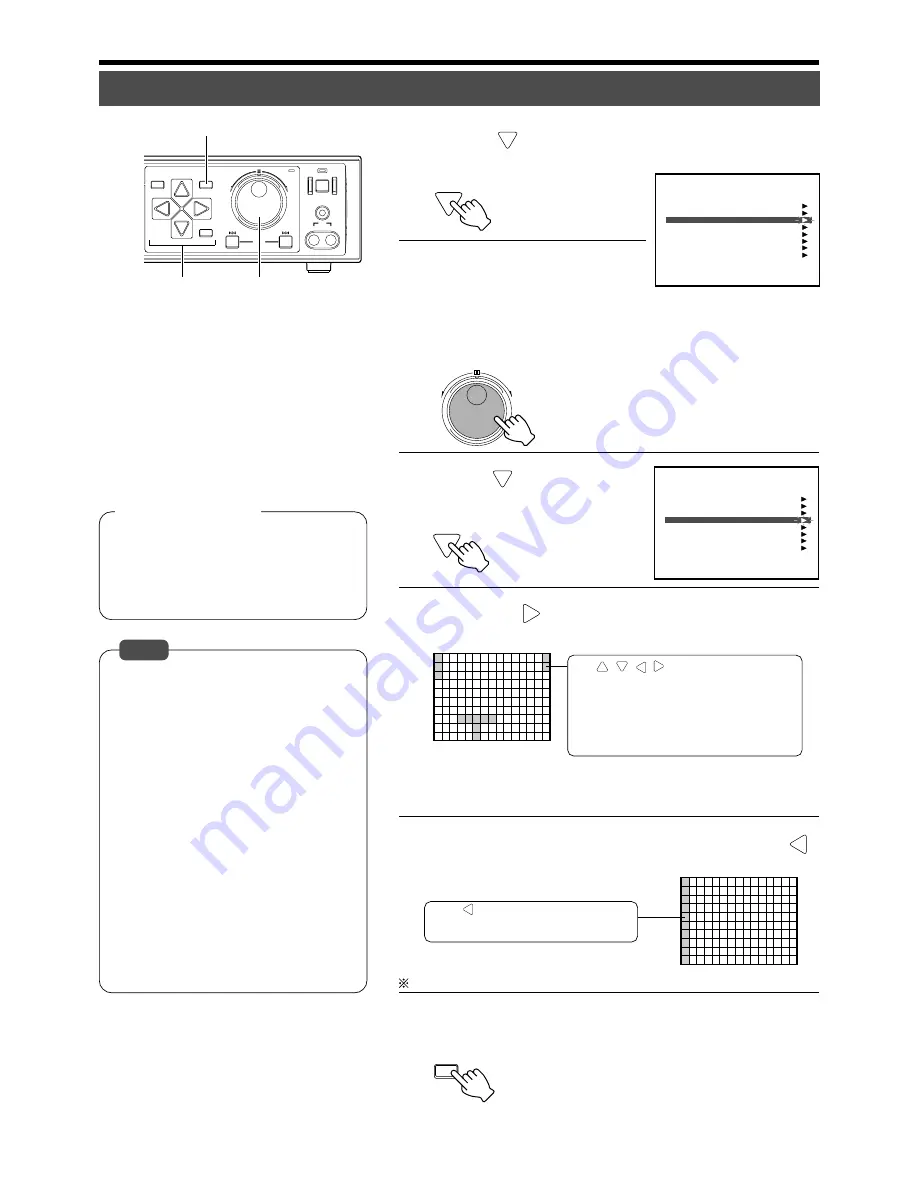
6.
Press [
] to move the cursor to “SCENE”
• Move the cursor to the camera for which
motion is to be detected.
7.
Turn the jog dial to select a
value
• Select a value from the
Settings
column under “SCENE” on page 28.
• When “MANUAL” is selected, “DETECTING SENSITIVITY”, “TERMI-
NATION SENSITIVITY” and “OBJECT SIZE LEVEL” can be further
specified under “DETAIL SETTING”.
8.
Press [
] to move the
cursor to “AREA SET-
TING”
9.
Press the [
] button
• Select the area for which motion is to be detected.
• Press and hold [SEARCH] when the “AREA SETTING” screen is dis-
played to switch to Motion Detect Test mode. (
☞
Page 70 ‘Check mode’)
• To exit the Test mode, press [SEARCH] again.
10.
Select the areas in the leftmost column and press [
]
to return to the “MOTION DETECT SETTING” Menu screen
Repeat Steps
3
~
10
to specify settings for other cameras.
11.
Press [MENU] to end setting
• The display returns to the normal screen.
• To alter the “REC MODE” Menu settings be-
fore setting at the “AREA SETTING” screen,
close the setting screen and open the
“AREA SETTING” screen again after alter-
ation is completed. There are cases where
live images are not displayed at the back-
ground of the “AREA SETTING” screen.
• The monitor screen is divided into 150 ar-
eas for detecting motion. To set all 150 ar-
eas, press and hold [EXECUTE].
• To clear all 150 areas, press and hold [CAN-
CEL].
• Record mode of Motion Detect (picture
quality, frame rate, etc.) is identical to the
Alarm Mode settings.
☞
Page 66 ‘Activation of Recording Via Ex-
ternal Alarm Signals’
• After camera setting is completed, capture
an actual image to double-check if alarm is
properly triggered via Motion Detect as well
as its detection sensitivity.
Use [
/
/
/
] to select the areas and press
[EXECUTE]. Areas that are selected will be displayed in
a different color on the monitor screen. To undo the
selection, press [CANCEL].
• The position can be moved diagonally by pressing
buttons simultaneously.
• The position can be moved continuously by pressing
and holding the buttons.
Press [
] to return to the “MOTION DETECT
SETTING” screen when areas selected are in the
leftmost column.
Notes
• To determine the value for “DETECTING
SENSITIVITY”, “TERMINATION SENSITIV-
ITY” and “OBJECT SIZE LEVEL”, when se-
lecting the “SCENE” value other than
“STANDARD”, please refer to the detailed
setting displayed. (
☞
Page 70 ‘Setting’)
<
How to set manually
>