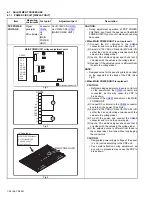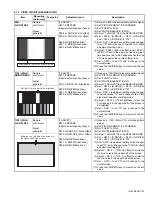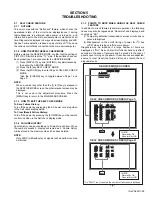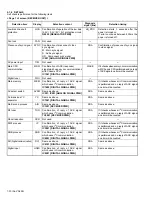
1-16 (No.YA229)
3.2
DISASSEMBLY PROCEDURE (RECEIVER UNIT)
CAUTION AT DISASSEMBLY:
•
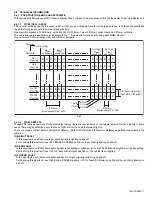
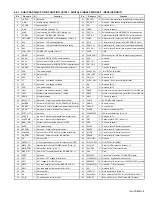
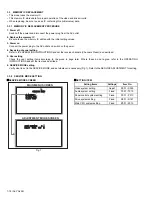
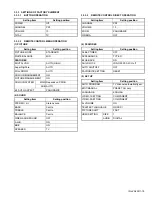
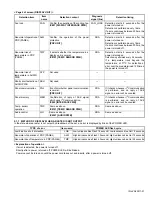
Be sure to perform the SYSTEM SETTING on the page 1-6, at the end of the procedure.
• Make sure that the power cord is disconnected from the outlet.
• Pay special attention not to break or damage the parts.
• When removing each board, remove the connectors as required. Taking notes of the connecting points (connector numbers)
makes service procedure manageable.
• Make sure that there is no bent or stain on the connectors before inserting, and firmly insert the connectors.
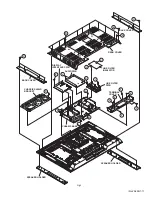
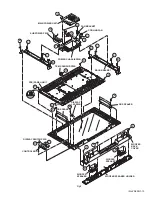
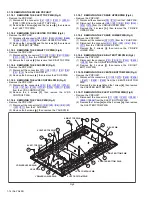
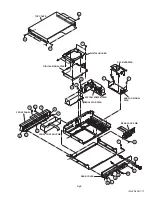
3.2.1 REMOVING THE TOP COVER
(1) Remove the 9 screws
[A]
then remove the TOP COVER.
3.2.2 REMOVING THE FRONT PANEL
• Remove the TOP COVER.
(1) Remove the 3 screws
[B]
and the 1 screw
[C]
.
(2) Remove the 3 claws
[D]
and the 2 claws
[E]
.
(3) Remove the FRONT PANEL toward you.
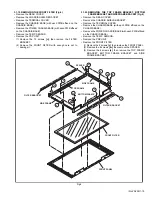
3.2.3 REMOVING THE FRONT CONTROL PWB
• Remove the TOP COVER.
• Remove the FRONT PANEL.
(1) Remove the
[CN00F]
connector on the ANALOG SIGNAL
PWB.
(2) Remove the 4 screws
[F]
, then remove the FRONT
CONTROL PWB.
3.2.4 REMOVING THE REAR COVER
• Remove the TOP COVER.
(1) Remove the 10 screws
[G]
, the 2 screws
[K]
, the 2 screws
[L]
, the 2 screws
[M]
and 1 screw
[N]
.
(2) Remove the REAR COVER toward you.
3.2.5 REMOVING THE RECEIVER PWB
• Remove the TOP COVER.
• Remove the REAR COVER.
(1) Remove the
[CN00A]
/
[CN00T]
connectors on the
RECEIVER PWB.
(2) Remove the RECEIVER PWB.
3.2.6 REMOVING THE REAR JACK PWB
• Remove the TOP COVER.
• Remove the REAR COVER.
(1) Remove the
[CNJ0J1]
/
[CNJ0J2]
connectors on the
ANLOG SIGNAL PWB.
(2) Remove the 2 screws
[S]
, then remove the REAR JACK
PWB.
3.2.7 REMOVING THE DIGITAL SIGNAL PWB
• Remove the TOP COVER.
• Remove the REAR COVER.
(1) Remove the
[CN001]
/
[CN002]
connectors on the ANLOG
SIGNAL PWB.
(2) Remove the
[CN003]
connector on the REGULATOR
PWB.
(3) Remove the 4 screws
[T]
, then remove the TUNER
HOLDER.
(4) Remove the 4 screws
[U]
, then remove the DIGITAL
SIGNAL PWB.
CAUTION:
Make sure to perform the "SYSTEM SETTING" on page 1-6,
when DIGITAL SIGNAL PWB is replaced.
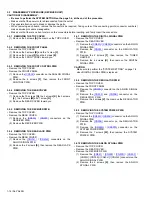
3.2.8 REMOVING THE REGULATOR PWB
• Remove the TOP COVER.
• Remove the FRONT PANEL.
(1) Remove the
[CN00D]
connector on the ANLOG SIGNAL
PWB.
(2) Remove the
[CN003]
and
[CN00B]
connector on the
REGULATOR PWB.
(3) Remove the 4 screws
[V]
, then remove the REGULATOR
PWB.
3.2.9 REMOVING THE SYSTEM POWER PWB
• Remove the TOP COVER.
(1) Remove the
[CN00G]
/
[CN00K]
connector on the ANLOG
SIGNAL PWB.
(2) Remove the
[CN00B]
connector on the REGULATOR
PWB.
(3) Remove the
[CN00Q]
/
[CN0PW]
connector on the
SYSTEM POWER PWB.
(4) Remove the 7 screws
[W]
, then remove the SYSTEM
POWER PWB.
3.2.10 REMOVING THE ANLOG SYGNAL PWB
• Remove the TOP COVER.
• Remove the REAR COVER.
• Remove the RECEIVER PWB.
(1) Remove the
[CN001]
/
[CN002
] /
[CN00D]
/
[CN00F]
/
[CN00G] / [CN00K] / [CNJ0J1] / [CNJ0J2] connector on the
ANLOG SIGNAL PWB.
(2) Remove the 2 screws
[X]
, then remove the ANLOG
SYGNAL PWB.
Содержание PD-Z50DX4
Страница 33: ...PDP COLOUR TELEVISION INSTRUCTIONS PD Z50DX4 ENGLISH LCT1781 001A ...
Страница 34: ......
Страница 90: ...56 ENGLISH ...
Страница 91: ......
Страница 92: ... 2004 Victor Company of Japan Limited 1104MKH CR VP ...
Страница 98: ...1 6 No YA229B PACKING Page 3 34 FRONT FRONT FRONT FRONT 2 7 8 7 7 7 7 7 7 5 2 7 6 8 3 4 1 ...
Страница 105: ...2 4 No YA229 ...


