


7
A
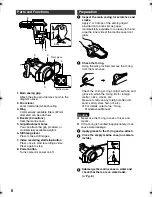
Setup the camera.
z
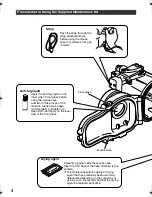
For models equipped with light, turn off the
light.
z
Open the lens cover.
z
Set to the shooting mode (video/still
image).
¹
Even when the shooting mode is set to
“video”, still images can be captured by
pressing the still image lever during video
recording.
z
It is recommended to set to the auto
shooting mode.
z
Insert the battery and micro SD card
beforehand if needed.
z
To turn off the camera, press and hold the
power button for more than 2 seconds.
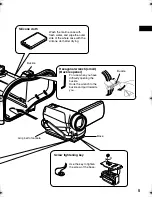
B
Insert the drying agent at the back of the
base.
C
Attach the base to the bottom of the
camera.
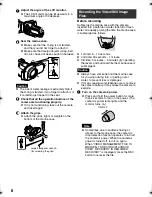
z
Align the tripod screw hole at the bottom of
your camera with the screw of the base,
and tighten the screw.
z
The camera turns on automatically when the
LCD monitor is opened. To turn off the camera,
press and hold the power button for more than
2 seconds.
D
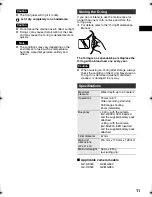
Fold the grip belt.
z
Make sure the grip belt is not caught
between the marine case when sealing.
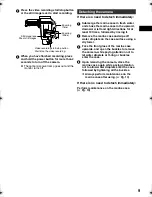
E
Open the marine case.
z
If it is difficult to open buckles, use the
small hexagonal wrench (buckle opener).
F
Insert the camera into the marine case.
z
Align the base attachment groove with the
base to insert.
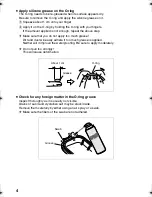
Attaching the Marine Case to the
Camera
Caution
1
2
Pass underneath
Catch
Drying agent
2
1
Tighten the screw
Open up the LCD monitor
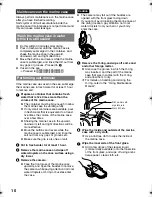
1. Unlock the grip belt, pull the belt out and
lock again.
2. Fold the grip belt and pass the front end
through the inner side of the belt.
3. Pull the end that has been passed through
the inner side of the belt and adjust the
length. (If the end is pulled out too much, it
may be recorded into the image or get
caught in the O-ring when sealing the
marine case.)
Lock
Small hexagonal wrench
(Buckle opener)
Base attachment groove
Base
Marine case internal base
WR-MG250_EN.book Page 7 Thursday, June 4, 2009 11:09 AM


