background image

53

EN

T

ROUBLESHOOTING

INTRODUCTION

PREPARATION

WATCHING TV

OPTIONAL SETTING

OPERATING BLU-RAY

BLU-RAY SETTING

TROUBLESHOOTING

INFORMATION

English

Question

Answer

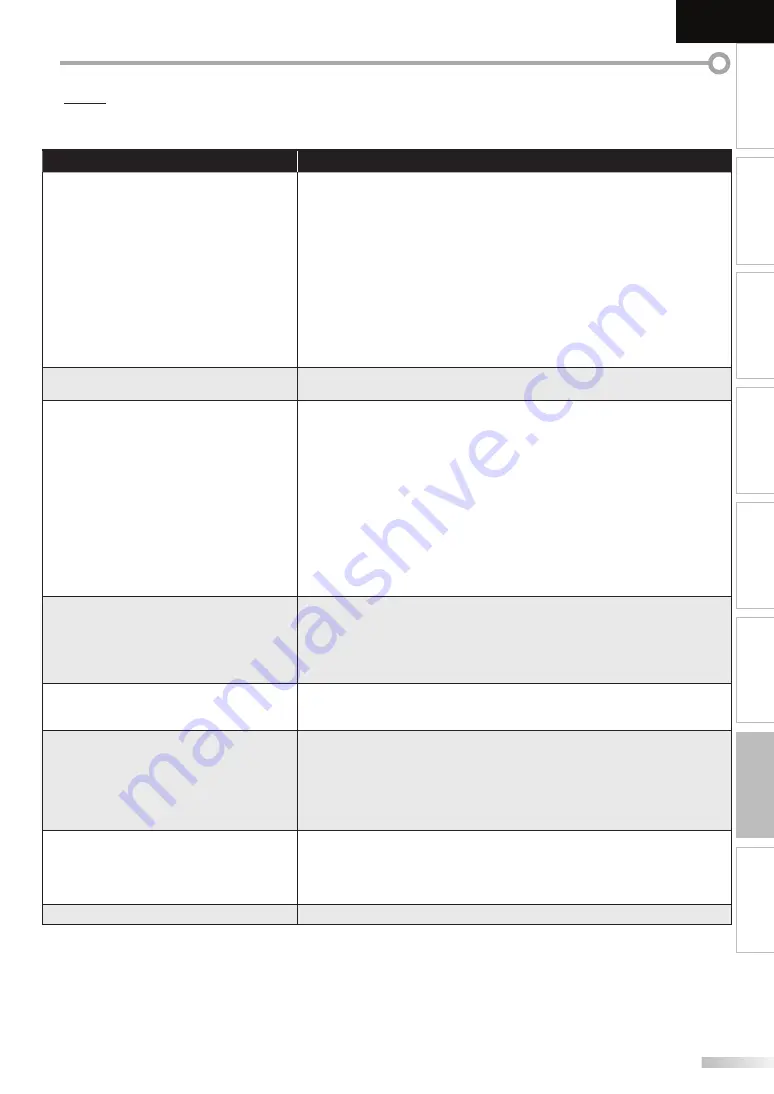
My remote control does not work.
What should I do?

•  Check the antenna or cable connection to the main unit.
•  Check the batteries of the remote control.
•  Check if there is an obstacle between the infrared sensor window and the 

remote control.

•  Test the signal output. If OK, then possible infrared sensor trouble.

Refer to “IR Signal Check” on page 56.

•  Aim the remote control directly at the infrared sensor window on the 

front of the unit.

•  Reduce the distance to the unit.
•  Re-insert the batteries with their polarities (+/– signs) as indicated.
•  When there is an infrared-equipped device such as PC near this unit, it 

may interrupt the remote control signal of this unit.

•  Move the infrared-equipped device away from this unit, change the angle 

of the infrared sensor or turn off the infrared communication function.

How come the Initial setup appears every 
time I turn on this unit?

•  Connect the RF coaxial cable to the unit directly and run the initial setup.
•  Make sure to complete the channel scan before turning off the unit.

Why I cannot watch some TV programs.

•  Make sure autoscan has been completed.

Refer to “Autoscan” on page 20.

•  Autoscan must be completed when you set up the unit for the first 

time or move it to a location where previously unavailable channels are 
broadcast.

•  The selected channel may not be broadcasting.
•  When autoscan is interrupted and not completed, 

some channels will not be received. Make sure to complete.
Refer to “Autoscan” on page 20.

•  The selected channel cannot be viewed by the “Child Lock” setting.

Refer to ‘‘Child Lock” on page 28.

•  The unit requires some kind of antenna input. An indoor antenna 

(VHF /UHF), an external antenna (VHF /UHF) or an RF coaxial cable from 
your wall cable/satellite box needs to be plugged  into the unit.

How come there is no image from the 
connected external devices?

•  Check if the right input mode is selected by pressing 

[INPUT SELECT]

 or 

using 

[CHANNEL - / + ]

. Refer to “Switching Each Input Mode” on page 17.

•  Check the antenna or cable connection to the unit.
•  When using the Composite Video Connection check that the Green 

(Y), Blue (Pb/Cb) and Red (Pr/Cr) connectors are connected to their 
corresponding colored jacks on the unit.

Whenever I entered channel number,
it changes automatically.

•  Many digital channels have alternate channel numbers. The unit changes 

the numbers automatically to the ones signifying the broadcasting 
stations. These are the numbers used for analog broadcasts.

My disc cannot be played back.
Is there any way I can play my disc?

•  Clean the disc.
•  Ensure the disc is correctly inserted.
•  Check if the disc is defective by trying another disc.
•  Cancel the parental lock or change the control level.
•  Insert a correct disc that plays back on this unit.
•  Handle a disc with special care so that it does not have fingerprints, 

scratches or dusts on its surface.

Why are captions not displayed entirely?
Or, captions are delayed behind the 
dialogue.

•  Captions that are delayed a few seconds behind the actual dialogue are 

common for live broadcasts. Most captioning production companies can 
display a dialogue to maximum of 220 words per minute. If a dialogue 
exceeds that rate, selective editing is used to insure that the captions 
remain up-to date with the current TV screen dialogue.

How can I set the clock ?

•  There is no clock function on this unit.


FAQ

Содержание LT-42B300

Страница 1: ...or future reference Keep the carton and original packaging for future use Serial Number Model No As an ENERGY STAR partner JVC has determined that this product or product model meets the ENERGY STAR guidelines for energy efficiency This JVC Television is factory set to Home mode which is optimized for normal home viewing This setting reduces power consumption to help the environment and to comply ...

Страница 2: ...e exclamation point within an equilateral triangle is intended to alert the user to the presence of important operating and maintenance servicing instructions in the literature accompanying the apparatus The lightning flash with arrowhead symbol within an equilateral triangle is intended to alert the user to the presence of uninsulated dangerous voltage within the apparatus s enclosure that may be...

Страница 3: ... required when carrying this unit Make sure to hold the upper and bottom frames of the unit firmly as illustrated WARNING To prevent injury this apparatus must be securely attached to the floor wall in accordance with the instructions Trademark Information HDMI the HDMI logo and High Definition Multimedia Interface are trademarks or registered trademarks of HDMI Licensing LLC Manufactured under li...

Страница 4: ... function heading operation is applicable to both If none of symbol appears under the function heading operation is applicable to all AA AA If you need to replace these accessories please refer to the model name and parts name with the illustrations and call our toll free customer support line found on the cover of this manual 1 Spread a thick and soft cloth over a table as shown below Place the m...

Страница 5: ...flash memory can be played back on this unit Digital audio Output Analog audio Output Features TV BD DVD Dolby Digital Sound Enjoy Dolby Digital multi channel surround sound when you connect the unit to your Dolby Digital decoder DTS You can enjoy movie dynamic and realistic sound like movie theater when you connect the unit to your DTS decoder Still Fast Slow Step Playback Various playback modes ...

Страница 6: ...ild Lock 28 PC Settings 32 Energy Saving Mode 33 Location 33 Current Software Info 34 JPEG MP3 Playback 34 BLU RAY Functions OPERATING BLU RAY Playable Media 36 Unplayable Media 36 Playback 37 Using the Title Menu Disc Menu Pop up Menu 37 Resume Playback 38 Fast Forward Fast Reverse 38 Slow Forward 38 Paused Step by step Playback 38 Repeat Playback 39 Rapid Playback 39 Random Playback 39 Programme...

Страница 7: ...he supplied AC power cord for a standard AC outlet 17 Cable management p 14 You can bundle the cables when you attach the supplied cable management tie here 18 Digital audio Output jack p 13 Coaxial digital cable connection for a decoder or an audio receiver 19 Component video and Audio Input jack p 10 p 12 RCA component video cable and RCA audio cable connection from an external device 20 S Video...

Страница 8: ...and of setting when the main menu is displayed 7 s B K L cursor p 15 Press to move left right up down through the items 8 INFO p 18 p 43 Digital mode DTV Press to display the channel information signal type and TV setting Analog mode TV Press to display the channel number signal type and TV setting External input mode Press to display the external input mode signal type and TV setting BLU RAY mode...

Страница 9: ...y menus for program and random playback CD 16 POP MENU p 37 Press to display the pop up menu disc menu BD DVD 17 PIP p 46 Press to turn the picture in picture feature on or off only applicable to BD video which supports the PIP function 18 POWER p 15 Press to turn the unit on and off 19 AUDIO p 17 p 45 Digital mode DTV Press to select the audio language Analog mode TV Press to select the audio mod...

Страница 10: ...eiver or Satellite Box Use an HDMI or an RCA component video cable to connect the HDMI or the Component video Input jack of the unit to the HDMI or the component video output jack of the cable receiver satellite box If you connect to the unit s Component video Input jack connect RCA audio cables to the Audio L R jacks below the Component video connector COMPONENT VIDEO OUT Pr Cr Pb Cb Y AUDIO OUT ...

Страница 11: ...itching the TV s external input or channel When switching the TV s menu language Information regarding behaviour of the device when status is received refer to the external device s manual HDMI OUT C APTER 5 R PEAT A B I LE 5 HDMI DVI Connection Use an HDMI DVI conversion cable to connect the unit to external video devices equipped with DVI output jack S EREO PCM DVI OUT AUDIO OUT R L HDMI cable B...

Страница 12: ...s below the Video connector When the audio jack of the video device is monaural connect an RCA audio cable to the Audio L Input jack CH PTER 15 RE EAT A B T T E 5 AUDIO OUT R L VIDEO OUT S VIDEO OUT STE EO TAND BY AUDIO OUT R L VIDEO OUT VIDEO 2 AUDIO VIDEO S VIDEO S VIDEO OUT Note If you connect to the S Video Input jack and the Video Input jack at the same time the S Video connection will have p...

Страница 13: ...and it requires stereo mini plug RCA conversion cable as well If you connect this unit to your PC you can use this unit as a PC monitor DVI OUT The following signals can be displayed Format Resolution Refresh rate Format Resolution Refresh rate VGA 640 x 480 60Hz WXGA 1 280 x 768 60Hz SVGA 800 x 600 60Hz 1 360 x 768 60Hz XGA 1 024 x 768 60Hz FHD 1 920 x 1 080 60Hz Other formats or non standard sig...

Страница 14: ... behind in the USB terminal and you turn off the unit the USB main menu will appear automatically when you turn on the unit again Cable Management Attach the supplied cable management tie first into the holes on the lower side of the rear of this unit shown as below Keep the cables through this holder to avoid tangle them Supplied accessories used in this connection are as follows cable management...

Страница 15: ...uirement of the ENERGY STAR qualification Select Home the unit is set to maximize the energy efficiency for home setting and it can be adjusted through a choice of picture and sound quality according to your preference When the initial setup is completed the lowest memorized channel with the confirmation message of the location setting will be displayed on the TV screen Note If you connect the cab...

Страница 16: ...en multiple channels broadcast by a single network Note No Signal will appear on the TV screen after the subchannel broadcast is over Audio only program message will appear on the TV screen when you receive only sound signal Volume Adjustment This section describes how to adjust the volume The mute function which turns the sound off and on is also described Use VOLUME to adjust the audio volume Vo...

Страница 17: ... modes Switching Audio Mode This section describes how to switch the audio in the analog mode and how to switch the audio language in the digital mode TV Press AUDIO to display the currently selected audio mode While receiving an MTS broadcast press repeatedly to cycle through the available audio channel 11 SAP STEREO When all audio are available SAP STEREO SAP MONO SAP STEREO When stereo and mona...

Страница 18: ...of Memories KABC KABC A quarter century ago which may now qualify as the good old days of newspapering run of paper sales accounted for 80 percent of the industry s advertising revenues Department stores and supermarket were 1 2 3 4 5 6 7 8 9 10 1 program title 2 program guide The program guide added to broadcasting information is displayed to a maximum of 4 lines 3 broadcast station 4 channel num...

Страница 19: ... 3 picture at a 16 9 size the picture is stretched horizontally and vertically to fill the screen This crops out the top and bottom of the picture Wide Display the picture with its center at the original size and the edges stretched horizontally to fill the screen For 16 9 video signal Full Display a 16 9 picture at its original size Zoom Display a 16 9 picture at its maximum size without changing...

Страница 20: ...to JPEG MP3 Playback on page 34 Note USB will be in gray if the USB flash memory is not inserted to this unit Autoscan If you switch wires e g between antenna and CATV or if you move the unit to a different area after the initial setting or if you restore the DTV channel you deleted you will need to perform autoscan Beforeyoubegin Make sure the unit is connected to antenna or cable 1 Press SETUP t...

Страница 21: ...hannels are highlighted When you remove a main channel its subchannels are removed as well Note The channel with the DTV indicated on the display is ATSC Otherwise the channel is NTSC 5 Press SETUP to exit Manual Register This function lets you add the channels that were not added by the autoscan due to the receptible condition at the initial setting 1 Press SETUP to display the main menu 2 Use Cu...

Страница 22: ...rm the antenna condition t Antenna Back Ind cator is available for digital broadcasting on y Video Ch Change CH PICTURE SOUND CHANNEL DETA L LANGUAGE BLU RAY USB 5 Press SETUP to exit Language Selection You can choose English Spanish or French as your on screen language 1 Press SETUP to display the main menu 2 Use Cursor K L to select LANGUAGE then press ENTER or PICTURE SOUND CHANNEL DETAIL LANGU...

Страница 23: ...ture Picture Mode Brightness Contrast Color Tint Sharpness Color Temperature Personal Standard Sports Movie Game PICTURE SOUND CHANNEL DETA L LANGUAGE BLU RAY USB Brightness Contrast Color Tint Sharpness Color Temperature Use Cursor K L to select the desired setting then use Cursor s B to adjust or Cursor s Cursor B Brightness Adjust Brightness 30 Move Enter ENT R to decrease brightness to increas...

Страница 24: ...n Emphasized effect Off Natural effect Auto Volume Leveling This function keeps a constant loudness differential between the TV commercials and the programs Use Cursor K L to select the desired option then press ENTER or Off On A l m Auto Volume Leveling Auto Volume Level ng reduces volume differences between channels and programs providing a consistent audio level PICTURE SOUND CHANNEL DETAIL LAN...

Страница 25: ... then press ENTER or C C n Closed Caption Off Off Caption Service Digital Caption Service Caption Style PICTURE SOUND CHANNEL DETAIL LANGUAGE BLU RAY USB 5 Use Cursor K L to select the desired closed caption then press ENTER or Closed Caption Closed Caption Digital Caption Service Caption Style Caption Service Off CC1 CC2 CC3 CC4 Text1 Text2 Text3 Text4 PICTURE SOUND CHANNEL DETAIL LANGUAGE BLU RA...

Страница 26: ...style such as font color or size etc 4 Use Cursor K L to select Caption Style then press ENTER or C C n Closed Caption Off Off Caption Service Digital Caption Service Caption Style PICTURE SOUND CHANNEL DETAIL LANGUAGE BLU RAY USB 5 Use Cursor K L to select User Setting then press ENTER or C i n Caption Style Off Middle White Solid Black Black None Solid User Setting Font Style Font Size Font Colo...

Страница 27: ...y pt yle Caption Style PICTURE SOUND CHANNEL DETA L LANGUAGE BLU RAY USB Edge Color Edge color of the displayed caption can be switched as below White Black Red Green Blue Yellow Magenta Cyan Closed Caption User Setting Font Style Font Size Font Color Font Opacity Background Color Background Opac ty Edge Type C i n Caption Style Edge Color PICTURE SOUND CHANNEL DETAIL LANGUAGE BLU RAY USB Edge Typ...

Страница 28: ... Downloadable Rating Clear Downloadable Rating New Password ld Child Lock A D C B PICTURE SOUND CHANNEL DETA L LANGUAGE BLU RAY USB A A Channel Lock B B MPAA Rating C C TV Rating D D New Password page 29 page 29 page 30 page 31 Note When you select a rating and set it to Block the higher ratings will be blocked automatically The lower ratings will be available for viewing When you set the highest ...

Страница 29: ...TA L LANGUAGE BLU RAY USB 7 Press SETUP to exit B MPAA Rating B MPAA Rating MPAA Rating is the rating system created by MPAA Motion Picture Association of America 5 Use Cursor K L to select MPAA Rating then press ENTER or Cannel Lock MPAA Rating TV Rating Canad an English Rating Canad an French Rating Downloadable Rating Clear Downloadable Rating New Password Child Lock Child Lock PICTURE SOUND CH...

Страница 30: ...sub ratings follow the step below Use Cursor K L s B to select the desired rating then press ENTER repeatedly to switch between View and Block or TV MA TV 14 TV PG TV G TV Y7 TV Y FV V S L D TV Rating Select View Block ENT R Back BACK PICTURE SOUND CHANNEL DETA L LANGUAGE BLU RAY USB Rating Category TV MA Mature audience only higher TV 14 Unsuitable for children under 14 TV PG Parental guidance su...

Страница 31: ...ssword h ld Child Lock PICTURE SOUND CHANNEL DETA L LANGUAGE BLU RAY USB 6 Press the Number buttons to enter the new 4 digit PIN Code Enter PIN Code again in Confirm password entry field d New Password Confirm password Enter password PIN Code Back BACK PICTURE SOUND CHANNEL DETA L LANGUAGE BLU RAY USB 7 Press SETUP to exit Note Make sure new PIN Code and confirm PIN Code must be exactly the same I...

Страница 32: ...orizontal Position Vertical Position 0 0 PICTURE SOUND CHANNEL DETA L LANGUAGE BLU RAY USB 5 Adjust the setting Position Reset Use Cursor K L to select Reset then press ENTER or Cancel Reset P R Position Reset Resets the display position of the picture PICTURE SOUND CHANNEL DETAIL LANGUAGE BLU RAY USB The horizontal vertical position of the PC screen are automatically adjusted Horizontal Position ...

Страница 33: ...D CHANNEL DETA L LANGUAGE BLU RAY USB On Select if you want to reduce the power consumption Off The power consumption may possibly exceed the limited requirement of the ENERGY STAR qualification 5 Press SETUP to exit Location When you select Retail the power consumption may possibly exceed the limited requirement of the ENERGY STAR qualification 1 Press SETUP to display the main menu 2 Use Cursor ...

Страница 34: ...usic v a your USB dev ce Your USB S Setup PICTURE SOUND CHANNEL DETAIL LANGUAGE BLU RAY USB The main menu appears automatically 2 Use Cursor K L to select USB and press ENTER The highlight will move to the name of your USB flash memory then press ENTER again or This menu al ows you to enjoy your photos and music v a your USB dev ce Your USB USB USB PICTURE SOUND CHANNEL DETAIL LANGUAGE BLU RAY USB...

Страница 35: ... 2 will turn the picture clockwise by 90 degrees Zoom Press 3 then use Cursor K L to select the zoom factor 1x 2x or 4x Press ENTER to set the zoom factor P cture Image1 jpg By T ansitions Mo e detail S ide ime Stop show 1 2 3 4 Music Use Cursor K L to select the desired file and then press ENTER or Cursor B Your USB Press ENTER key to play pause Music Music1 mp3 Music Title Music1 Artist None Alb...

Страница 36: ...on the high density super audio CD layer cannot be delivered Do not use a single CD adaptor which makes 3 inches 8 cm to 5 inches 12 cm disc You can play back discs with the marks listed in Playable Media If you use non standardized discs this unit may not play them back or the sound and video quality will be compromised BLU RAY Functions Region Codes This unit has been designed to play back BD vi...

Страница 37: ...er This is not a malfunction When you cannot remove the disc you may try either following operations Press and hold EJECTA on the unit for more than 5 seconds Unplug the AC power cord and plug it in again then press EJECTA It will take about 10 seconds to eject the disc while that the unit will not respond to any key commands Using the Title Menu Disc Menu Pop up Menu BD DVD Many of BD video and D...

Страница 38: ...for the fast reverse it is 1 2x 2 10x 3 30x 4 70x and 5 200x For DVD the approximate speed for the fast forward or reverse playback is 1 2x 2 8x 3 20x 4 50x and 5 100x For audio CD the approximate speed is 1 2x 2 8x and 3 30x For audio CD fast forward fast reverse search between different tracks are not available during program and random playback Slow Forward BD DVD 1 During playback press PAUSE ...

Страница 39: ...le keeping the sound output This function is available only on discs recorded in the Dolby Digital format 1 During playback press MODE repeatedly until appears 2 Press ENTER or Cursor s B to switch 1 3x or Off or or Off Plays back in normal speed Plays back approximately at 1 3 times of normal playback 3 Press PLAY B to return to normal playback Note Virtual surround does not work during this func...

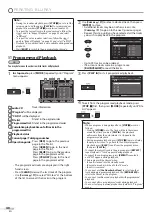
Страница 40: ...L to select a desired track then press ENTER to store Additional tracks may be on other screens Use Cursor K L to go on to the next previous pages Repeat this step until you have selected all the tracks you wish to play back in the program or 0 26 24 CD_DA 0 36 1 14 0 45 0 50 0 53 0 20 0 54 8 9 10 11 12 13 14 1 14 0 50 1 14 0 50 0 53 0 54 0 36 2 4 9 11 12 14 8 16 TR Page Down Page Prev Page Next P...

Страница 41: ...t be performed when the unit has kept the resume information The total number of chapters titles tracks in your disc with less than 10 chapters titles tracks press the chapter title track number directly To play a double digit chapter title track press the chapter title track number Track search is not available for programmed or random playback Time Search Time Search You can select the desired t...

Страница 42: ...ds when there is no input You can mark up to 9 points To clear a marker select the marker to be cleared and then press CLEAR Ejecting the disc or turning off the power will erase all markers Selecting AC at step 3 in the section To set a marker will also erase all markers For BD marker search cannot be performed when the unit has kept resume information or the unit is in the stop mode Direct Searc...

Страница 43: ...ears only when the repeat setting is active C chapter repeat T title repeat A B A B repeat appears only when multi angle is available on the DVD current playback status current repeat setting appears only when the repeat setting is active T track repeat A all repeat A B A B repeat current title number current chapter number total chapters current chapter number total chapters elapsed time of the c...

Страница 44: ...e language setting If you choose any other languages will be displayed instead Refer to page 52 Ejecting the disc will cancel your subtitle setting If 4 digit language code appears in the subtitle menu refer to Language Code List on page 52 BD Audio Mode BD Audio Mode There are 2 options for the BD Audio Mode setting either by setting the output to the secondary and interactive audio accompanied b...

Страница 45: ...econdary video is not displayed or when BD Audio Mode is set to HD Audio Output For some BD secondary audio will be output even when secondary video is off The sound mode cannot be changed during playback of discs not recorded in multiple audio Some discs allow changing the audio language setting on the disc menu Operation varies depending on the discs Refer to the manual accompanying the disc AUD...

Страница 46: ...udio will not be output when the secondary audio is set to Off or when BD Audio Mode is set to HD Audio Output Refer to Audio Soundtrack on page 45 and BD Audio Mode on page 44 Virtual Surround Virtual Surround You can enjoy virtual surround on your 2 channel stereo system 1 During playback press MODE repeatedly until appears 2 Use Cursor K L to select the sound level or Off No surround effect 1 N...

Страница 47: ...lus Dolby TrueHD DTS or DTS HD the corresponding core stream Dolby Digital or DTS are output LPCM 2ch LPCM will be output from Digital Audio Output jack Custom Blu ray Language Setting You can change the desired language when playing back the disc 3 Follow steps 1 2 above then use Cursor K L to select then press ENTER or Custom Language Video Audio Parental Others 4 Use Cursor K L to select then p...

Страница 48: ...rsor K L to select then press ENTER or Custom Language Video Audio Parental Others 4 Use Cursor K L to select then press ENTER or Video Progressive Mode Auto Still Mode Auto 5 Use Cursor K L to select the desired item then press ENTER or Video Progressive Mode Auto Still Mode Auto Progressive Mode Default Auto Sets the optimum progressive output for the images in a material stored Video Progressiv...

Страница 49: ...utput Digital Out Bitstream Down Sampling On DRC Auto Bitstream When playing back discs recorded in Dolby Digital Dolby Digital Plus Dolby TrueHD DTS or DTS HD the corresponding core stream Dolby Digital or DTS are output LPCM 2ch LPCM signal will be output from Digital Audio Out jack Down Sampling Default On This function is available only on digital outputting of a disc recorded in 96kHz Audio B...

Страница 50: ...forget the password enter 4 7 3 7 The password will be cleared and BD Rating Level DVD Rating Level will be set to 0 All accordingly 6 Use Cursor K L to select the desired item then press ENTER or Parental BD Rating Level All DVD Rating Level All Password Change BD Rating Level All To release the limitation Age Setting To set the age limitation After selecting Age Setting use the Number buttons to...

Страница 51: ...rade 5 Use Cursor K L to select the desired item then press ENTER Angle Icon Default On You can set whether to display the angle icon or not during BD DVD playback Others Angle Icon On Auto Power Off On Software Upgrade On During BD DVD playback the angle icon will appear on the TV screen when the BD DVD has the scene with various angles Off The angle icon will be unshown even if the BD DVD has th...

Страница 52: ...4947 Chinese CHI 7254 Corsican 4961 Croatian 5464 Czech CZE 4965 Danish DAN 5047 Dutch DUT 6058 English ENG 5160 Esperanto 5161 Estonian 5166 F H Faroese 5261 Fiji 5256 Finnish FIN 5255 French FRE 5264 Frisian 5271 Galician 5358 Georgian 5747 German GER 5051 Greek GRE 5158 Greenlandic 5758 Guarani 5360 Gujarati 5367 Hausa 5447 Hebrew 5569 Hindi 5455 Hungarian HUN 5467 I K Icelandic ICE 5565 Indone...

Страница 53: ...d channel cannot be viewed by the Child Lock setting Refer to Child Lock on page 28 The unit requires some kind of antenna input An indoor antenna VHF UHF an external antenna VHF UHF or an RF coaxial cable from your wall cable satellite box needs to be plugged into the unit How come there is no image from the connected external devices Check if the right input mode is selected by pressing INPUT SE...

Страница 54: ...d input mode is connected to the working input jack Check if your computer is NOT in sleep mode when the input mode of this unit is in PC mode Tap any key on the keyboard to wake up your computer Make sure that the sound is not muted Press MUTE so that the volume bar and current volume level will appear on the TV screen Make sure that the volume is NOT set to 0 or Mute If so use VOLUME to adjust t...

Страница 55: ...r black white picture with BD DVD Make sure the disc is compatible with the unit Picture freezes momentarily during playback Check the disc for finger prints scratches and clean with a soft cloth wiping from center to edge Disc cannot be played Clean the disc Ensure the disc is correctly inserted Check if the disc is defective by trying another disc Cancel the parental lock or change the control l...

Страница 56: ...n one region or all regions SAP Secondary Audio Program Second audio channel delivered separately from main audio channel This audio channel is used as an alternate in bilingual broadcasting SDTV Standard Definition TV Standard digital format that is similar to the NTSC picture quality S Video Offers higher quality images by delivering each signal color c and luminance y independently of each othe...

Страница 57: ...F 5 C to 104 F 40 C Power requirements 120V AC 10 60Hz 0 5 Power consumption maximum 282W LCD 42 inches full HD panel Dimensions without stand with stand W 40 4 inches 1 026 0mm 40 4 inches 1 026 0mm H 26 2 inches 664 5mm 28 6 inches 725 0mm D 5 4 inches 137 0mm 12 3 inches 310 0mm Weight 58 5 lbs 26 5kg 63 8 lbs 28 9kg If you subscribe to cableTV the channels are displayed as 1 135 Cable companie...

Страница 58: ...Do not attempt to service the product yourself ...

Страница 59: ......

Страница 60: ...JVC U S A Division of JVC Americas Corp 1700 Valley Road Wayne New Jersey 07470 JVC Loves the Earth A94H6UF 1EMN25219 Printed in USA ...

Отзывы: