background image

7

Picture setting

OK

OK

OK

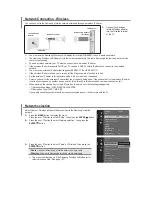
1. Display “Picture” menu

2. Select item and setting or adjust

Picture

Picture Mode

Detail

Color

Tint

White Balance

Features

Back Light

Bright

Picture

Picture

>

>

>

Bright

Cool

• To enter an items menu

MENU

Picture Mode

You can select a preset picture setting according to your favor.


Bright 

:  Hightens contrast and sharpness.

Standard :  Standardize picture adjustment.
Soft 

:  Softens contrast and sharpness.

Back Light

You can change the backlight brightness.


Darker   Brighter

Picture

You can change the contrast of the picture.


Lower   Higher

Bright

You can change the brightness of the picture.


Darker   Brighter

Detail

You can change the sharpness of the picture.


Softer   Sharper

Color

You can change the color of the picture.


Lighter   Deeper

Tint

You can change tint only in NTSC.


Reddish   Greenish 

White Balance

You can change the white balance of the picture to better match the type of video being view.


Cool 

:  Bluish white color.

Warm 

:  Reddish white color.

Mid 

:  Normal white color.

1. 

Select

2. 

Enter

1. 

Select

3. 

Finish

1. 

Select

2. 

Enter

2. 

Adjust

Содержание LT - 32BX18

Страница 1: ...cture setting 7 Sound setting 9 Useful functions 10 Viewing Closed Caption 12 Watching Video or DVDs 12 Troubleshooting 13 Technical information 14 Specification 15 FUNCTIONS REFERENCE Contents ENGLISH HIGH DEFINITION MULTIMEDIA INTERFACE The illustrations of LT 32EX18 is used in this instruction manual for explanation purpose Your TV may not look exactly the same as illustrated This illustration s...

Страница 2: ... on the TV Placing liquid naked flames cloths paper etc on the TV may cause a fire Never expose to rain or moisture To prevent fire or electric shock never allow liquids to enter the unit Never insert objects into the cabinet openings It may cause a fatal electric shock Take care when children are near Hold the TV so as not to scratch the screen Do not touch the screen when carrying the TV Do not car...

Страница 3: ...hannel setting P 11 1 Register the favorite channel 2 Recall the favorite channel If the favorite channel has not been registed then No Memory will be displayed will be displayed Programmed Press and hold Press Set 1 4 Favorite 1 4 Press number button 1 4 only Press number button 1 4 only Zoom Auto Panoramic Regular Panoramic 14 9 Zoom 16 9 Zoom Full Move the picture with 5 or while this bar is di...

Страница 4: ...ian JVC assumes no responsibility for damage due to improper mounting 200 mm x 200 mm mount which conforms to VESA standards Installation requirements To avoid overheating ensure the unit has ample room After all the connections have been made insert the plug into an AC outlet Connect an aerial and VCR DVD Player AERIAL OR VCR DVD Player If you have any problem with assembly please contact a retai...

Страница 5: ...DVD Player Game consoles Video camera To VIDEO 2 PC VCR DVD recorder Amplifier VIDEO 1 Watching videos Output Input Composite signal Component signal P 15 Sound L R Use Component signal Video 1 Setting P 12 VIDEO 2 Watching videos Output Input Composite signal Sound L R HDMI 1 Connecting HDMI 2 HDMI devices Output Input HDMI signal P 15 HDMI Setting P 12 HDMI 2 input does not support analogue audio...

Страница 6: ...3 CH 04 CH 05 CH 06 CH 07 CH 08 CH 09 CH 10 CH 11 Channel Summary CH CC ID Skip Yes Yes Yes Yes Yes Yes Yes Yes Yes 1 Turn on the TV Show only when powering on for the first time The power on the unit can also be used 2 Select a language 3 Select Air or Cable 4 Automatically register channels Auto Program 5 Check what was registered 1 Select 2 Set Select JVC logo appears If you want to set undesire...

Страница 7: ...ck Light You can change the backlight brightness Darker Brighter Picture You can change the contrast of the picture Lower Higher Bright You can change the brightness of the picture Darker Brighter Detail You can change the sharpness of the picture Softer Sharper Color You can change the color of the picture Lighter Deeper Tint You can change tint only in NTSC Reddish Greenish White Balance You can...

Страница 8: ...r Picture adjustment Clear SD For clearly picture Off Mode 1 Mode 2 When Clear SD set to Mode 1 or Mode 2 then Digital VNR and DigiPure and Picture Management cannot operate Digital VNR Reduce the amount of noise in original picture Off On DigiPure For natural looking outlines Off On Pull Down For smooth cinema film Auto Off On Color Management For natural looking pictures Off On Picture Management...

Страница 9: ...e Balance Cinema Surround Off MTS Select the stereo and SAP broadcasted programs Stereo Stereo sound SAP Second Audio Programs Mono mono sound Bass Low tones Weaker Stronger Treble High tones Weaker Stronger Balance Speaker balance Left Stronger Right Stronger Cinema Surround Ambient sound High Low Mono Off AI Volume 1 Display Set Up menu Prevent sudden increase or decrease of sound when changing ...

Страница 10: ... 3 Enter Blue Lock Release 0 OK To enter an items menu 1 Select 2 Enter OK 1 Select 3 Finish 2 Adjust On Timer TV to turn on automatically from standby mode at a set channel and time Sleep Timer TV to turn off automatically to standby mode after a set time Channel Guard Stop children from watching specific channels MENU 1 Display Features menu 2 Select item and setting or adjust 1 Select PR channel...

Страница 11: ...d mute the sound when the signal is weak or absent On Off Child Lock Disables the side control buttons of the TV On Off Auto Shutoff Set the power to turn off if no signal is received and no operation is performed for about 15 minute On Off Favorite Setting Delete the favorite channel that you registered Power Lamp Power lamp lights while the TV is on On Off P 4 Eco Mode Adjust contrast of light a...

Страница 12: ...tting Switch between video and component signal Video Component HDMI Setting Setting for HDMI input Size Normally set to Auto If wrong screen size appears in 480p 525p change to 1 or 2 Audio Normally set to Auto If no sound change to Analogue or Digital Audio is not available for HDMI 2 PC Setting Setting for PC input PC Position Adjust screen position Phase Sets the focus of screen Pixel Adjusts ...

Страница 13: ...with 625p progressive scanning change the output setting of the external device to 625i interlace scanning If a problem occurs when you are using the TV check the below troubleshooting guide before calling for repair Poor picture quality Page Unnatural color Adjust Color and Back Light P 7 Check Color System If Auto is selected P 8 select the specific color system manually Noise Set to the followin...

Страница 14: ...e quality If the signal doesnʼt appear check that the vertical frequency on the PC is set to 60Hz Resolution 640 x 480 VGA 1024 x 768 XGA Vertical frequency Hz 60 0 Connect a DVI device to HDMI 1 using DVI HDMI conversion cable Connect analogue sound output of the DVI device to L and R terminals in IN HDMI 1 Set Audio in HDMI Setting to Analogue or Auto P 12 HDMI 2 input does not support analogue ...

Страница 15: ... 571 7 x 230 5 791 x 520 5 x 10³ 9 1014 x 698 x 296 1014 x 646 5 x 10⁸ 7 Weights without stand 13 5 kg 12 5 kg 12 6 kg 11 9 kg 22 kg 20 kg Accessories Remote control unit RM C2020 x 1 AAA R03 dry cell battery x 2 Screw x 4 Terminal name Terminal type Signal type IN Signal type OUT Input terminals VIDEO 1 RCA connectors x 6 Composite video Analogue component 576i 625i 480i 525i Progressive 576p 625...

Страница 16: ... 2008 Victor Company of Japan Limited 0708WKT NF MT ...

Отзывы: