background image

35

5

Customising TV Settings

GB

AD Switch
(for DTV mode)

Audio Description is an auxiliary audio function that provides an additional audio track 
for visually challenged persons. This function handles the Audio Stream for the AD (Audio 
Description), when it is sent along with the main audio from the broadcaster.
•  Set to “Off” for normal broadcasting sound coming out from speakers.
•  Set to “On” to activate the description sound track if available. The availability of Audio 

Description sound track is indicated by the visually impaired icon "V.I." in the information 
banner.

Digital Audio 

Output (Coaxial)

Selects the digital audio output mode. Press the OK button to select PCM / Auto.

4.  Press the BACK button to return to the previous menu or press the MENU button to return to the main menu.

5.  Press the EXIT button to exit the menu.

Stereo / Dual Sound Reception (ATV Mode)

When a programme is selected, press the AUDIO button to display the sound information for the selected station.

Broadcast

On Screen Display

Mono

Stereo

Dual

MONO / NICAM MONO

MONO / NICAM STEREO

MONO / NICAM DUAL I, NICAM DUAL II, NICAM DUAL I+II

Mono sound selection

If the stereo signal is weak, you can switch to mono by pressing the AUDIO button. In mono reception, the clarity of sound is 
improved. To switch back to stereo, press the AUDIO button again.

Language selection for dual language broadcast

If a programme can be received in two languages (dual language), you can switch to NICAM DUAL INICAM DUAL IINICAM 

DUAL I+II or MONO by pressing the AUDIO button repeatedly.

NICAM DUAL I

Sends the primary broadcast language to the loudspeakers

NICAM DUAL II

Sends the secondary broadcast language to the loudspeakers

NICAM DUAL I+II

Sends the primary and secondary broadcast languages to the 
loudspeakers

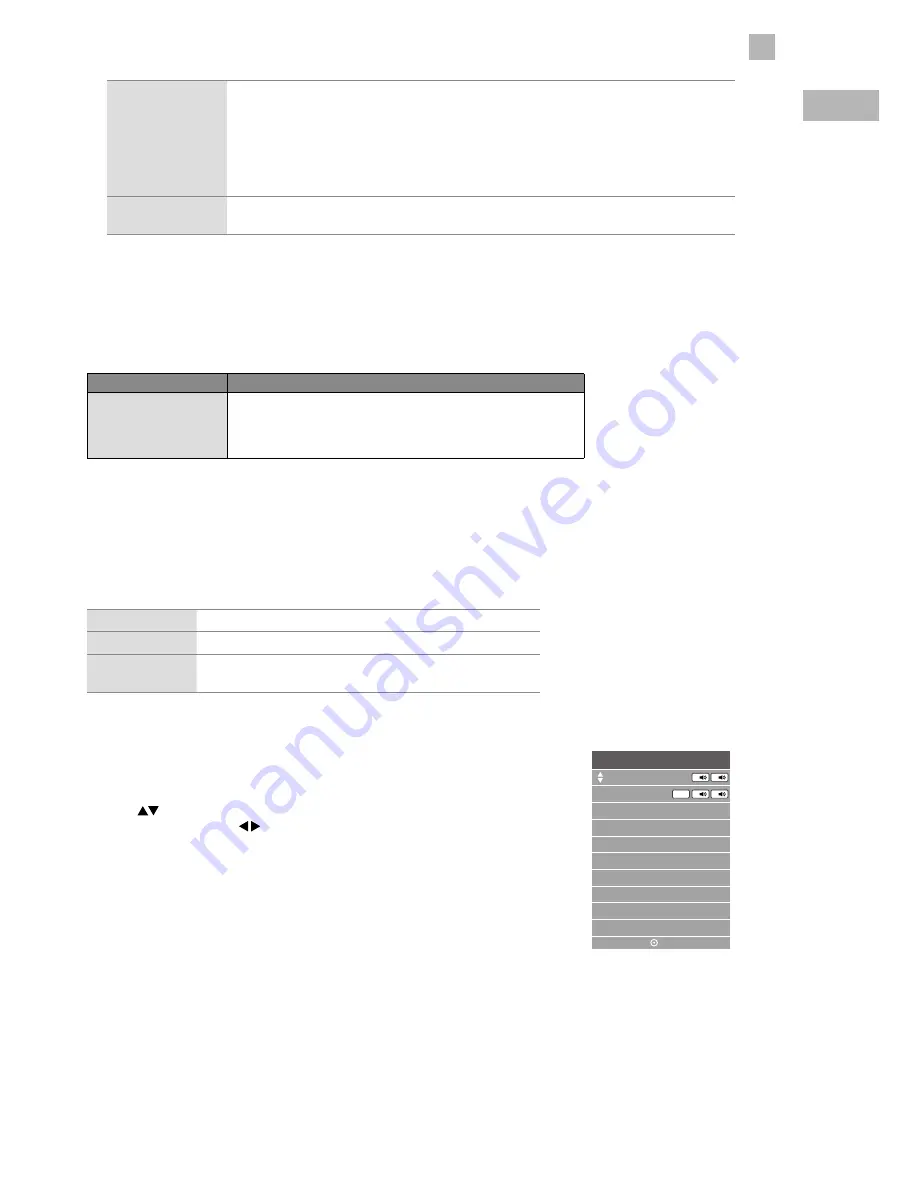
Speaker Sound Output Selection (DTV Mode)

While watching a DTV programme, you can press the AUDIO button to 
display the audio language list (only applicable when the TV programme has 
this feature).

Press the 

 buttons to select an audio language or audio format if 

available and then press the     buttons to select sound track between 
L/R (Stereo), L/L (Mono Left) and R/R (Mono Right). Press the OK button to 
confirm and exit.

Audio Language

English

L

R

Norsk

L

R

V.I.

OK

Содержание LT-24E45B

Страница 1: ...Instruction Manual 32 HD LED TV LT 32E35B LT 32E35W GB ...

Страница 2: ... Source 20 Channel Selection 21 Listening to the Radio Radio Mode 21 Display Channel Information 21 Volume Adjustment 21 Optimum Viewing 21 5 Customising TV Settings 22 Channel Setting TV DTV or Radio Mode 22 Auto Tuning DVB T 22 Auto Tuning DVB C 23 DTV Manual Tuning DVB T 24 DTV Manual Tuning DVB C 24 ATV Manual Tuning 25 Channel Edit ATV DTV Mode 26 Signal Information DTV Mode DVB T 27 Signal I...

Страница 3: ...eletext within Digital Service 49 7 Entertainment 50 Connecting a USB Storage Device 50 Viewing Photos 50 Listening to Music 51 Viewing Movies 52 My Text 53 8 PVR Personal Video Recorder 54 Time Shift Function 54 Recording DTV Programme onto a USB Storage Device 55 Timer Programming 56 Playing Recorded Programme 57 9 Others Information 58 Maintenance 58 Hints and Tips 58 Display Modes 60 YPbPr Mod...

Страница 4: ...reate a safety hazard If the mains cable is damaged it must be replaced by the manufacturer its service agent or similarly qualified persons in order to avoid a hazard Interference Do not place the unit on or near appliances which may cause electromagnetic interference If you do it may adversely affect the operating performance of the unit and cause a distorted picture or sound Optimum viewing Vie...

Страница 5: ...atal electric shock CAUTION RISK OF ELECTRIC SHOCK DO NOT OPEN The lightning flash with arrowhead symbol within an equilateral triangle is intended to alert the user to the presence of uninsulated dangerous voltage within the unit s enclosure that may be of sufficient magnitude to constitute a risk of electric shock The exclamation point within an equilateral triangle is intended to alert the user...

Страница 6: ...t you spend some time reading this instruction manual so that you fully understand these features You will also find some hints and tips to help you resolve any issues Read all the safety instructions carefully before use and keep this instruction manual for future reference Chapter 2 If you require additional assistance please call our Support Centre Norway 815 56 602 Sweden 0770 474 700 Denmark ...

Страница 7: ... then screw the support by using 4 screws A supplied Installing Removing the Base Stand The LCD display is very fragile and must be protected at all times when installing and removing the base stand Be sure that no hard or sharp object or anything that could scratch or damage the LCD display comes into contact with it DO NOT exert pressure on the front of the TV at any time because the screen coul...

Страница 8: ... the mounting kit Due to space restrictions we recommend that you make all connections refer to page 14 17 and page 50 for details before mounting on to the wall Remove the stand assembly before mounting the TV onto the wall Keep all the spare screw should you want to use the stand assembly option Mounting the TV to a Wall Please read this instruction manual carefully while setting up your TV If y...

Страница 9: ...ceives IR signals from the remote control Do not put anything near the sensor as its function may be affected 4 INPUT Press to select among different input signal sources DTV ATV AV YPbPr HDMI1 HDMI2 USB Confirmed selection on the OSD menu 5 MENU Displays the OSD on screen display menu 6 VOL V Adjusts the volume Press to select and adjust a setting in the OSD menu 7 CH Press to select a channel or...

Страница 10: ...system 4 RF Connects to the aerial socket on the wall with the RF coaxial cable 5 HEADPHONE Connects to the headphones 6 COMMON INTERFACE Allows the insertion of a Common Access Module 7 HDMI1 HDMI2 ARC Connects to a High Definition HD signal output device such as a set top box blu ray disc player or AV receiver 8 USB Allows the insertion of a USB storage device to play video audio photo and text ...

Страница 11: ...perty Only use the battery type indicated in this manual When the batteries are exhausted the remote will not function Replace both batteries at the same time with new ones Do not install new batteries with used ones and do not mix different types of batteries Do not dispose of used batteries as domestic waste Dispose of them in accordance with local regulations Handling the Remote Control Take ca...

Страница 12: ...t function ATV DTV mode MIX Select TELETEXT with a TV programme ATV mode SIZE Enlarge the picture on the TV in teletext ATV mode 8 HOLD Freeze a multi page passage on screen in teletext ATV mode REVEAL Reveal hidden information such as the answer to a quiz in teletext ATV mode SUB PAGE Display the subpage on the teletext screen ATV mode INDEX Select the page number of the index from teletext ATV m...

Страница 13: ... mode 18 CH Select a channel 19 Play Pause Start the time shift function DTV mode Start playback DTV USB mode Pause playback DTV USB mode Stop Rec Record the current programme DTV mode Stop the playback or recording DTV USB mode 20 HDMI A short cut to switch input source between HDMI1 and HDMI2 DTV A short cut to switch input source to DTV mode 21 Prev To skip to the beginning of the previous chap...

Страница 14: ...e or the INPUT button on the remote control to display the Source List Use the buttons to select HDMI1 HDMI2 and then press the OK button to confirm Alternative Press the HDMI button repeatedly to switch between HDMI1 HDMI2 Making Video and Audio Connections Not all AV devices have the ability to connect to a TV please refer to the owner s manual of your AV device for compatibility and connection ...

Страница 15: ...frame 4 Press the button at the front right side under the frame or on the remote control to turn on your TV 5 Press the button at the front right side under the frame or the INPUT button on the remote control to display the Source List Use the buttons to select YPbPr and then press the OK button to confirm R L VIDEO Digital Audio Output Coaxial Audio in L R COMPONENT OUT Y Pr Pb AV Cable not incl...

Страница 16: ... connect the TV s Digital Audio Output Coaxial socket to an external audio receiver s audio coaxial input socket 2 Plug the connected devices into the mains socket before switching on the POWER ON OFF switch which is located at the front right side under the frame 3 Press the button at the front right side under the frame or on the remote control to turn on your TV 4 Press the button at the front ...

Страница 17: ... headphones on and slowly increase the volume until you reach a comfortable listening level Rear Right Side View of TV USB 5V 500mA HDMI2 ARC HDMI1 RF COMMON INTERFACE CI HEADPHONE YPbPr Earphones Cable not included Long term exposure to loud music may cause hearing damage It is best to avoid extreme volume when using headphones especially for extended periods ...

Страница 18: ...sure the aerial is plugged in and then press the OK button If you have already installed the TV using the Quick Start Guide please go to the section Selecting the Input Source on the next page English Svenska Dansk Česky Slovak Norsk Suomi Please select an OSD Language OK First Time Installation Please ensure aerial is plugged in Then press OK button USB 5V 500mA HDMI2 ARC HDMI1 RF COMMON INTERFAC...

Страница 19: ...MENU button to interrupt the tuning half way A pop up screen will be displayed press the button to select Yes to confirm 11 After tuning is complete the channels are arranged in a preset order If you wish to skip channels modify the preset order or rename channels select Channel Edit under the Channel menu refer to page 26 for details b If you select DVB C the next step is to configure the DVB C s...

Страница 20: ...BBC and ITV e g London Beds and Cambs etc Tertiary Region You may receive signals from more than one transmitter within the Secondary Region e g Beds and Cambs may have Luton or Sandy Heath Eco Friendly Auto Standby Function The latest eco friendly power saving technology will automatically switch the TV into standby mode if the TV is left on and idle for 4 hours or it does not receive an input si...

Страница 21: ... to switch between DTV and Digital radio channel Press the CH buttons on the remote control repeatedly to change the radio stations Alternative Press the LIST button to enter the Channel List Then use the buttons to highlight and select the station Press the OK button to listen to the selected station Press the GUIDE button to see all the stations in the Programme Guide refer to page 47 for detail...

Страница 22: ...OK button to confirm 3 Press the buttons to select DVB T and then press the OK button to confirm 2 Press the buttons to select Auto Tuning and then press the OK button Channel Setting TV DTV or Radio Mode Auto Tuning DVB T Use this to automatically find and store all available channels This is normally recommended if some channels have been added or removed by the broadcaster or if you have moved ...

Страница 23: ...hannel Edit under the channel menu refer to page 26 for details 4 Press the buttons to select Scan type Symbol ks s and then press the OK button to confirm 3 Press the buttons to select DVB C and then press the OK button to confirm 2 Press the buttons to select Auto Tuning and then press the OK button to confirm Channel Tuning DTV 3 Channel s Radio 0 Channel s 36 K32 UHF CH Press MENU to skip DTV ...

Страница 24: ...K button DTV Manual Tuning DVB T Allows you to make manual fine tuning adjustments to the channel under DTV mode 1 Press the MENU button and then press the buttons to select the CHANNEL menu and then press the OK button CHANNEL PICTURE SOUND TIME OPTION LOCK EXIT EXIT CHANNEL PICTURE SOUND TIME OPTION LOCK EXIT EXIT Auto Tuning DTV Manual Tuning ATV Manual Tuning Signal Information CI Information ...

Страница 25: ...p Press the buttons to select Frequency Symbol ks s QAM Type Press the OK button to commence the search of that channel When the signal has been tuned the picture and signal strength will be displayed on the screen 4 Press the MENU button to return to the main menu 5 Press the EXIT button to exit the menu CADTV Manual Tuning Frequency 610000 Symbol ks s 6875 QAM Type QAM 64 Bad Normal Good Press O...

Страница 26: ...Press the OK button to confirm ATV channels Press the YELLOW button and then press the buttons to move to the selected channel Press the YELLOW button or the OK button to confirm d Skip Press the BLUE button to select the channels that you want to skip when you are selecting channels Press the BLUE button again to undo it e FAV Favourite Press the FAV button to set the selected channel as one of t...

Страница 27: ...OUND TIME OPTION LOCK EXIT EXIT CHANNEL PICTURE SOUND TIME OPTION LOCK EXIT EXIT Auto Tuning DTV Manual Tuning ATV Manual Tuning Signal Information CI Information Software Update Channel Edit CHANNEL Auto Tuning CADTV Manual Tuning ATV Manual Tuning Signal Information CI Information Software Update Channel Edit CHANNEL Signal Information Channel K52 Network London Frequency 482000 Quality 100 Stre...

Страница 28: ...ce DTV Mode The common interface allows the use of a Common Access Module to enable you to view scrambled pay to view services These services are provided by TopUp TV UK only and others The Common Access Module and viewing card can be obtained from the service provider Rear Right Side View of TV USB 5V 500mA HDMI2 ARC HDMI1 RF COMMON INTERFACE CI HEADPHONE YPbPr CI Common Interface Allows the Comm...

Страница 29: ...check for the availability of new software and to download the file please call our Support Centre Norway 815 56 602 Sweden 0770 474 700 Denmark 70 27 87 37 Finland 020 500 6550 Software Update Over Air Download DVB T The TV auto detects the latest firmware through the DTV signal and allows you to accept or refuse the firmware upgrade service This function may not be available in some countries Pl...

Страница 30: ...L If you encounter problems after the software update we recommend that you restore your TV to the factory default settings To do this follow the steps below 1 Press the MENU button to go to the MAIN menu Press the buttons to select OPTION and then press the OK button 2 Press the buttons to select Restore Factory Default and then press the OK button Press the button to select Yes to reset the sett...

Страница 31: ...ons to select Yes No for the upgrade procedure Download 20 Software Update OAD 70 During download please do not turn off or unplug your TV If you encounter problems after the software update we recommend that you restore your TV to the factory default settings To do this follow the steps below 1 Press the MENU button to go to the MAIN menu Press the buttons to select OPTION and then press the OK b...

Страница 32: ...nd dark areas of the picture for User mode Tint For NTSC format Adjusts the balance between red and green levels Tint is only available for NTSC signal reception Colour Temperature Select among colour temperature Medium Cool User Warm Adjusts the colour components independently to achieve a warm or cool colour for User mode Red Increases red tint Green Increases green tint Blue Increases blue tint...

Страница 33: ...ture will be cropped This selection will allow you to zoom in the picture without any alteration while the 4 sides of the picture will be cropped Subtitle This selection will allow you to zoom in the picture without any alternation while filling the entire screen with subtitles shown at the bottom of the screen This selection will allow you to zoom in the picture without any alternation while show...

Страница 34: ...er mode Bass Controls the relative intensity of lower pitched sounds for User mode Balance Adjusts the relative volume of the speakers in a multiple speaker system Auto Volume Volume levels are automatically controlled e g advertisements tend to be louder than the programmes Surround Sound Select to turn Surround Sound On Off Backlight Allows you to adjust the backlight setting of your TV This con...

Страница 35: ...reo Dual MONO NICAM MONO MONO NICAM STEREO MONO NICAM DUAL I NICAM DUAL II NICAM DUAL I II Mono sound selection If the stereo signal is weak you can switch to mono by pressing the AUDIO button In mono reception the clarity of sound is improved To switch back to stereo press the AUDIO button again Language selection for dual language broadcast If a programme can be received in two languages dual la...

Страница 36: ...utomatically switches the TV to standby after the preset time has elapsed The clock will be set automatically when receiving a digital signal Time must be set before using Sleep Timer function Press the buttons to select a period of time after which the TV automatically switches to standby mode OFF 10 20 180 240 min The timer begins to count down from the number of minutes selected If you turn the...

Страница 37: ...PTION LOCK EXIT EXIT 2 Press the buttons to select OSD Language and then press the OK button The default on screen menu language is English Hearing Impaired PVR File System Restore Factory Default HDMI CEC OSD Language Audio Language Country Subtitle Language On English Norsk Norway Norsk OPTION 3 Press the buttons to navigate the menu and change the settings Press the OK button to confirm 4 Press...

Страница 38: ...s the OK button 3 Press the buttons to select the Primary Secondary Audio Language Press the button and then press the buttons to select your desired audio language Press the OK button to confirm 4 Press the BACK button to return to the previous menu or press the MENU button to return to the main menu 5 Press the EXIT button to exit the menu Audio Language Primary Svenska Dansk Česky Slovak Suomi ...

Страница 39: ...auto tuning If you want to change the country please refer to Auto Tuning on page 22 23 PVR File System DTV Mode Allows you to select your preferences in the PVR File System 1 Press the MENU button and then press the buttons to select the OPTION menu and then press the OK button CHANNEL PICTURE SOUND TIME OPTION LOCK EXIT EXIT Hearing Impaired PVR File System Restore Factory Default HDMI CEC OSD L...

Страница 40: ...m Size PVR File System Type FAT 32 PVR File System Size SD 0 Mins All HD 0 Mins MENU OK Do not unplug USB device Formatting Please wait Format disk Time Shift Size After formatting the Time Shift Size menu will appear if you have selected HiSpeed FS in PVR File System Type Press the buttons to select your preferred file size Press the OK button to confirm This option cannot be chosen if you have s...

Страница 41: ...nd DVD player using only the remote control of the TV CEC also allows individual CEC enabled devices to command and control each other without user intervention Make sure that your CEC compliant device is connected to your TV using a HDMI cable and the correct HDMI input source is selected prior to using this function Some HDMI cables may not support HDMI CEC functions HDMI CEC Connection 2 Press ...

Страница 42: ...r Dolby Digital Plus then ARC function will not work and there will be no sound output from ARC compliant audio devices In this case please set SPDIF MODE to PCM Please refer to your ARC compliant devices guidebook for more details on the operation of the HDMI ARC function Ensure HDMI CEC is On 3 Press the buttons to select the following options and then press the OK button HDMI CEC Press the butt...

Страница 43: ...designed to prevent accidental re tuning of the TV losing of channels and to prevent children from watching unsuitable programmes The Lock System must be set to On for this function to operate If the Lock System is set to On a valid password must be entered when you access Auto Tuning Manual Tuning Restore Factory Default 1 Press the MENU button and then press the buttons to select the LOCK menu a...

Страница 44: ...tton to return to the previous menu Press the MENU button to return to the main menu 7 Press the EXIT button to exit the menu 5 Use the 0 9 buttons to input the old password and then input the new 4 digit password Re enter new password for confirmation Confirm new password Please enter new password Please enter old password Clear Cancel 3 Use the 0 9 buttons to input a 4 digit password to enter th...

Страница 45: ...annel Parental Guidance Off Off LOCK 4 Press the buttons to select Block Channel and then press the OK button The default password is 6666 If you change the password be sure to remember the new password If you forget the new password enter the master password 9527 5 A Block Channel screen will pop up Press the buttons to select a channel Press the GREEN button on the remote control to block or unb...

Страница 46: ... default password is 6666 If you change the password be sure to remember the new password If you forget the new password enter the master password 9527 4 Press the buttons to select Parental Guidance and then press the OK button Lock System Set Password Block Channel Parental Guidance Off Off LOCK 5 Press the buttons to select an age rating Off 4 18 Then press the OK button to confirm 6 Press the ...

Страница 47: ...ELLOW Date Press the YELLOW button and then press the buttons to view the schedule of the previous next day Press the YELLOW button again to return to the EPG BLUE Remind Press the BLUE button while on the selected programme the Reminder setting menu will be displayed Press the buttons to adjust the settings and then press the OK button to confirm the settings After confirmation the Schedule list ...

Страница 48: ...ou have difficulty reading the text on the TV you can double the height of the text Press the SIZE button The top half of the page will be displayed in double height text Press the SIZE button again The bottom half of the page will be displayed in double height text Press the SIZE button again to return to the full page Page STOP If the page of text you have selected contains subpages these subpag...

Страница 49: ...o page 38 for details Teletext within Digital Service 1 In DTV mode press the TEXT button to display the teletext page 2 Follow the instructions on digital teletext and move onto the next step by pressing OK RED GREEN YELLOW BLUE or 0 9 buttons etc To change the digital teletext service you will need to exit the current text service and change channels Then enter the text service of the newly sele...

Страница 50: ...he OK button to confirm Rear Right Side View of TV USB 5V 500mA HDMI2 ARC HDMI1 RF COMMON INTERFACE CI HEADPHONE YPbPr USB Cable not included Adapter Portable hard Disk USB Hub USB 500mA 500mA 500mA 5V If a hard disk is used make sure its mains adapter is connected to the mains supply If a USB hub is used make sure its mains adapter is connected to the mains supply as the total current consumption...

Страница 51: ...OK button If you want to select the specified photos press the buttons to select the picture file and then press the OK button A tick box will be displayed If you want to delete the file press the RED button to enter the Sub Menu and then press the button to confirm 3 Press the buttons to select your storage device and then press the OK button 7 Press the EXIT button to return to the previous menu...

Страница 52: ...Ratio 3 Press the buttons to select your storage device and then press the OK button Viewing Movies 1 Press the button at the front right side under the frame or the INPUT button on the remote control then press the buttons to select the USB mode and then press the OK button 2 Press the buttons to select MOVIE and then press the OK button 5 The music information Album Title Bit Rate Artist Samplin...

Страница 53: ...ttons and then press the OK button to select the function Prev page Next page Prev Next Stop Music Playlist Info 3 Press the buttons to select your storage device and then press the OK button My Text 1 Press the button at the front right side under the frame or the INPUT button on the remote control then press the buttons to select the USB mode and then press the OK button 2 Press the buttons to s...

Страница 54: ... return to the current live broadcast press the button The PVR Time Shift Progress Bar 1 Indicates the status of the currently displayed video 2 Indicates the time lagging behind the live broadcast PVR reviewing 3 Indicates the available recording time on your USB storage device 4 Indicates the current time 2 3 4 1 During normal TV viewing you may press the button to pause the live programme if yo...

Страница 55: ...y watching 2 Press the OK button the recording progress bar will disappear 3 Press the button to stop recording Recording will stop automatically when the disk is full If you want to turn off your TV during recording press the button A dialogue will display Press the buttons to select your desired option and then press the OK button to confirm If you select the middle option in the box the screen ...

Страница 56: ...to confirm your settings Timer Programming This function is used to perform scheduled recording The recording from timer programme or direct recording may have a little bit of delay when it starts to record the broadcast programme Please make sure the USB device is inserted If not a warning message will pop up 1 Press the GUIDE button on the remote control The EPG menu will appear EXIT INFO Schedu...

Страница 57: ...device and then press the OK button 4 Press the buttons to select the MSTPVR folder and then press the OK button 5 Press the buttons to select your recorded programme and then press the OK button A tick box will be displayed If you want to delete the file press the RED button to enter the Sub Menu and then press the button to confirm Press the button to view 6 Press the OK button or the i button t...

Страница 58: ...es are installed with the correct polarity to to Install new batteries Power is suddenly turned off Check the power of the TV The mains supply maybe interrupted Check if the sleep timer is set Check whether the Auto Standby is activated The video function does not work No Picture No Sound Check whether the TV is switched on Try another channel The problem may be caused by the broadcaster Picture a...

Страница 59: ...if you have a weak signal Usually it just means you ll need to re scan your digital box or TV Don t worry it is easy to do And once you ve done it you should get all the free channels available to you If problems persist you may need to get your aerial checked Talk to your retailer or contact your local aerial installer Why do I get blocking on my digital picture In most cases blocking is caused b...

Страница 60: ...ill be adjusted accordingly YPbPr Mode Resolution Vertical Frequency Hz Aspect Ratio 480I 720 x 480 60 Auto 4 3 16 9 Zoom Subtitle SmartZoom 480P 720 x 480 576I 720 x 576 50 576P 720 x 576 720P 1280 x 720 50 60 1080I 1920 x 1080 50 60 1080P 1920 x 1080 50 60 HDMI Mode Resolution Vertical Frequency Hz Aspect Ratio 480I 1440 x 480 60 Auto 4 3 16 9 Zoom Subtitle SmartZoom 480P 720 x 480 60 576I 1440 ...

Страница 61: ...perating Temperature 0 C 40 C Operating Humidity 10 80 Mercury Content mg 0 0 mg Presence of Lead Please refer to 2 under this table 3 Reference Period 2010 1062 2014 Speaker Power 8 W 8 W Dimension W x D x H with base 732 x 211 x 472 mm Weight Net 4 8 kg Inputs Output HDMI 2 YPbPr 1 Common Interface 1 Digital Audio Output Coaxial 1 USB 1 AUDIO IN RCA 1 L R Aerial 1 Headphone 3 5mm 1 Features and ...

Страница 62: ...62 9 Others Information GB A LT 32E35B 60 Watt 41 kWh annum cm inch 81 2010 1062 2014 32 A LT 32E35W 60 Watt 41 kWh annum cm inch 81 2010 1062 2014 32 ...

Страница 63: ...spose of used batteries according to your local laws or regulations Do not dispose of batteries with normal household waste For more information please contact the local authority or your retailer where you purchased the product The terms HDMI and HDMI High Definition Multimedia Interface and the HDMI Logo are trademarks or registered trademarks of HDMI Licensing LLC in the United States and other...

Страница 64: ...IB LT 32E35B_W GB 161103V2W Dear Customer This apparatus is in conformance with the valid European directives compatibility and electrical safety European representative of the manufacturer is DSG Retail Ltd co no 504877 1 Portal Way London W3 6RS UK For Help and Support Call Norway 815 56 602 Sweden 0770 474 700 Denmark 70 27 87 37 Finland 020 500 6550 ...

Отзывы: