background image

5

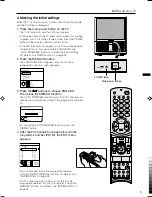
4 Making the initial settings

When the TV is first turned on, it enters the initial setting mode,
and the JVC logo is displayed.

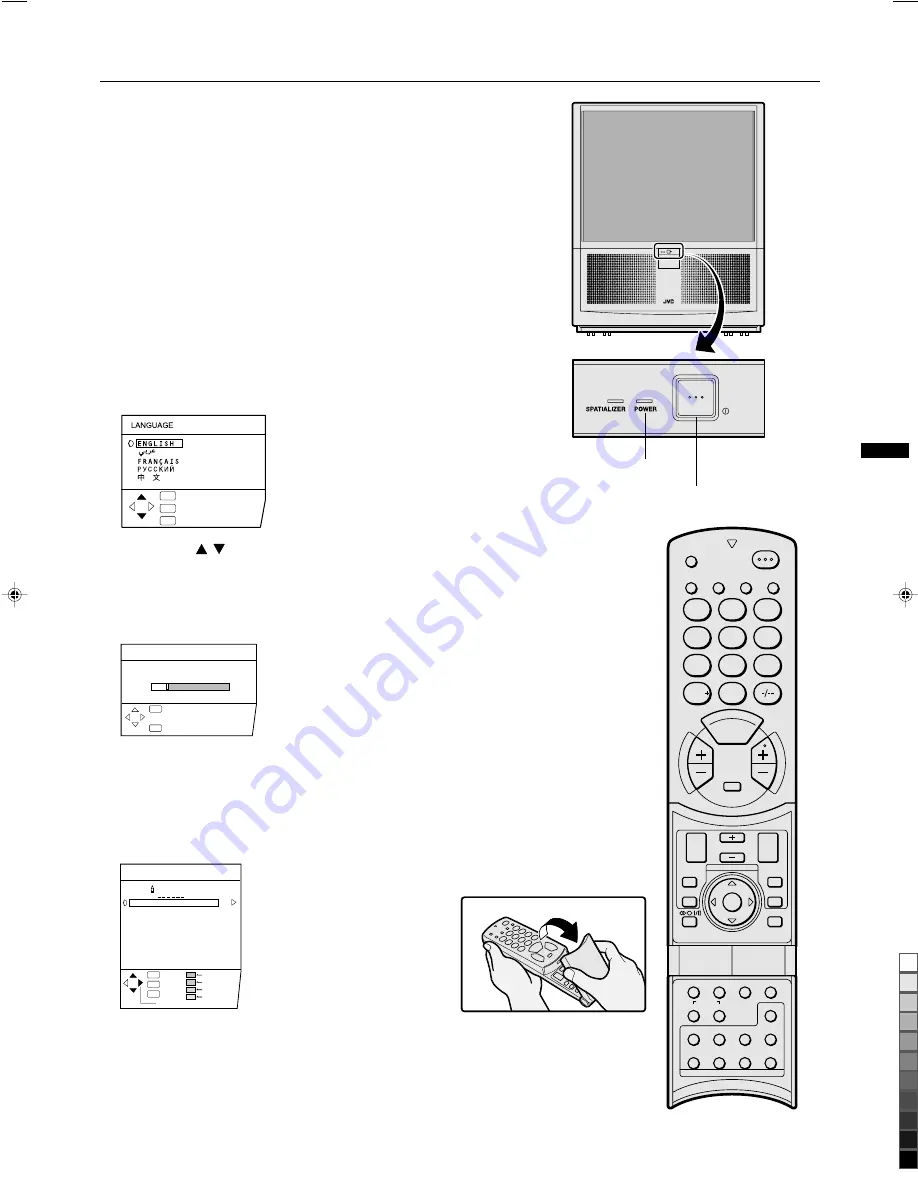
1 Press the main power button on the TV

The TV is turned on, and the JVC logo appears.

•If the power lamp on the TV lights red and does not change

to green, your TV is in the standby mode. Press the POWER
button on the remote control to turn the TV on.

•If the JVC logo does not appear,  your TV has already been

turned before. In this case,use the "LANGUAGE" and
"AUTO PROGRAM" functions to make the initial settings.
For details, see "INSTALL menu" on page 23.

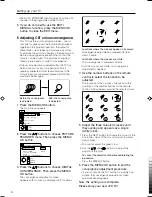
2 Press the MENU/OK button

The LANGUAGE menu appears. You can choose a
language for the on-screen language.

3 Press the 

/

 buttons to choose ENGLISH.

Then press the MENU/OK button.

The AUTO PROGRAM function starts. The TV channels you
receive are automatically stored in the programme numbers
list.

•To  cancel the AUTO PROGRAM function, press the

DISPLAY button.

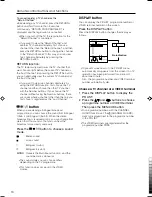
4 After the TV channels have been stored in the

programme number (PR) list, the EDIT menu
appears.

•You can proceed to edit the programme numbers

list using the EDIT/MANUAL function. For details, see
"EDIT/MANUAL" on page 23.

•If a TV cannel you want to view is not stored in the

programme numbers list, you can register it using the
MANUAL function. For details, see "EDIT/MANUAL" on
page 23.

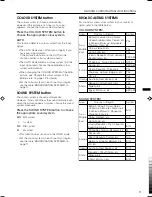
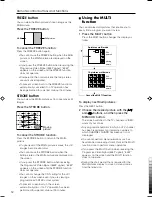
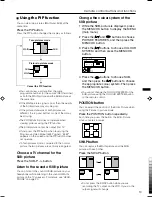
Setting up your TV

CH/CC

PR    ID
AV
01
02
03
04
05
06
07
08
09

CH
CH
CH
CH
CH
CH
CC
CC
CC

21
22
23
24
25
26
01
02
03

ID
INSERT
DELETE
MANUAL

MOVE

EDIT

:EXIT

:OK

OK

TV

:BACK

DISP

:BACK

:OK

OK

DISP

CH    10

AUTO PROGRAM

20%

:EXIT

:OK

OK

TV

:BACK

DISP

C

H

A

N

N

E

L

V

O

L

U

M

E

1

2

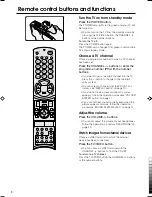
ZOOM

MULTI

MUTING

NEXT

PIP

POSITION

FREEZE

MENU/

OK

SWAP

SUB-P

PIP

TEXT

STROBE

DISPLAY

RETURN

TV/VIDEO

BASS

PICTURE

MODE

POWER

SPATIALIZER

3

4

5

6

7

8

9

0

COLOUR

SYSTEM

SOUND

TV/TEXT

HOLD

MODE

REVEAL

SIZE

SUBPAGE

STORE

CANCEL

INDEX

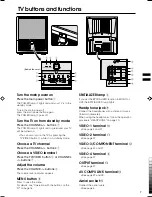
Main power button

POWER lamp

 LCT1078-001A_p01-15

11/2/01, 2:12 PM

5

Black

Содержание HV-53PRO

Страница 1: ...Setting up your TV TV buttons and functions Remote control buttons and functions Using the TV s menu Basic operation PICTURE SETTING menu PICTURE FEATURES menu SOUND SETTING menu FEATURES menu INSTALL menu Additional preparation Troubleshooting Specifications 2 3 4 7 8 16 16 17 18 20 21 23 27 30 Back cover ...

Страница 2: ...cover 6 If you are not going to use this TV for a long preriod of time be sure to disconnect the AC plug from the AC soket 7 This TV set is mounted on casters which make it easier to move However when positioning or moving the TV observe the following cautions Do not position the TV on a slanting or unstable place Do not use excessive force which could damage the TV or even overterm the TV breakin...

Страница 3: ... a high CONTRAST or BRIGHTNESS setting Do not play video games computer programme or similar programmes that have fixed or repetitive images Keep contrast and brightness low especially on teletext programmes news programmes business reports and home shopping or similar programmes To adjust contrast and brightness see page 17 Do not leave fixed images on the screen for long time Screen Cleaning You...

Страница 4: ...an audio cable If the VCR s audio output is in mono connect the VCR s AUDIO OUT audio output jack and the TV s AUDIO L MONO jack with an audio cable You can use the AV COMPU LINK function if your VCR has an AV COMPU LINK terminal For details see Connecting AV COMPU LINK Supported Devices on page 29 2 Connecting the power cord Connect the mains plug to the AC outlet 3 Putting the batteries into the...

Страница 5: ...automatically stored in the programme numbers list To cancel the AUTO PROGRAM function press the DISPLAY button 4 After the TV channels have been stored in the programme number PR list the EDIT menu appears You can proceed to edit the programme numbers list using the EDIT MANUAL function For details see EDIT MANUAL on page 23 If a TV cannel you want to view is not stored in the programme numbers l...

Страница 6: ... TV BACK DISP 3 Press the buttons to choose DIGITAL CONVERGENCE Then press the MENU OK button The convergence adjustment screen appears with crosses displayed in 9 locations Before the convergence is adjusted After the convergence is adjusted Locations where the crosses appear in 3 colours Convergence adjustment is required Perform steps 4 and 5 Locations where the crosses are white The convergenc...

Страница 7: ...ess to open the menu For details see Operation with the buttons on the TV on page 16 TV buttons and functions SPATIALIZER lamp 3 If you set the SPATIALIZER function to MONO or LIVE the SPATIALIZER lamp lights Headphone jack 9 Connect the headphones with a stereo mini jack 3 5mm in diameter When using the headphones follow the operation procedure HEADPHONE on page 20 VIDEO 1 terminal 0 See page 4 a...

Страница 8: ...o colour appears follow the operation procedure COLOUR SYSTEM button on page 11 If you cannot hear sound normally even when the picture appears normally follow the operation procedure SOUND SYSTEM button on page 11 Adjust the volume Press the VOLUME buttons You cannot adjust the volume of your headphones Follow the operation procedure HEADPHONE on page 20 Watch images from external devices Choose ...

Страница 9: ...Remote control buttons and functions The LIVE mode works properly only with stereo sound The LIVE mode does not work correctly with headphones The MONO mode works properly only with monaural sound The SPATIALIZER is manufactured under lisense from Desper Products Inc BASS button You can enjoy a powerful bass sound by using the SUPER BASS Super Bass Reflex function Press the BASS button to turn the...

Страница 10: ...choose the sound from Bilingual I Sub I or Bilingual II Sub II When the stereo broadcasting is received poorly you can change from stereo to mono sound so that you can hear the broadcast more clearly and easily Press the button to choose a sound mode Stereo sound mono sound Bilingual I sub I Bilingual II sub II MONO Cancels the Multi Sound function and the sound becomes monaural The sound mode you...

Страница 11: ...em D K D K system M M system This function does not work in the VIDEO mode For the sound systems in each country or region see the table BROADCASTING SYSTEMS on page 11 Bahrain Kuwait Oman Qatar United Arab Emirates Yemen etc Indonesia Malaysia Singapore Thailand India etc SECAM SECAM SECAM NTSC PAL PAL PAL PAL PAL PAL PAL PAL PAL China Vietnam etc Hong Kong etc Islamic Republic of Iran Lebanon Sa...

Страница 12: ...t change the TINT setting for the still images on the screen even if you are viewing a programme with NTSC colour system To prevent screen burn in the screen automatically dims if no TV operation has been performed for a period of about 15 minutes Moving picture MAIN Still pictures Using the MULTI function You can display multi pictures that enable you to easily find a program you want to view 1 P...

Страница 13: ... your headphones while listening to the sound of MAIN picture on the TV speakers For details see HEAD PHONE on page 20 2 5 5 2 MAIN SUB MAIN SUB Cancel the PIP function Picture in picture mode Twin pictures mode Change the colour system of the SUB picture 1 While the SUB picture is displayed press the MENU OK button to display the MENU main manu 2 Press the and buttons to choose PICTURE FEATURES a...

Страница 14: ...eral other teletext pages are being received Press the HOLD button The hold are displayed at the top left of the screen To cancel the Hold function Press the HOLD button again REVEAL button Some teletext pages include hidden text such as answers to a quiz You can display the hidden text Each time you press the REVEAL button text is hidden or revealed SIZE button You can double the height of telete...

Страница 15: ...el the Sub page function Press the SUBPAGE button again Using the List mode You can store the numbers of your favourite teletext pages in memory and call them up quickly using the coloured buttons To store the page numbers 1 Press the MODE button to engage the List mode The stored page numbers are displayed at the bottom of the screen 2 Press a coloured button to choose a position Then press the n...

Страница 16: ...hoose the setting of that function If you want to operate a function which appears only with its name follow the descriptions of that function on the following pages 5 Press the MENU OK button to comple the setting The menu disappears When watching the television with the NTSC system the menus are displayed at about half of their normal verical size Operation with the buttons on the TV You can als...

Страница 17: ... the picture colour lighter deeper TINT You can adjust the picture tint reddish greenish You can change the TINT setting picture tint only when the colour system is NTSC 3 58 or NTSC 4 43 You cannot select the TINT function when receiving the Progressive Video Signal 525P signal To return to the default settings in each PICTURE MODE Press the blue button Returns the picture settings in the current...

Страница 18: ...e a sharper more detailed picture You can choose from the DigiPure function settings of AUTO MIN and MAX Picture motion compensation function This function displays fast moving pictures for example the players or ball in a football game more smoothly and naturally on the screen You cannot select the Digipure function when receiving the Progressive Video Signal 525P signal AUTO The TV will automati...

Страница 19: ... You can change the screen size according to the picture aspect ratio Choose the optimum one of two ZOOM modes 1 Choose ZOOM then press the MENU OK button COLOUR SYSTEM PAL EXIT OK OK TV BACK DISP ZOOM REGULAR ZOOM EXIT OK OK TV BACK DISP 2 Press the buttons to choose a ZOOM mode Then press the MENU OK button The picture expands and the chosen ZOOM mode is dis played in about 5 seconds You can cho...

Страница 20: ...OLUME function while viewing images from a VIDEO terminal the setting is registered as the setting for VIDEO mode The AI VOLUME fnction may not operate as expected if the sound input level from a broadcast station or video software is extremely low BBE You can use the BBE function to enjoy easy to listen sound that is faithful to the original sound recorded ON This function is turned on OFF This f...

Страница 21: ...his function cannot be used to turn off the TV s main power When this function is on you can display the SLEEP TIMER menu again to confirm or change the remaining time CHILD LOCK You can disable the front control buttons of the TV When this function is set to ON the TV can be operated only by using the remoto control Use this function to prevent children from operating the TV at their own discreti...

Страница 22: ...nfirming the ID num ber press the TV VIDEO button to exit the menu When you would like to cancel the CHANNEL GUARD function you must perform the operation To set this function again 5 5 ID NO AUTO SHUTOFF You can set your TV to turn off if no signal are received for about 15 minutes or longer after the end of a broadcast ON This function is turned on OFF This function is turned off The AUTO SHUTOF...

Страница 23: ...n of a TV chan nel you want to view to the programme number MANUAL function CAUTION Using the MOVE DELETE or INSERT function rewrites the current programme numbers list Resultingly the programme number of some of the TV channels will change INSTALL LANGUAGE AUTO PROGRAM EDIT MANUAL TELETEXT LANGUAGE EXIT OK OK TV BACK DISP EXIT OK OK TV BACK DISP BACK OK OK DISP CH 10 AUTO PROGRAM 20 CH CC PR ID A...

Страница 24: ...on Press the DISPLAY button 3 Press the button to choose the system sound system for a TV channel you want to register For the sound systems in each country or region see the table BROADCASTING SYSTEMS on page 11 4 Press the green or red button to search for a TV channel Scanning stops when the TV finds a TV channel Then the TV channel is displayed 5 Press the green or red button repeatedly until ...

Страница 25: ...2 E32 DS 24 CH 33 US 33 E33 CH 34 US 34 E34 CH 35 US 35 E35 CH 36 US 36 E36 CH 37 US 37 E37 CH 38 US 38 E38 DS 25 CH 39 US 39 E39 DS 26 CH 40 US 40 E40 DS 27 CH 41 US 41 E41 DS 28 CH 42 US 42 E42 DS 29 CH 43 US 43 E43 DS 30 CH 44 US 44 E44 DS 31 CH 45 US 45 E45 DS 32 CH 46 US 46 E46 DS 33 CH 47 US 47 E47 DS 34 CH 48 US 48 E48 DS 35 CH 49 US 49 E49 DS 36 CH 50 US 50 E50 DS 37 CH 51 US 51 E51 DS 38 ...

Страница 26: ...n French Italian Spanish Portuguese Greek Swedish Finnish Polish Serbian Croatian Slovenian Czech Slovak Rumanian Hungarian German French Italian Swedish Finnish Russian Bulgarian Lettish Lithuanian Estonian Ukrainan Serbian Croatian Slovenian Czech Slovak English German Arabic Czech Slovak Hungarian English German French Italian Spanish Portuguese Swedish Finnish GROUP 1 GROUP 2 GROUP 3 GROUP 4 3...

Страница 27: ...he following connection diagram see the Specifications to choose the best VIDEO terminal Note that connecting cables are not supplied When connecting devices that are supported by AV COMPU LINK see Connecting AV COMPU LINK Supported Devices on page 29 1 VCR composite signal 2 VCR S VIDEO signal Y C 3 VCR for recording composite signal 4 DVD player composite signal 5 DVD player S VIDEO signal Y C 6...

Страница 28: ...al image source If connecting a device to the VIDEO 3 COMPONENT terminal with a video cable Connect the TV s Y VIDEO jack and the device s VIDEO OUT video output jack with a video cables Then set the VIDEO 3 SETTING to VIDEO according to VIDEO 3 SETTING on page 22 In the VIDEO 4 terminal the VIDEO jack is indicated by V 2 Connect the TV s AUDIO jacks L MONO and R and the device s AUDIO OUT au dio ...

Страница 29: ... male plugs at both ends You must connect the device to an appropriate VIDEO terminal and set it up correctly Otherwise the AV COMPU LINK remote control system will not function correctly For details see Setting up the AV COMPU LINK remote control system The TV must be in standby mode the POWER lamp lighting red If the TV s Main power is off the POWER lamp off the AV COMPU LINK remote control syst...

Страница 30: ...y think there is a problem with the TV itself Important This Troubleshooting guide only covers problems whose cause are not easy to determine If a question arise when you are operating a function read the page s corresponding to the operation of the function well not this Troubleshooting guide After you have followed the Troubleshooting description or the operating description of the functions con...

Страница 31: ...l Remote control function ZOOM PIP MULTI FREEZE and STROBE BUTTON MENU function SHARP TINT DIGITAL VNR Digipure and ZOOM Other concerns When the SLEEP TIMER function or AUTO SHUTOFF function operates the TV is automatically turned off If the TV is turned off suddenly try to press the POWER button to turn on the TV once again At this time if the TV resumes a normal state there is no problem If you ...

Страница 32: ...S VIDEO Y C input and Audio L R inputs are available VIDEO 2 terminal RCA connector X 3 Video input and Audio L R inputs are available VIDEO 3 COMPONENT RCA connector X 5 terminal Video input Component video Y CB CR input and Audio L R inputs are available Progressive video signal 525P signal input is available VIDEO 4 terminal RCA connector X 3 S VIDEO connector X 1 Video input S VIDEO Y C input ...

Отзывы: