


February 3, 2003 7:03 pm
Page 14
— 14 —
Master Page: Right
Editing with another video recorder or a
camcorder
You can use your recorder as the source player or the recording
deck. You can use a camcorder as the source player and your
recorder as the recording deck. Refer also to the other
components’ instruction manuals for connection and its
operations.
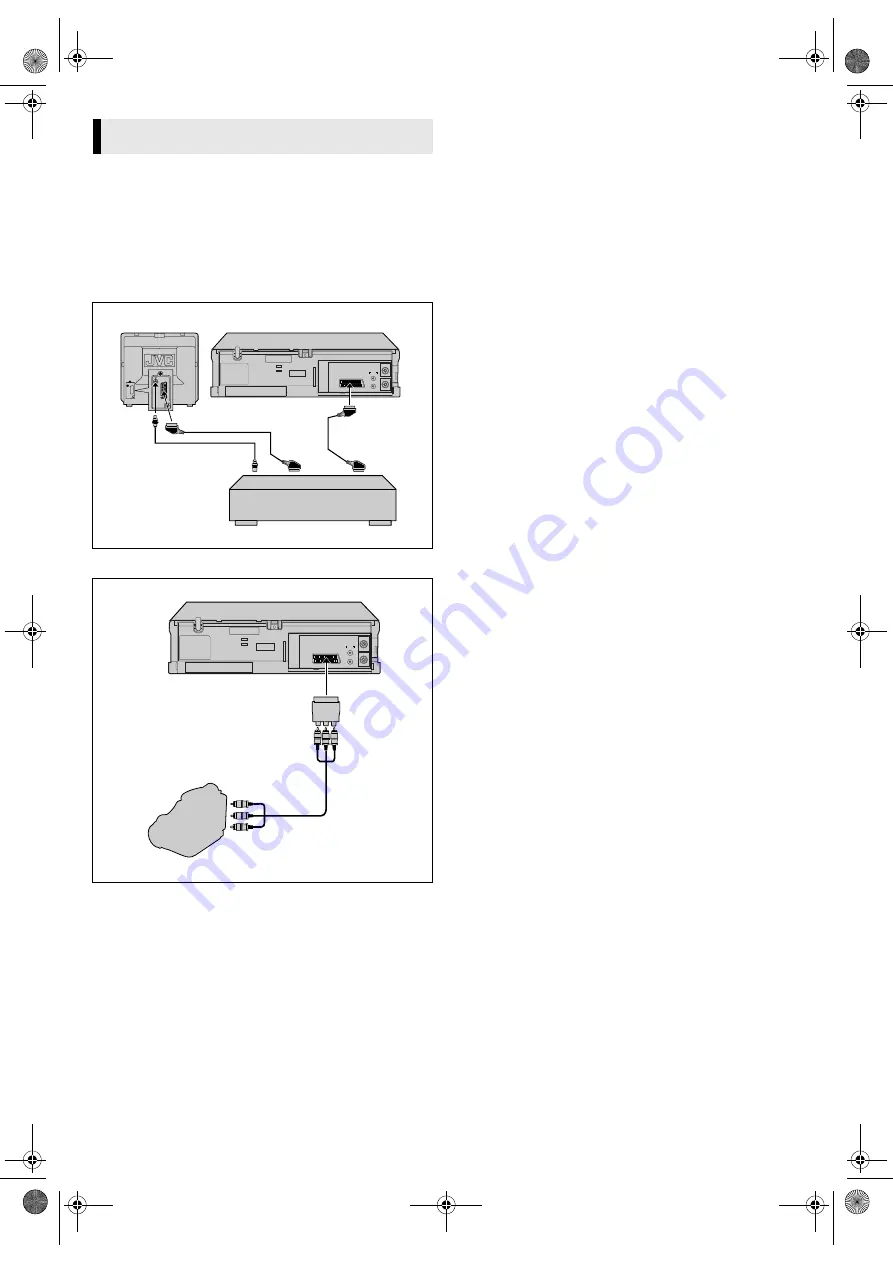
Connection with another video recorder
Connection with a camcorder
A
Make connections
Connection with another video recorder
Connect EURO AV1 AUDIO/VIDEO connector to another video
recorder.
Connection with a camcorder
Connect the camcorder’s AUDIO/VIDEO OUT connectors to the
recorder’s EURO AV1 AUDIO/VIDEO connector via a cable
adapter.
B
Load cassettes
Insert the playback cassette into the source player and the cassette
to be recorded on into the recording deck.
C
Select input mode on recording deck
Select the correct external input on the recording deck. On this
recorder, press
AV
and/or
PR+/
to select “AV1”.
D
Select edit mode
Select the appropriate edit mode for the components if such a
mode is equipped.
E
Start playback
Engage the Play mode of the source player.
F
Start recording
Engage the Record mode of the recording deck.
Editing
Video
channel or
AV mode
21-pin SCART cable
(not provided)
Player
Your recorder
Another recorder
Recorder
TV receiver
RF cable
(provided)
Your recorder
Cable adapter
(not provided)
Audio/Video cable
(not provided)
Player
Camcorder
AUDIO OUT
VIDEO OUT
HR-V500_200E-001EN.fm Page 14 Monday, February 3, 2003 7:04 PM


