2-6
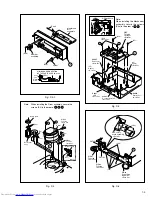
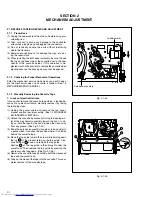
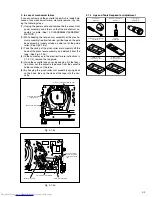
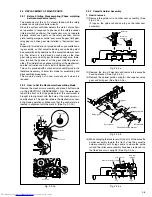
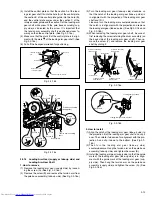
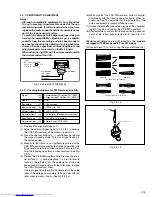
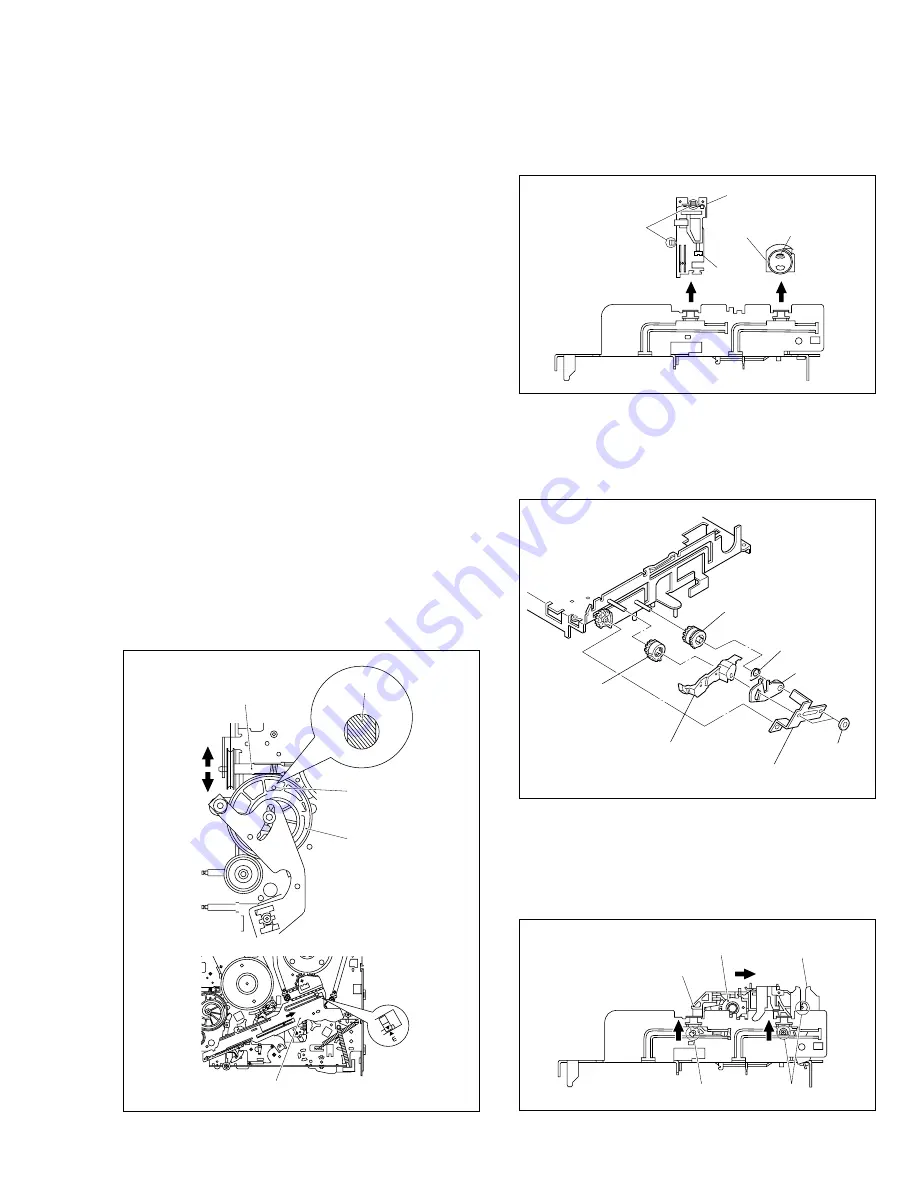
(4) While swinging the lock levers (R) and (L) of the cassette
holder assembly toward the front, slide the cassette
holder assembly until its legs come to where the guide
rail and the roller cam assembly have been removed (so
that the drive arm is upright). (See Fig.2-2-3c.)
Fig. 2-2-3c
Cassette holder assembly
Lock lever (L)
Drive arm
(Upright)
Leg
Legs
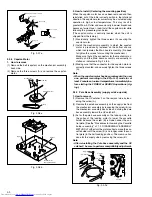
2.2.3
Cassette Holder Assembly
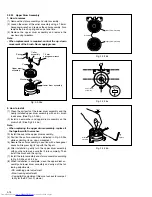
1. How to remove
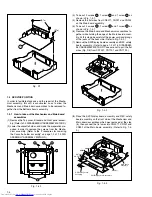
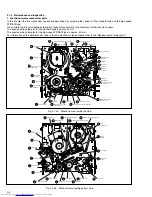
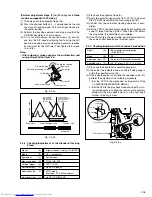
(1) Remove the guide rail and roller cam assembly. (See
Fig.2-2-3a.)
(3 lugs on the guide rail and one lug on the roller cam
assembly)
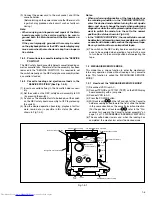
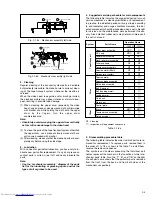
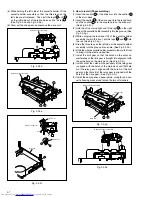
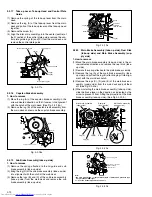
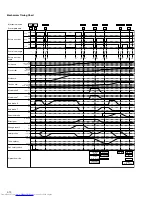
Fig. 2-2-2a
Worm gear
Guide hole
Control cam
Chassis hole
Control plate
Mark E
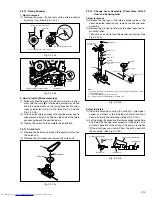
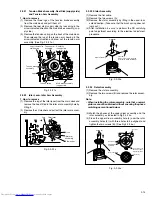
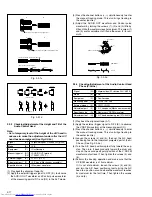
Fig. 2-2-3b
(2) Remove the two slit washers and remove the cassette
housing bracket. (See Fig.2-2-3b.)
(3) Remove the opener guide, spring(A), door opener, relay
gear and limit gear. (See Fig.2-2-3b.)
Fig. 2-2-3a
Lugs
Lug
Lug
Guide rail
Roller cam
assembly
Limit gear
Relay gear
Opener guide
Spring(A)
Cassette housing bracket
Slit washers
Door opener
2.2 REPLACEMENT OF MAJOR PARTS
2.2.1
Before Starting Disassembling (Phase matching
between mechanical parts)
The mechanism of this unit is closely linked with the rotary
encoder and system controller circuits.
Since the system controller detects the status of mechani-
cal operation in response to phases of the rotary encoder
(internal switch positions), the mechanism may not operate
properly unless such parts as the rotary encoder, control
plate, loading arm gear, control cam, cassette gear, limit gear,
relay gear and drive gear are installed in their correct posi-
tions.
Especially, this model is not provided with any cassette hous-
ing assembly, so that cassette loading and unloading must
be accomplished by operation of the cassette holder assem-
bly. The latter is in turn driven by such parts as the drive
gear, relay gear and limit gear. Exercise enough care, there-
fore, to have the phases of all this gear matching one an-
other. (For information on phase matching of the mechanism,
see the instructions on how to install individual parts.)
This unit is provided with a mechanism assembly mode. It is
therefore necessary to enter this mode for assembling and
disassembling procedures.
This mode is usually not in use, manually set it when it is
required.
2.2.2
How to Set the Mechanism Assembling Mode
Remove the mechanism assembly and place it bottom side
up. (See SECTION 1 DISASSEMBLY.) Turn the worm gear
toward the front so that the guide hole of the control cam is
brought into alignment with the hole at the mechanism as-
sembly chassis. This position renders the mechanism assem-
bling mode operational. Make sure that the control plate is
located in alignment with the mark E. (See Fig.2-2-2a.)

