GM-P420PCE
GM-P421PCE
GM-P420E
1-5
No.51953
8
Preparations
Checking the Accessories
The following accessories are included with the Monitor. Check for them. If any item is missing, please contact the dealer where
you purchased the Monitor.
• Remote control (RM-C576) x 1
• Power cord x 2 (Use the one matching the wall outlet.)
• Batteries (AA/R6P) x 2
Installing the Batteries
Put the batteries in the remote control as follows. If the remote control has become erratic in operation, change the batteries.
1
Remove the back cover.
While pushing the release lever on the cover, remove the cover in
the direction of the arrow.
2
Place the batteries.
Put the two supplied batteries (AA/R6P), noting the
ª
and
·
markings, as shown.
3
Replace the back cover as illustrated.
Make sure the release lever on the cover is locked in place correctly.
Precautions for using batteries
If batteries are used improperly, the liquid could leak out, causing a fire, injury, etc. or dirtying the vicinity.
Take notice of the following:
• Do not mix old and new batteries.
• Do not mix different types of battery as different types may have different characteristics.
• Place the batteries according to the
ª
and
·
markings indicated on the battery compartment.
• When installing the batteries, insert the
·
end first to avoid a short circuit.
• Use only the specified batteries.
• When you are not using the remote control for a long time, remove the batteries.
• When the batteries have reached the end of their life, replace them with new ones immediately. Otherwise, the liquid may leak
out, or malfunction may be caused by the leaked liquid. If the leaked liquid contacts your skin, wipe off the liquid with a soft
cloth. If the affected skin is left as is, you may get a rough skin.
• Do not throw the batteries into fire or try recharging them.
• The service life of batteries is six months to one year for normal use. The supplied batteries are only for checking the operation
and their life may be shorter. When the remote control operation becomes erratic, replace with new batteries.
The instruction below applies only to
the use in Holland.
Gebruike batterijen:
7
ENGLISH
8
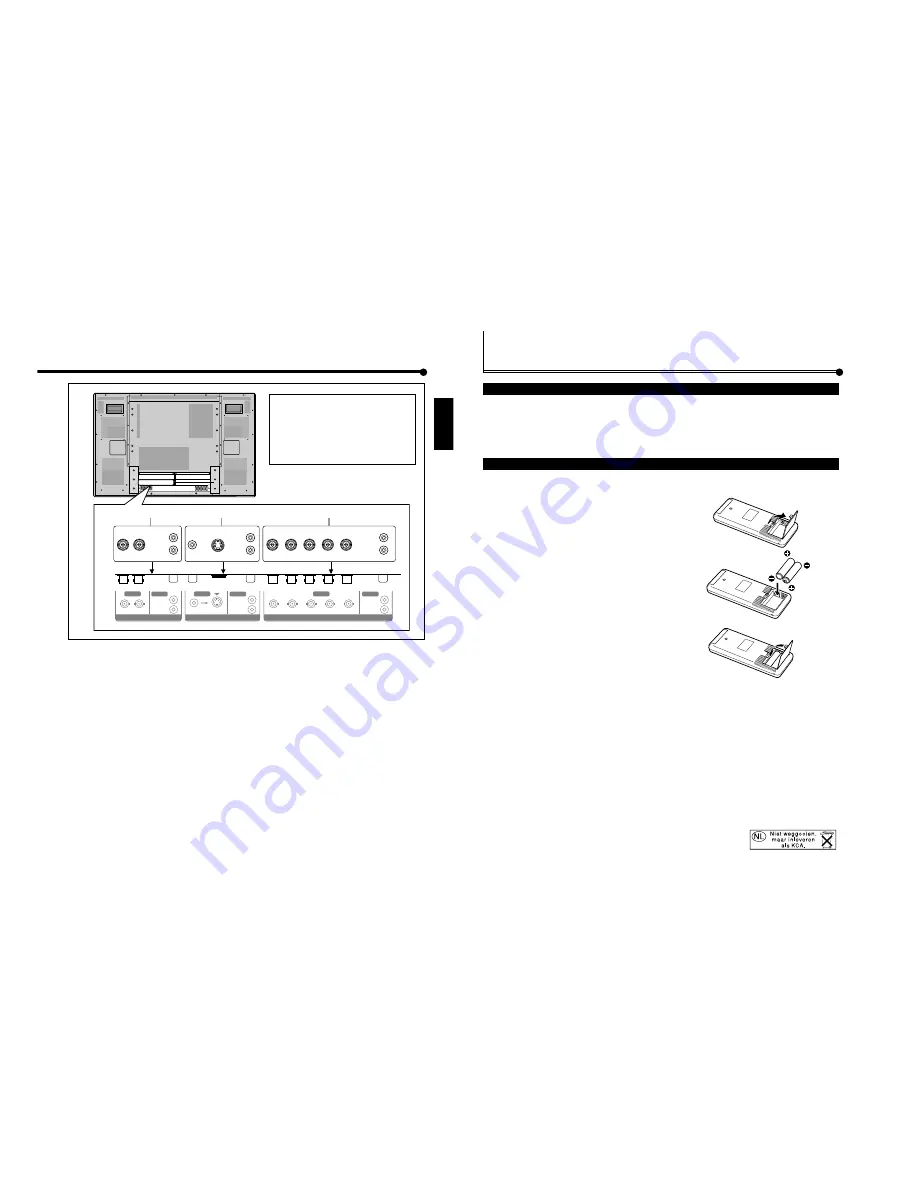
VIDEO A terminals (page 12)*
•
VIDEO IN terminal (BNC)
Connect this terminal to the video output terminal of a
VCR, etc.
•
VIDEO OUT terminal (BNC)
Connect this terminal to the video input terminal of
another Monitor.
•
AUDIO (L/MONO, R) input terminals (pin jack)
Connect these terminals to the audio input terminals of a
VCR, etc.
Note:
• Since the video output terminals on this Monitor are
loop-though terminals, the devices connected to this
video output terminal should be correctly terminated.
Otherwise, pictures become abnormally bright or the
Monitor screen gets affected abnormally.
9
VIDEO B terminals (page 12)*
•
Y/C (S video) IN terminal (mini DIN 4pin)
Connect this terminal to the S-video output terminal of a
VCR, etc.
•
VIDEO IN terminal (pin jack)
Connect this terminal to the video output terminal of a
VCR, etc.
•
AUDIO (L/MONO, R) input terminals (pin jack)
Connect these terminals to the audio output terminals of
a VCR, etc.
Note:
• When both the video and S-video terminals are
connected, the S-video terminal will have priority.
p
COMPONENT/RGB B input terminals (page 12)*
•
R, G, B, HD/Cs, VD (VIDEO) input terminals (BNC)
Connect these terminals to the following output
terminals of a personal computer or other equipment:
– Analog RGB signal output terminals
– Horizontal sync (HD) signal or composite (Cs) signal
output terminal
– Vertical sync (VD) signal output terminal
Notes:
• External sync signals are automatically detected when
they come in.
• When both horizontal (HD)/vertical (VD) sync and
composite (Cs) sync are connected, HD/VD sync signals
will be used.
•
Y, Pb, Pr (VIDEO) input terminals (BNC)
Connect these terminals to the component signal output
terminals of NTSC or high-vision equipment.
Note:
• When these terminals are used as the component
terminals (Y, Pb, Pr)—see “Setting the COMPONENT/
RGB B Input” on page 23, external sync signals (HD/Cs,
VD) cannot be used.
•
AUDIO (L/MONO, R) input terminals (pin jack)
Connect these terminals to the audio output terminals of
the other equipment.
Note:
* GM-P420PCE and GM-P421PCE do not have
the following input terminals—VIDEO A,
VIDEO B, and COMPONENT/RGB B. To
input video, S-video, and component
signals, you need to install video input unit
(IF-C422P1G), which is separately
purchased.
VIDEO A
AUDIO
VIDEO
IN
OUT
L/MONO
R
VIDEO B
AUDIO
VIDEO
IN
Y/C IN
L/MONO
R
COMPONENT/RGB B
AUDIO
VIDEO
Y/G
Pb/B
Pr/R
HD/Cs
VD
L/MONO
R
8
9
p


