No.51666
DLA-M4000LU
DLA-M4000LE
56
Setting Up (or Changing) User Sources (Cont.)
Submenu item [USER SOURCE SET UP]
Operating the Main Menu (Cont.)
■
Remote control unit
■
Main menu
Note
• The selected item is shown in magenta color. Items shown
in gray color cannot be operated or set in the current mode.
MEN
U/E
N
T
E
R
QUICK
ALIGN.
AV HIDE
OPERATE
PRESET
AV
SHIFT
ZOOM
FOCUS
LENS
U
T
+
D
W
–
RGB/COMPUTER
LENS
LOCK
UNLOCK
PAGE BACK
6
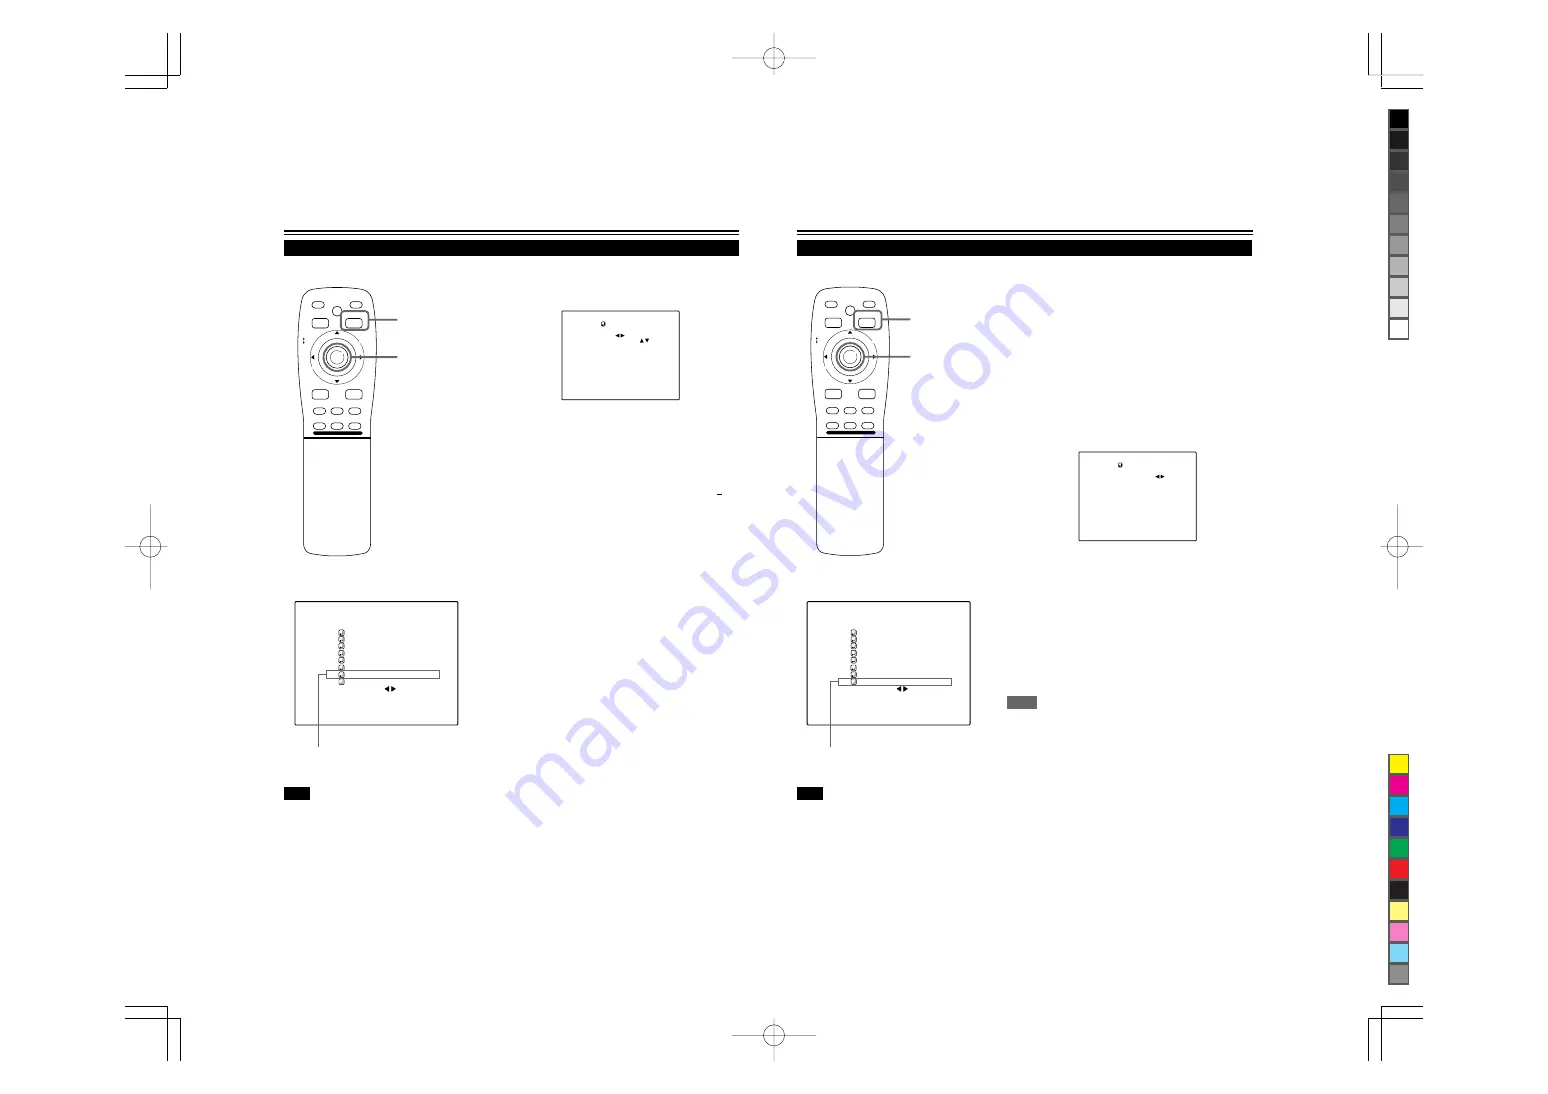
Press the MENU/ENTER button to set.
• The “USER NAME setup menu” is displayed.
PAGE BACK button
MENU/ENTER button
(USER NAME setup menu)
1. Press MENU/ENTER toward the
2
or
3
mark to select
positions where to enter characters.
2. Press MENU/ENTER toward the
5
or
∞
mark to select
positions where to enter characters.
• You can select any characters from A to Z, 0 to 9, _ and
space.
3. Press MENU/ENTER toward the
5
or
∞
mark to select
positions where to enter characters.
• The display returns to the “USER SOURCE SETUP” screen.
• To delete a user name, overwrite the user name with spaces.
However, if this user name area is registered as a source to
any other channel on the “CHANNEL setup
•
selection” menu,
or if this user name area is selected in AUTO mode or
dedicated (forced) mode, the user name cannot be deleted.
The user name before change will be displayed.
• Up to 9 characters can be entered.
N T S C ( 4 8 0 i )
E N G L I S H
P I X E L C L O C K
P O S I T I O N
P I C T U R E
O P T I O N S
S O U R C E
C H A N N E L
U S E R S O U R C E S E T U P
D I S P L A Y S I Z E
D E C O D E R
L A N G U A G E
C O M P 1
A U T O
S X G A 1
U S E R N A M E
777777777
57
Setting Up (or Changing) the Display Size
Operating the Main Menu (Cont.)
■
Remote control unit
■
Main menu
Note
• The selected item is shown in magenta color. Items shown
in gray color cannot be operated or set in the current mode.
MEN
U/E
N
T
E
R
QUICK
ALIGN.
AV HIDE
OPERATE
PRESET
AV
SHIFT
ZOOM
FOCUS
LENS
U
T
+
D
W
–
RGB/COMPUTER
LENS
LOCK
UNLOCK
PAGE BACK
In this section, the number of horizontal effective dots and that of
vertical effective lines of the source being input are set.
1
Press the MENU/ENTER button.
• The main menu appears on the screen.
2
Press MENU/ENTER toward the
5
or
∞
mark to select a submenu item,
“DISPLAY SIZE”.
• The selected item (text display) is shown in magenta color.
3
Press the MENU/ENTER button to set.
• A submenu item, “DISPLAY SIZE adjustment menu”, appears
on the screen.
PAGE BACK button
MENU/ENTER button
(DISPLAY SIZE adjustment menu)
4
Press MENU/ENTER toward the
5
or
∞
mark to select an item to be adjusted.
• The selected item (text display) is shown in magenta color.
5
Press MENU/ENTER toward the
2
or
3
mark to adjust the item.
• To adjust other items, repeat steps 4 and 5.
H P I X E L
V P I X E L
H C E N T E R
V C E N T E R
D I S P L A Y S I Z E
( U S E R 1 )
1 1 5 2
8 7 0
6 0
2 4
Submenu item [DISPLAY SIZE]
Memo
• It is recommended that you perform adjustments in the following order:
1. Adjustment of H PIXEL and V PIXEL
2. Automatic adjustment of QUICK ALIGNMENT
3. Adjustment of H CENTER and V CENTER
N T S C ( 4 8 0 i )
E N G L I S H
P I X E L C L O C K
P O S I T I O N
P I C T U R E
O P T I O N S
S O U R C E
C H A N N E L
U S E R S O U R C E S E T U P
D I S P L A Y S I Z E
D E C O D E R
L A N G U A G E
C O M P 1
A U T O
S X G A 1


