25
④
Rotate the J-DIAL clockwise for outer direction or counterclockwise
for inner direction to move the #2 variable range marker. The actual
target distance appears on the center top of the screen in selecting unit.
To turn off the #2 VRM, selects the FUNCTION-#2 VRM-OFF on the
menu sheet.
(4) Using cursor
Touch the JOYSTICK, cross cursor appears on the screen. The cross mark
will be move any direction by using the JOYSTICK and the range and bear-
ing and Time-To-Go data and Lat/Loug of the cursor position will be dis-
played on the lower right corner on the display.
It is necessary to connect with the equipment of the outside of NAV-AID,
COMPASS for these displays. (Refer to 3.6.2)
Then, it sets BEARING to “T”. (Refer to 4.18) It isn’t possible to go if not
setting POSITION to “LL”. (Refer to 4.16)
The cross cursor and cursor data will disappear in approximately 8 seconds.
4.12 BEARING MEASUREMENT
(1) Using the bearing scale
Using the bearing scale on the screen, visually estimate the bearing where
the radial line of the bearing scale would pass through the center of the
target. The bearing you obtain will be the target’s relative bearing in de-
grees.
(2) Using #1 EBL
Press the EBL/VRM key.
If VRM is highlighted, press and hold the EBL/VRM key to change to EBL
mode.
Rotate the J-DIAL clockwise or counterclockwise to move the electronic
bearing line to the center of the target. Target bearing appears on the center
top of the screen in degrees. Bearing may be displayed in relative “R”, true
“T”, or magnetic “M” depending on the menu selection.
To turn off the EBL, press the EBL/VRM key while EBL is highlighted.
(3) Using #2 EBL
①
Press the JOYSTICK.
②
Selects FUNCTION menu, then press the JOYSTICK.
OPERATION
Содержание Radar 3000
Страница 1: ......
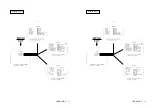
Страница 15: ...8 INSTALLATION FIG 3 1 GENERAL SYSTEM DIAGRAM 8 INSTALLATION FIG 3 1 GENERAL SYSTEM DIAGRAM...
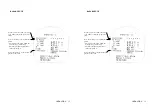
Страница 38: ...31 OPERATION MENU ENT Spanish Menus 31 OPERATION MENU ENT Spanish Menus...
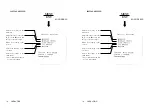
Страница 39: ...32 OPERATION MENU ENT Norwegian Menus 32 OPERATION MENU ENT Norwegian Menus...
Страница 55: ......


