4
5
Always place and store the appliance away from heat, sunlight, moisture, sharp objects and similar
items.
PRECAUTIONS
To avoid risk of electric shock, do not immerse the appliance, its power cord or any of its parts in
water or any other liquid.
If the appliance or the power cord display visible signs of damage, immediately unplug the appliance
from the electrical outlet and do not use it.
Do not use the appliance outdoors.
Do not place it on excessively hot surfaces.
Do not handle or move the product when it is in use or when it contains very hot water.
Remove the power cord when the product is not in use and before cleaning it.
Make sure that the bottle or food jar to be placed in the appliance is at a safe temperature before
proceeding to heat it.
This appliance is intended exclusively for domestic use.
Do not immerse the appliance in water
The bottle warmer is for heating foods but not for cooking them. The recommended temperature
is 37°.
USE OF THE PRODUCT
1- First of all clean the appliance and its part/accessories, as indicated in the paragraph below.
2- Place the appliance on a flat, stable surface, out of children’s reach, where there is no risk of it
being accidentally bumped while in use.
3- Plug the power cord into the electrical outlet.
4- Remove the measuring cup from its housing and fill it with water for heating the bottle or food jar.
Fill the measuring cup to half for a bottle or food jar between 120ml and 250ml.
5- Then pour the measured water in the heater chamber. Never fill the chamber completely. If too
much water is used, the bottle could heat for too long with the risk of it becoming too hot.
6- The LED lamp will light up. The heating cycle then begins.
Warning: Do not put your hands on or into the chamber while the appliance is being used (i.e.
while heating) .
7- The appliance will automatically switch off when the heating cycle is complete.
8- Before feeding your baby, shake the bottle or food jar and check that the contents are at the
desired temperature.
9- After using the appliance, wait for about 15 minutes for the heating element to cool down, before
using it once more.
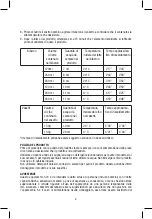
Bottle
Volume of
milk (ml) in
the bottle
Required
quantity of
water
Initial tempera-
ture of milk in
the bottle
Approximate heating
time
120ml
7 ml
20° C
2’17”
2’03”
240 ml
8 ml
20° C
2’44”
2’50”
230 ml
8 ml
20° C
3’16”
3’50”
120 ml
10 ml
4° C
2’44”
2’50”


