background image


Jotron AS| Phontech 6200: Call Logging Unit 

 Web Interface  

Page 1-1 

P/N: 89459 (v.A) 

1


WEB INTERFACE 


1.1


LOGGING ON TO THE CALL LOGGING WEB INTERFACE 

 
The call logging interface can be reached through any modern web browser. First we must locate the 
address of the storage unit that is currently used for call logging.  
 
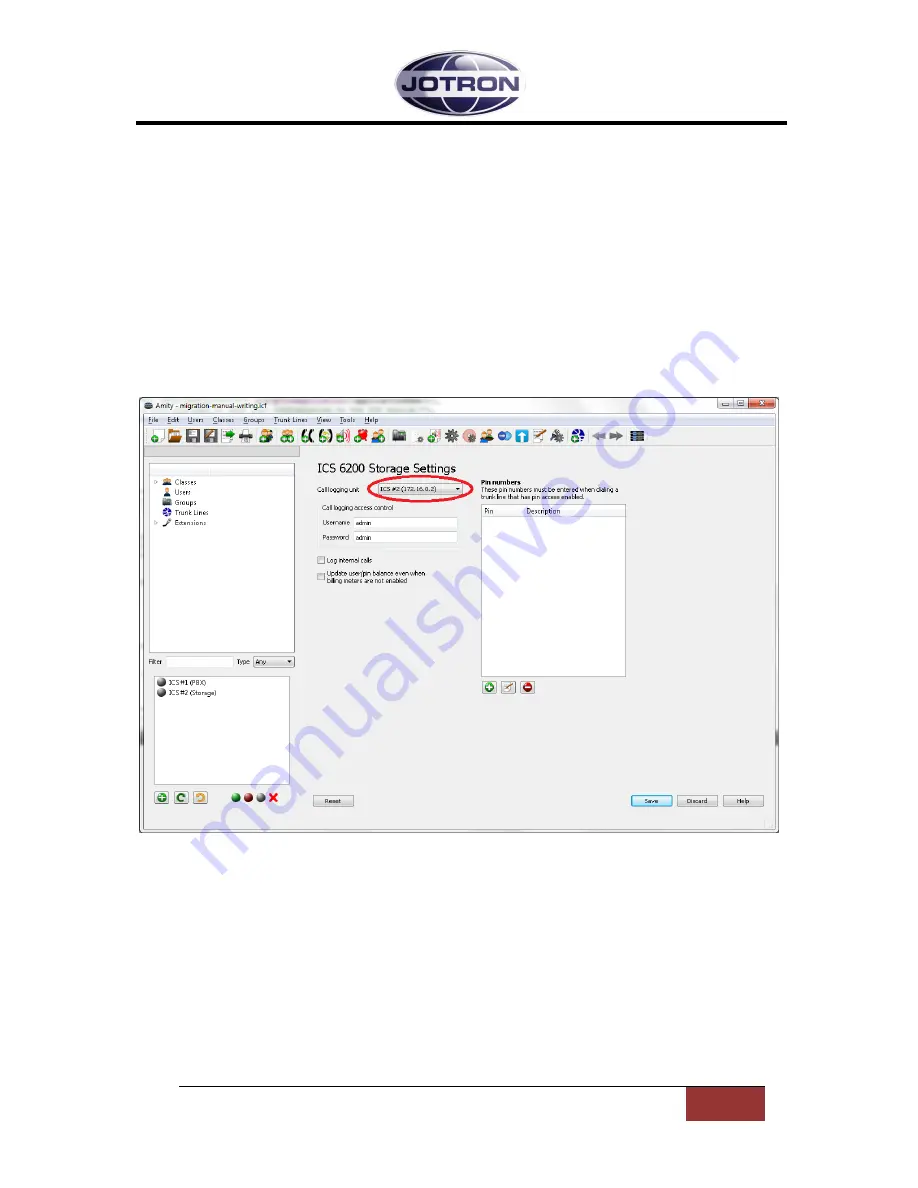
This address can be either in the Phontech 6200 Configuration Application found under the Phontech 
6200 Storage Settings that is described in the Installation Manual. The address we are looking for can 
be found in the “Call logging unit” dropdown box as seen on the picture below. 


Figure 1 - Location of Selected Storage Unit 

 
You can also find the address of the call logging unit by looking in the “Information” menu on the 
front panel display on the physical unit. Click any of the navigation buttons to clear the “Jotron” logo 
and click the “Enter” button when you are at the “Information” menu item. Then click “Enter” again 
on the “Number and IP” item. The address will now be displayed on the screen. 
 
Once we have found the address we can access the call logging web interface by entering this 
address into a modern web browser. You will be greeted with a username and password prompt 
where you have to enter the username and password that has been configured in the Phontech 6200 
Storage Settings. The default username and password are both “admin”. 
 

Содержание Phontech 6200

Страница 1: ......

Страница 2: ...Phontech 6200 Call Logging Unit Page ii P N 89459 v A Amendment Record NO INIT DATE CHAPTERS VERSION REASON FOR CHANGE 0 K A T 01 09 14 All A Initial release 1 2 3 4 5 6 7 8 9 10 11 12 13 14 15 16 17...

Страница 3: ...ieved to be accurate However no responsibility is assumed for inaccuracies Jotron AS reserves the right to make changes without further notice to any products or modules described herein to improve re...

Страница 4: ...ON TO THE CALL LOGGING WEB INTERFACE 1 1 1 2 USERS PINS PAGE 1 2 1 2 1 USERS 1 2 1 2 2 PINS 1 3 1 2 3 EXPORT OF USERS AND PINS 1 4 1 2 4 IMPORT OF BALANCES 1 4 1 3 INDIVIDUAL USER AND PIN PAGES 1 5 1...

Страница 5: ...he picture below Figure 1 Location of Selected Storage Unit You can also find the address of the call logging unit by looking in the Information menu on the front panel display on the physical unit Cl...

Страница 6: ...account The list can be navigated in by either using the search box in the top right of the list or by using the arrows or page numbers at the bottom right of the list All of the users in the user lis...

Страница 7: ...e navigated in the same way as the user list by either searching in the upper right corner or using the page numbers and buttons at the bottom right corner of the list The PINs list contains a button...

Страница 8: ...lues CSV by clicking the corresponding button in the Export section When the button is clicked a download dialog with the selected format will appear and you can select where to save the exported data...

Страница 9: ...ious and next buttons at the bottom right of the list Figure 5 Details for User 101 The columns in the call log are as follows Date Time The date and time when the call was initiated Source The user t...

Страница 10: ...of August One month prior This option will take us one month back from the current month So if the current date is 15th of September it will generate a report from the 15th of August to the 15th of S...

Страница 11: ...Duration The number of seconds the user was in the call Billed The number of seconds that should be billed for the call This does not include the time taken by the user to dial or enter a pin number...

Страница 12: ...wo lists on this page by clicking the check boxes in the left most column After the user or PIN has been selected you can enter the number of credits that you want to add in the Amount to add spin box...

Страница 13: ...ling rates can be found in the list at the top of this page The list can be navigated with the buttons and page numbers in the bottom right corner of the list To remove a configured rate select it by...

Страница 14: ...x in the Add billing rate section You then enter the desired rate in the box below it This rate will be the cost of a call pr minute If you want to match a single number simply enter the number in the...

Страница 15: ...e exported XML format The import function will only add additional or change existing rates It will not delete any configured billing rates 1 7 SETTINGS PAGE In the Settings page you can get an overvi...

Страница 16: ...s into a file that can later be restored by the Restore function The actual call records are not stored in the file and cannot be restored later You can also perform a factory reset by clicking the Fa...

Страница 17: ......

Отзывы: