4
Operation
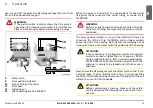
You can now lift the pivot and clamping nut together, turn them
90° and then deposit them again.
WARNING!
If the pivot position indicator shows that the pivot is
open when the container is mounted, it is vital that you
close the lock properly before commencing a journey.
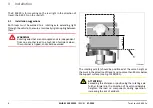
8
9
10
11
12
13
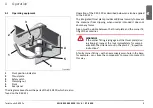
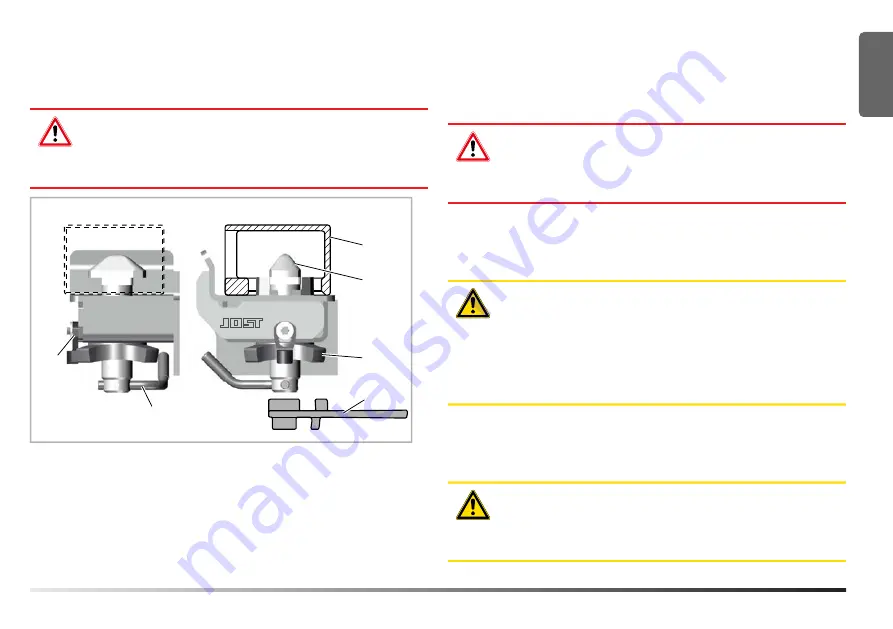
TL403/006
8
Safety catch
9
Pivot position indicator
10
Corner fitting of container
11
Pivot head
12
Clamping nut
13
JOST operating key 915.259.000
When the pivot is rotated 90°, the underside of its head must
lie against the base panel of the corner fitting, as shown in Fig.
TL403/006.
WARNING!
Perform a visual inspection through the hole in the side
of the corner fitting, and make sure the pivot is correctly
positioned.
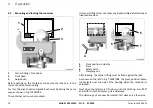
The pivot position indicator is now in the direction of travel, as
shown on the left in of Fig. TL403/006, and no longer projects
above the side of the housing. Next, tighten the clamping nut by
hand until it comes into contact with the underside of the housing.
ATTENTION!
If the container is to be tipped as well as transported
normally on roads, tighten the nut to approx. 100 Nm
using a suitable tool (e.g. JOST universal operating key
915.259.000). We also recommend using this tool if the
container is simply to be loaded and its further use is
unknown.
Next, secure the clamping nut with the safety catch so that it can-
not work loose. To do so, fold the catch down. If you cannot bring
the catch into its locked position because of the position of the nut,
slacken the nut until this is possible.
ATTENTION!
Before commencing a journey, make sure the safety
catch is closed and the clamping nut is secured so it can-
not turn.
EN
Twist Locks R 403 Fx
MUB 013 005 M30
(REV-B)
07-2020
11


