background image

English – 

19

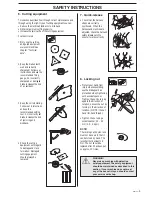
ASSEMBLY

• Fit the appropriate

guard (A) for use with
the trimmer head. Hook
the guard onto the shaft
fitting and secure it with
the bolt (L).

• Fit the disc drive (B) on

the output axle.

• Turn the blade axle until

one of the disc drive’s
holes aligns with the
corresponding hole in
the gear housing.

• Insert the locking pin

(C) into the hole to lock
the axle.

• Screw on the trimmer

head (H) in the
direction of rotation.

• Dismantling takes place

in the reverse order.

Assembling other guards and
cutting equipment

H

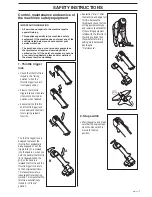
Adjusting the harness and clearing
saw

Quick release

On the front is an easily
accessible, quick release
catch. Use this if the engine
should catch fire or in any
other emergency situation
when you quickly need to
take off the harness and
machine.

Even load on the
shoulders

A well-adjusted harness and
clearing saw significantly
facilitates working. Adjust
the harness for the best
working position. Tension
the side straps so that the
weight is evenly distributed
across the shoulders.

Correct height

Adjust the support strap so
that the cutting attachment
is parallel to the ground.

Correct balance

The cutting attachment
should rest lightly on the
ground. If you use a saw
blade it should balance
about 10 cm above the
ground to prevent contact
with stones and the like.
Adjust the position of the
support strap attachment
ring to balance the clearing
saw correctly.

!

WARNING!
When working with the clearing saw it
should always be hooked in the harness.
If this is not done, you cannot control the
clearing saw safely and this can result in
injury to yourself or someone else. Never
use a harness with a defective quick
release catch.

Содержание GR 2126D

Страница 1: ...Operator s manual EPA Please read these instructions carefully and make sure you understand them before using the machine ...

Страница 2: ...tor of the machine shall ensure while working that no persons or animals come closer than 15 metres Machines fitted with clearing or grass blades can be thrown violently to the side when the blade comes into contact with a fixed object The blade can cause the amputation of arms and legs Always keep people and animals at least 15 metres from the machine Arrows which show limits for handle mounting ...

Страница 3: ... Filing the grass blade 25 Sharpening the clearing blade 26 Maintenance schedule 26 TECHNICAL DATA GR2126D 27 EMISSION CONTROL WARRANTY STATEMENT Your warranty rights and obligations 28 Jonsered has a policy of continuous product development and therefore reserves the right to modify the design and appearance of products without prior notice WARNING Under no circumstances may the design of the mac...

Страница 4: ...en fatal injury to the operator or others It is extremely important that you read and understand the content of this manual When using a clearing saw brushcutter or trimmer protective equipment approved by the appropriate authorities must be used Personal protective equipment does not eliminate the risk of accidents however it can reduce the effects of an injury in the event of an accident Ask you...

Страница 5: ... the proper parts can cause the blade to fly off and seriously injure the operator and or bystanders Under no circumstances may the cutting equipment be used without an approved guard fitted See the chapter Technical data If the wrong guard or a defective guard is fitted this can cause serious personal injury WARNING Over exposure to vibrations can result in blood vessel or nerve injury to persons...

Страница 6: ...maintenance and service of the machine s safety equipment 7 Cutting equipment 1 Clearing blades are intended for cutting wood 2 Grass blades are intended for brush cutting 3 The trimmer head is intended for trimming grass 2 1 3 8 Locking nut A locking nut is used to secure some types of cutting equipment on the output shaft WARNING Mufflers fitted with catalytic converters become extremely hot dur...

Страница 7: ...y locked in its idling position Control maintenance and service of the machine s safety equipment IMPORTANT INFORMATION All service and repairs to the machine require special training This applies especially to the machine s safety equipment If the machine does not meet any of the controls listed below you should contact your service workshop The purchase of one of our products guarantees that pro...

Страница 8: ...that has a defective muffler 2 Check regularly that the muffler is secure 3 If your muffler is fitted with a spark arrest screen then it should be cleaned regularly A blocked screen leads to the engine overheating with serious damage as a result Never use a muffler with a defective spark arrest screen 4 Vibration damping system Check the vibration damping element regularly for material cracks and ...

Страница 9: ...our instructions and use the recommended setting tool An incorrectly set blade increases the risk of jamming and kickback 4 Check the cutting equipment with regard to damage and crack formation Damaged cutting equipment should always be replaced WARNING Never use a machine with defective safety equipment The safety equipment should be maintained as described in this section If your machine does no...

Страница 10: ...of the cord it can be soaked in water for a few days This will make the line tougher and it will keep longer Sharpening the clearing blade See the cutting equipment s packaging for correct filing instructions A correctly sharpened blade is a prerequisite for working efficiently and to avoid unnecessary wear to the blade and clearing saw Make sure that the blade is well supported when you use the f...

Страница 11: ...ne is started otherwise the clutch can become loose and cause personal injury Never start the machine indoors Bear in mind the dangers of inhaling the engine s exhaust fumes Observe your surroundings and make sure that there is no risk of people or animals coming into contact with the cutting equipment Place the machine on the ground ensure the cutting equipment runs free of twigs and stones Push ...

Страница 12: ...affect a tree s direction of fall etc 3 Make sure you can walk and stand safely Look out for any obstacles with unexpected movement roots stones branches pits ditches etc Take great care when working on sloping ground IMPORTANT INFORMATION This section covers basic safety precautions for working with brushcutters and trimmers If you encounter a situation where you are uncertain how to proceed you ...

Страница 13: ...gine should catch fire or in any other emergency situation when you quickly need to take off the harness and machine Even load on the shoulders A well adjusted harness and clearing saw significantly facilitates working Adjust the harness for the best working position Tension the side straps so that the weight is evenly distributed across the shoulders Correct height Adjust the support strap so tha...

Страница 14: ...k of injury The bevel gear unit can get hot during use and may remain so for a while afterwards There is a risk of slight burns if you touch it WARNING Beware of thrown objects Always wear eye protection Never lean over the guard Stones rubbish etc can be thrown up into the eyes resulting in blindness or other serious injury Keep unauthorised persons at a distance Children animals onlookers and he...

Страница 15: ...n trimming and clearing you should use less than full throttle so that the cord lasts longer and to reduce the wear on the trimmer head Trimming The trimmer is ideal to cut grass that is difficult to reach using a normal lawn mower Keep the cord parallel to the ground when cutting Avoid pressing the trimmer head against the ground as this can ruin the lawn and damage the tool Do not allow the trim...

Страница 16: ...anging ring 11 Cylinder cover 12 Starter handle 13 Fuel tank 14 Choke 15 Air purge 16 Air filter cover 17 Clutch cover 18 Handlebar adjustment 19 Locking nut 20 Support flange 21 Support cup 22 Drive disc 23 Trimmer head 24 Socket spanner 25 Operator s Manual 26 Transport guard 27 Allen key 28 Locking pin 29 Harness 30 Spray guard 31 Blade guard 28 30 27 29 31 J O N S E R E D S E R V I C E ...

Страница 17: ... shaft and secure with 1 bolt NOTE Use the recommended blade guard See Technical data Fit the drive disc B on the output axle Turn the blade axle until one of the holes in the drive disc aligns with the hole in the gear housing Insert the locking pin C in the hole so that the axle is locked Place the blade D support cup E and support flange F on the output axle Fit the nut G The tightening torque ...

Страница 18: ... trimmer head Tap n go Pro K J I G F I A K B C trimmer guard as possible The nut is tightened when the spanner is turned against the direction of rotation left hand thread Fit the trimmer head s bottom section K on the cover I by pressing the two sections together with the cut outs on the bottom section aligned with the catches on the cover To dismantle follow the instructions in the reverse order...

Страница 19: ...to take off the harness and machine Even load on the shoulders A well adjusted harness and clearing saw significantly facilitates working Adjust the harness for the best working position Tension the side straps so that the weight is evenly distributed across the shoulders Correct height Adjust the support strap so that the cutting attachment is parallel to the ground Correct balance The cutting at...

Страница 20: ... especially when handling the saw near flammable substances or vapours Fuelling WARNING The following precautions reduce the risk of fire Do not smoke or place any sources of heat in the vicinity of the fuel Never refuel when the engine is running Always stop the engine and let it cool for a few minutes before refuelling Open the fuel cap slowly when fuelling so that any over pressure is released ...

Страница 21: ...et the choke control in the choke position The start throttle position is obtained by setting the choke control in the choke position and then returning it to its original position Never use the machine without a guard or spray guard nor with a defective guard WARNING The complete clutch cover with shaft must be fitted before the machine is started otherwise the clutch can become loose and cause p...

Страница 22: ...the carburettor should be finely adjusted Fine adjustment should be carried out by a skilled technician NOTE If the cutting attachment rotates moves in the idling position turn the idling speed screw counter clockwise until the blade stops Rec idling speed 2700 rpm Recommended max speed See Technical Data WARNING The complete clutch cover with shaft must be fitted before the machine is started oth...

Страница 23: ...otate move CAUTION Contact your servicing dealer if the idle speed setting cannot be adjusted so that the cutting attachment stops Do not use the machine until it has been properly adjusted or repaired High speed needle H The high speed needle affects the machine s power speed temperature and fuel consumption A too lean adjustment on the high speed needle H the high speed needle H is screwed in to...

Страница 24: ...achine is fitted with this type of screen it should be cleaned regularly This is done using a wire brush On mufflers without a catalytic converter the screen should be cleaned weekly or replaced if necessary On mufflers fitted with a catalytic converter the screen should be checked and cleaned monthly If the screen is damaged it should be replaced If the screen is frequently blocked this can be a ...

Страница 25: ...aging for correct filing instructions The blades are sharpened using a single cut flat file Sharpen all edges equally to maintain the balance of the blade Filing the grass blade Cleaning the air filter Dismantle the air filter cover and remove the air filter Wash in clean warm soapy water Ensure that the filter is dry before refitting An air filter used for a long period of time can never be clean...

Страница 26: ...otate at idling Clean the exterior of the machine Check that the harness is undamaged Check the blade guard for damage or cracks Change the guard in case of impacts or cracks Check that the blade is properly centred sharp and without cracks Check the trimmer head for cracks and chips or damage Replace if necessary A non balanced blade trimmer head induces heavy vibrations that may damage the machi...

Страница 27: ...dles max At max speed left right handles min At max speed left right handles max GR2126D 1 50 24 5 1 26 32 1 06 27 11 000 11 700 2 700 8 014 0 9 kW 9 000 rpm No Yes Walbro MB Champion RCJ 7Y NGK BPMR 7A 0 02 0 5 Zama C1Q 1 06 0 5 9 9 4 5 91 97 1 1 1 0 1 6 1 9 1 5 1 3 5 5 3 5 Approved accessories GR2126D Centre hole in blades Ø 25 4 mm Threaded blade axle M10 Grass blade Trimmer head Plastic knifes...

Страница 28: ... from efects in materials and workmanship which cause the failure of a warranted part for a period of two years WHAT IS COVERED REPAIR OR REPLACEMENT OF PARTS Repair or replacement of any warranted part will be perfor med at no charge to the owner at an approved Jonsered servicing dealer If you have any questions regarding your warranty rights and responsibilities you should ontact your nearest au...

Страница 29: ...English 29 1 Poly Trim 2 3 4 5 6 7 8 20mm 20mm B A 6 Nm X 10 ...

Страница 30: ...30 English 1 Trimmy H II 2 3 4 5 6 7 8 9 7 5 m 25 2 0 2 4 mm 080 095 1 2 15 cm 6 3 7 m 12 15 cm 6 xre 5 ...

Страница 31: ...English 31 1 Tap N Go Pro 2 5 6 7 8 9 10 12 Click 3 4 7 5 m 25 2 0 2 4 mm 080 095 15 cm 6 3 7 m 12 1 2 11 15 cm 6 15 cm 6 ...

Страница 32: ...2002W11 xre 5 108 88 26 95 ...

Отзывы: