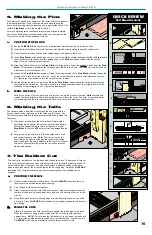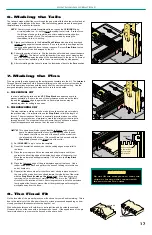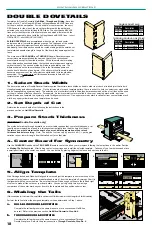
JOINT MAKING OPERATIONS
HALF B LI N D DOVETAI LS
Begin by selecting the template and corresponding bit for your joinery
project. If your template selection is a variably spaced pattern, you will also
need the equally spaced template for the same bit diameter to use in setting
the depth of cut.
The following procedure is the same for all types of dovetails. To have a
perfectly fitting dovetail, regardless of the type, the depth of cut is critical.
Every dovetail bit has its own unique depth of cut which is dependent on all
three of the following parameters:
1.
Diameter of the bit
2.
Degree of angle of the cut
3.
Spacing of the cuts
Router bits will vary slightly in diameter and degree of cutting angle due to
manufacturing tolerances. For a given pattern spacing, the depth of cut for
the desired fit must be determined by trial and error. The depth of cut for all
patterns using the same router bit, whether equally spaced or variably
spaced, is the same.
Therefore, you will find it easier to use the equally
spaced template to make your test cuts. Set the bit height to the approxi-
mate setting shown on the selected template plan page. Install the equally
spaced template for the bit size.
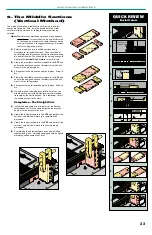
Position your fence as shown in the illustration so that about half of the bit is
inside the fence opening (or profile insert if used). Slide template to align a
BLACK line under the hairline cursor.
Using two scrap pieces of wood clamped vertically to the Vertical Push
Fixture, make two or three cuts following the series of BLACK template
settings. Once completed, test the fit of the two pieces together. If they
cannot fit together or are too tight you need to lower the bit height. If the
fit is too loose you need to raise the bit height. Repeat this procedure until
the desired fit is achieved.
You MUST arrive at the proper depth of cut by trial and error.
NOTE:
It requires very little change of the bit
height to affect the fit.
Mark one of the final test pieces to identify the bit. Save the piece to be
used as a setup gauge for the next time that you want to make the same
size joint. This will save you a lot of time when doing trial and error setups.
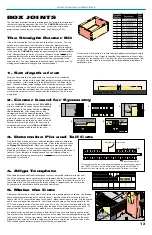
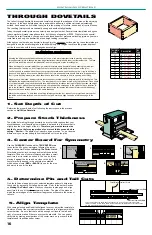
1. Setting depth of cut for Dovetails
2. Center board for Symmetry
Use the CLINCHER
Rabbit and the TRU-CENTER
scale to center the bit on your workpiece following the
instructions in the earlier Section on
Making The
Perfect Joint. After finding center, lock carriage and
install the selected template. Take one of your
workpieces and place a small pencil mark at its
center on one end. You can do this by placing it
against the fence and up close to the bit. This center
mark will be used in the next step to establish which
series of cuts (RED or BLACK) to use for the pins
and which to use for the tails.
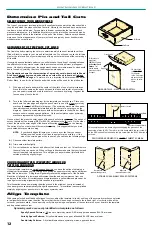
3. Determine Pin and Tail Cuts
Find the full size plan page for your selected template pattern to determine
the choice for a properly cut tail and pin board. Refer to the earlier Section
on
Making The Perfect Joint. Place your board onto plan page and align
pencil mark to one of the lower
center cut marks. The side of the plans
which the outer edges of the board overlap grooves will become the series of
Tail cuts. If your template is variably spaced you can obtain a different
appearing joint by aligning pencil mark to an upper
center cut mark before
assignment of cut series.
4. Align Template
With carriage locked and
Rabbit still aligned to cursor, adjust the template in
its slot until one of the
symmetry marks you selected is in alignment with the
cursor hairline. Be sure that there will be enough cut lines to the left and
right of cursor to make all the cuts over your board width. You can quickly
verify this by making a comparison of the center mark on your board to the
template and its position under cursor.
This example shows the board edges overlapping the grooves on the upper
side of plan (RED). Therefore, for this board width, the tail cuts will be the
RED series of cut lines and the pin cuts will be the BLACK series of cut lines.
R
RU
UL
LE
E O
OF
F T
TH
HU
UM
MB
B
• Heighten to Tighten
• Lower to Loosen
1.
2.
3.
5.
4.
Template
Number
Description
1/4" Equally Spaced
1
26
Plan
Page
1/4" Variable No. 1
2
26
1/4" Variable No. 2
3
26
5/16" Equally Spaced
4
27
5/16" Variable No. 1
5
27
5/16" Variable No. 2
6
27
3/8" Equally Spaced
7
28
3/8" Variable No. 1
8
28
3/8" Variable No. 2
9
28
1/2" Equally Spaced
10
29
1/2" Variable No. 1
11
29
1/2" Variable No. 2
29
12
5/8" Equally Spaced No.1
30
13
5/8" Equally Spaced No.2
30
14
3/4" Equally Spaced
31
15
Gap
Raise bit by
amount of gap.
14
Pencil Mark at center of board
Upper Symmetry Mark
Lower Symmetry Mark


