6
Note:
Press the drain valve to allow the water in the water container to drain.
Note:
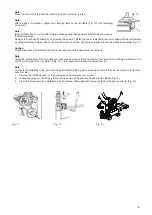
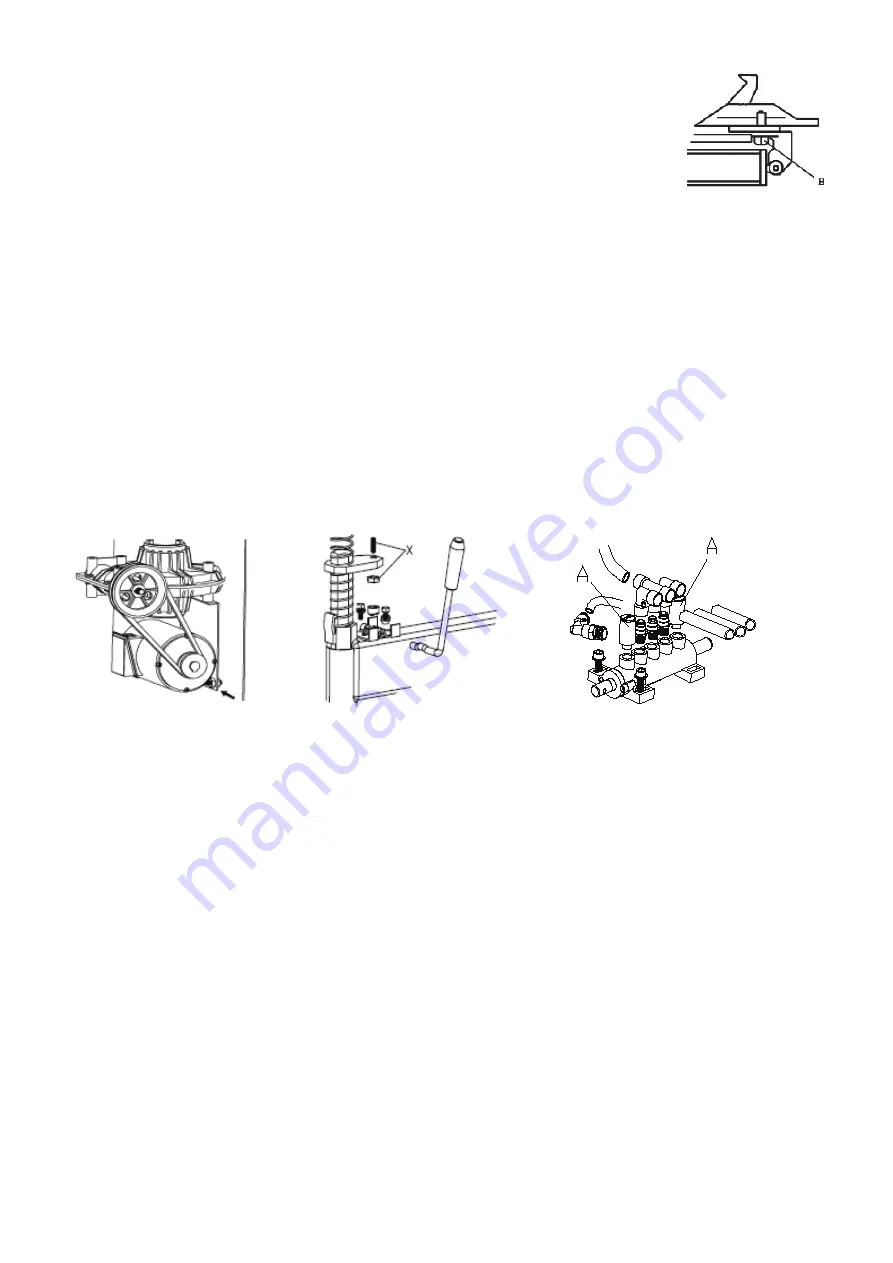
After 20 days of operation, tighten the clamping jaws on the turntable (Fig. 10) with fastening
screws (B).
Note:
If the turntable does not work with full force, please check that the belt is tightly fitted and observe
the following steps:
Remove the right-hand housing by unscrewing the screws. Tighten the two screws under the motor support firmly, maintaining
a sufficient distance between the motor support and motor block. Tighten the screws to tension the strap adequately (Fig. 11).
Caution:
Please disconnect the machine from the power supply and the pneumatic connections.
Note:
Adjust the locking plate if the mounting arm cannot be secured or if it does not meet the requirement of being a distance of 2-3
mm from the edge of the rim. Refer to Fig. 12 in this respect and realise the adjustment (X).
Note:
To ensure the reliability of the jaws and the bead breaker blade, please proceed as follows to keep the valves of these com-
ponents clean:
1. Remove the left-hand cover of the housing by unscrewing the two screws.
2. Loosen the valves (A) belonging to the jaw opening/closing pedal and bead breaker blade (Fig. 13).
3. Clean the silencers with compressed air and replace if damaged with components from the spare parts list (Fig. 13).
Abb. 13
Fig. 11
Fig. 12
Fig. 13
Fig. 10
Содержание Fix Moto
Страница 13: ...11 452 457 453 422 423 442 445 425 616 459 ...
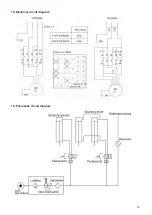
Страница 17: ...15 15 Electrical circuit diagram 16 Pneumatic circuit diagram ...
Страница 18: ...16 ...


