background image

SECTION 3 - CHASSIS & TURNTABLE

3121200

3-63

1

1

2

2

3

4

3

5

6

6

7

8

9

10

11

12

13

14

16

15

17

18

3

4

5

6

7

8

9

10

11

12

13

14

15

16

MAE30640

0440286-E

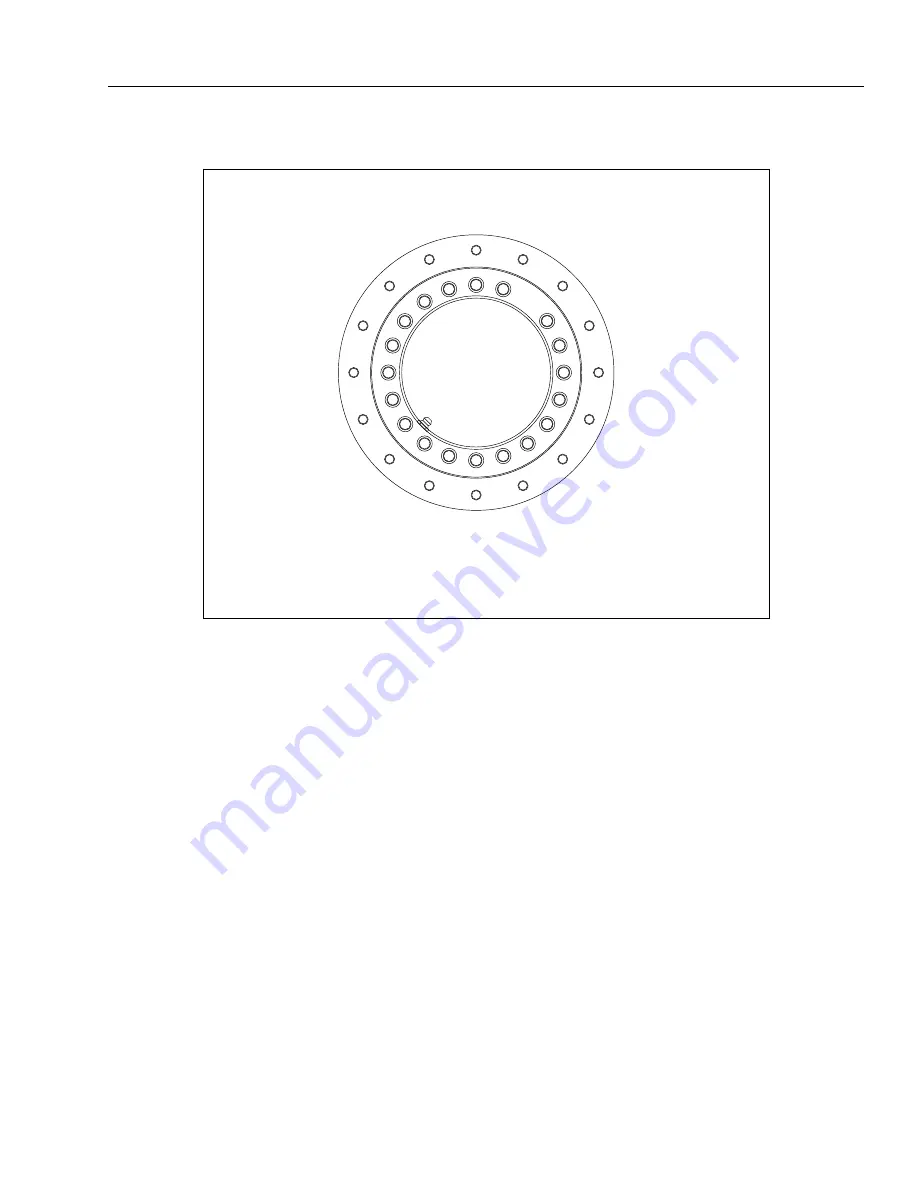
Figure 3-29.  Swing Bearing Torque Sequence

NOTE:

Swing Bearing Torque Sequence is typical for both inner and outer races.

Содержание T500J

Страница 1: ...Service and Maintenance Manual Model T500J PN 3121200 July 25 2018 Rev I AS NZS...

Страница 2: ......

Страница 3: ...operate at extremely high potentially dangerous pressures Every effort should be made to relieve any system pressure prior to discon necting or removing any portion of the system Do not use your hand...

Страница 4: ...Issue Revised Revised Revised Revised Revised Revised Revised Revised REVISON LOG A January 15 2005 B July 15 2005 C August 26 2005 D December 12 2005 E February 24 2006 F May 1 2007 G September 28 20...

Страница 5: ...equent Inspection 2 1 Annual Machine Inspection 2 1 Preventative Maintenance 2 1 2 2 Service and Guidelines 2 2 General 2 2 Safety and Workmanship 2 2 Cleanliness 2 2 Components Removal and Installati...

Страница 6: ...Drums Wheel Bearings 3 15 Hub Removal 3 15 Brake Drum Inspection 3 15 Bearing Inspection 3 15 Bearing Lubrication 3 15 Seal Inspection and Replacement 3 16 Bearing Adjustment 3 16 3 7 Tires Wheels 3...

Страница 7: ...n 3 60 Swing Bearing Torque Values 3 62 Swing Drive Checks 3 62 3 16 Engine 3 65 Throttle Choke Adjustment 3 65 Fuel Valve Lever 3 65 Checking RPM Level 3 65 Choke Actuator 3 65 Checking Oil Level 3 6...

Страница 8: ...moval 4 1 Installation 4 2 4 2 Main Boom Powertrack 4 3 Removal 4 3 Installation 4 3 4 3 Boom And Cylinder Assembly 4 4 Removal 4 4 Installation 4 4 4 4 Main Boom Assembly 4 5 Removal 4 5 Disassembly...

Страница 9: ...Up 5 28 Platform Level Down 5 28 Swing Right 5 28 Swing Left 5 28 Outrigger Up 5 28 5 5 Hydraulic Oil Fill at Startup 5 30 5 6 Hydraulic Hoses 5 30 5 7 Hydraulic Filter and Breather 5 30 5 8 Hydraulic...

Страница 10: ...ng Silicone Dielectric Compound to Electrical Connections 7 5 Installation of Dielectric Grease 7 5 Deutsch HD DT DTM DRC Series 7 6 AMP Seal 7 6 AMP Mate N Lok 7 6 DIN Connectors 7 7 Exclusions 7 7 B...

Страница 11: ...5 3 17 Swing Motor Removal 3 38 3 18 Seal Orientation 3 39 3 19 Notch Alignment 3 39 3 20 Timing Mark 3 40 3 21 Swing Motor Installation 3 40 3 22 Swing Motor 3 41 3 23 Swing Motor Removal 3 42 3 24 S...

Страница 12: ...5 34 Piston Disassembly 5 24 5 35 Cylinder Head Disassembly 5 24 5 36 Composite Bushing Installation 5 25 5 37 Cylinder Head Assembly 5 25 5 38 Piston Disassembly 5 26 5 39 Cylinder Head Installation...

Страница 13: ...Mate N Lok Connector 7 6 7 10 DIN Connector 7 7 7 11 Connector Assembly Figure 1 7 8 7 12 AMP Connector 7 8 7 13 Connector Assembly Figure 2 7 9 7 14 Connector Assembly Figure 3 7 9 7 15 Connector Ass...

Страница 14: ...22 7 33 Electrical Schematic Boom Operations Sheet 1 of 2 7 26 7 34 Electrical Schematic Boom Operations Sheet 2 of 2 7 27 7 35 Electrical Schematic Trailer Sheet 1 of 4 7 28 7 36 Electrical Schemati...

Страница 15: ...der Drift 2 5 2 3 Maintenance Schedule 2 7 3 1 Malfunctions and Remedies 3 10 3 2 Tire Wear 3 18 3 3 Wheel Torque Chart ANSI ANSI Export CSA Aus 3 19 3 4 Wheel Torque Chart CE 3 19 3 5 Surge Brake Tro...

Страница 16: ...xii 3121200 LIST OF TABLES TABLE NO TITLE PAGE NO This page left blank intentionally...

Страница 17: ...Pressure 30 7psi 2 15kg cm2 MaximumTravelGradeability ANSI CSA AUS 20 MaximumTravelGradeability CE 15 MaximumSideslope ANSI CSA AUS 11 MaximumSideslope CE 8 5 Max HydraulicSystemPressure 2950psi 203Ba...

Страница 18: ...m 221ft lbs 300Nm Table 1 6 Engine Specifications Type 4 stroke overheadvalve singlecylinder Displacement 16 5cu in 270cm BorexStroke 3 0x2 3in 77x58mm Max Output 8 4hp 6 3kW 3600rpm Max Torque 14 1ft...

Страница 19: ...ithin 5 of specified pres sures Table 1 9 Hydraulic Oil Hydraulic System Operating Temperature Range S A E Viscosity Grade 0 to 180 F 18 to 83 C 10W 0 to 210 F 18 to 99 C 10W 20 10W30 50 to 210 F 10 t...

Страница 20: ...SECTION 1 SPECIFICATIONS 1 4 3121200 1 1 2 3 12 3 4 5 6 7 8 10 11 9 MAE29490 Figure 1 1 Operator Maintenance Lubrication Diagram...

Страница 21: ...tion 3 Hydraulic Filter Breather NOTE The cap securing the filter must be torqued 154 to 170 ft lbs 209 to 230 5 Nm Interval 100 hours Comments Change after the first 20 hours then every 100 hours of...

Страница 22: ...required 6 Swing Drive Lube Point s 2 Grease Fittings Capacity As Required Lube MPG Interval As Required DO NOT OVERGREASE BEARINGS OVERGREASING BEARINGS WILL RESULT IN BLOWING OUTER SEALS IN HOUSING...

Страница 23: ...voir Lube DOT 3 or 4 Brake Fluid Interval Check before each tow Flush the system yearly or when system is known to be contaminated 11 Coupler Hitch Ball Capacity Coupler 2 Grease Fittings CE Only Hit...

Страница 24: ...SECTION 1 SPECIFICATIONS 1 8 3121200 Figure 1 2 Torque Chart SAE Fasteners Sheet 1 of 5 Torq ue To rqu e Torq ue To rqu e Torq ue Torq ue...

Страница 25: ...SECTION 1 SPECIFICATIONS 3121200 1 9 Figure 1 3 Torque Chart SAE Fasteners Sheet 2 of 5 Torq ue Tor que Torq ue Torqu e To rqu e...

Страница 26: ...SECTION 1 SPECIFICATIONS 1 10 3121200 Figure 1 4 Torque Chart SAE Fasteners Sheet 3 of 5 Cl amp L oa d To rque To rqu e Torq ue Torqu e Tor que Torq ue...

Страница 27: ...SECTION 1 SPECIFICATIONS 3121200 1 11 Figure 1 5 Torque Chart SAE Fasteners Sheet 4 of 5 To rqu e To rqu e Torq u e To rq ue To rqu e To rq ue...

Страница 28: ...SECTION 1 SPECIFICATIONS 1 12 3121200 Figure 1 6 Torque Chart METRIC Fasteners Sheet 5 of 5 Torq ue To rqu e Tor qu e To rqu e To rqu e To rq ue...

Страница 29: ...e Frequent Inspection shall be accomplished for each machine in service for 3 months or 150 hours whichever comes first out of service for a period of more than 3 months or when purchased used The fre...

Страница 30: ...r containers until they are ready to be used Components Removal and Installation 1 Use adjustable lifting devices whenever possible if mechanical assistance is required All slings chains cables etc sh...

Страница 31: ...the mating parts If it becomes necessary to hand fabricate a gasket use gasket material or stock of equivalent material and thickness Be sure to cut holes in the right location as blank gaskets can ca...

Страница 32: ...d grade mineral oils with viscosities suited to the ambient temperatures in which the machine is operating are recommended for use NOTE Metal particles may appear in the oil or filters of new machines...

Страница 33: ...rated load in the platform and power off Maximum allow able drift is 2 inches 5 cm in 10 minutes If the machine does not pass this test proceed with the following Cylinder Leakage Test Cylinder oil mu...

Страница 34: ...should not be lubricated unless otherwise instructed i e sheave pins c Pins should be inspected to ensure it is free of burrs nicks and scratches which would damage the bear ing during installation an...

Страница 35: ...placetirewhentreadsareworn whensidewallhasabulge orsidewallisworn X Brakes electric Magnets Controller intowvehicle Checkwearandcurrentdraw Checkpoweroutput amperage andmodulation X Roofvents windows...

Страница 36: ...SECTION 2 GENERAL 2 8 3121200 NOTES...

Страница 37: ...ructions If you do not have these instructions call your dealer or JLG to obtain a copy A hard stop is used to Confirm that the brakes work Confirm that the trailer brakes are properly synchronized wi...

Страница 38: ...brakes are actuated by an electromagnet With all of the brake components connected into the system the brake will oper ate as follows When the electrical current is fed into the system by the con trol...

Страница 39: ...ntaminated with grease or oil or abnormally scored or gouged It is important to replace both shoes on each brake and both brakes of the same axle This is necessary to retain the balance of your brakes...

Страница 40: ...aintenance DRUM BRAKE ADJUSTMENT Brakes should be adjusted 1 after the first 200 miles of opera tion when the brake shoes and drums have seated 2 at 3000 miles intervals 3 or as used and performance r...

Страница 41: ...y against the one fitted noting the posi tion of the brake cable attachment Remove the four bolts securing the backplate to the axle remove the old assembly and install the new using the proper torque...

Страница 42: ...uterBearing 10 Washer 11 BrakeShoe Primary 12 BrakeShoe Secondary 13 TensionSpring Bottom 14 TensionSpring Top 15 TensionSpring Center 16 SpringClip 17 CompressionSpringSpreader 18 AdjustingKey 19 Adj...

Страница 43: ...der ADJUSTMENT ADJUSTMENT NOTE When adjusting the brake drum only turn the wheel in the direction of forward rotation 1 Turn each wheel in the direction of forward rotation Turn the brake adjuster bol...

Страница 44: ...MUST NOT BECOME FULLY COMPRESSED WHEN ACTIVATED ADJUSTMENT PROCEDURE 1 Brake a Loosen the linkage b Tighten the adjusting screw 12 on the outside of the brake plate opposite the cable entry 13 turn in...

Страница 45: ...etc Check the compression spring for initial tension d Test Run If necessary carry out 2 3 brake tests e Brake Test Recheck the play in the brake linkage and if necessary readjust the linkage for leng...

Страница 46: ...ed Shockabsorberofoverrunninghitchdefective Serviceatqualifiedworkshop Reversedrivinghardtoaccomplishoreven impossible Brakesystemadjustedtootightly Serviceatqualifiedworkshop Bowdencablespre loaded S...

Страница 47: ...7 0273654 I Figure 3 7 Axle and Tongue Installation With Electric Brakes 2 in Ball 1 SafetyChain 2 PinandCable 3 CouplerAssembly 4 ParkingBrakeCableAssembly 5 ParkingBrakeBracket 6 Conduit 7 Electric...

Страница 48: ...767 C 6 5 7 7 3 4 2 1 1 Couplerassembly 2 Spacer 3 Pinandcable 4 Tongue 5 ParkingBrakeCableAssembly 6 ParkingBrakeBracket 7 Conduit 8 ElectricBrakeAssembly 9 TireAssembly 10 BatteryCharger Figure 3 8...

Страница 49: ...ation 2 in Ball 0275908 E Figure 3 9 Axle and Tongue Installation With Hydraulic Brakes 2in Ball 1 SafetyChain 2 CouplerAssembly 3 LanyardCable 4 BrakeLine 5 TongueAdapter 6 ParkingBrakeCableAssembly...

Страница 50: ...5 6 3 MAE30560 0273657 G Figure 3 10 Axle and Tongue Installation with Mechanical Brakes 50mm ball 1 HitchAdapter 2 CouplerAssembly 3 Tongue 4 Rod 5 BrakeRodSupport 6 TubeMountBar 7 MechanicalBrakeAs...

Страница 51: ...more than 0 015 in 0 38 mm then the drum surface should be re machined If scoring or other wear is greater than 0 090 in 2 28 mm on the diameter the drum must be replaced i e for a 10 in 25 400 cm dr...

Страница 52: ...removed inspect the seal to assure it is not nicked or torn and is still capable of properly sealing the bearing cavity If there is any question of condition replace the seal To replace the seal 1 Pry...

Страница 53: ...1 GreaseSeal 2 InnerBearingCone 3 InnerBearingCup 4 BrakeAssembly 5 HubAssembly 6 WheelStud 7 OuterBearingCup 8 OuterBearingCone 9 SpindleWasher 10 SpindleNut 11 CotterPin 12 GreaseCap 13 WheelNut 14...

Страница 54: ...ng cracking or uneven wear Turn drum smooth only if under maximum diameter Replace as neces sary 3 7 TIRES WHEELS Tire Inflation Tire pressure is the most important factor in tire life Inflation press...

Страница 55: ...HEEL Tighten the lug nuts to the proper torque for the axle size on your trailer to prevent wheels from coming loose Use a torque wrench to tighten the fasteners If you do not have a torque wrench tig...

Страница 56: ...ING FIXTUREANDTHENFOLLOW DIRECTOINSBELOW ROTATETHESPARESOTHETWOHOLESLINEUPWITH THETWOSLOTSINTHEMOUNTINGPLATEANDINSERT CARRIAGEBOLTSTHROUGHFROMTHEBACKSIDE ASSEMBLEWHEELNUTSTOTHISSIDE INSERTCARRIAGEBOLT...

Страница 57: ...Replace rebuildactuatormastercylinder Wornoutbrakeshoes Replacebrakeshoesandcheckbrakedrums Leakywheelcylinders Replace rebuildwheelcylindersandreplacebrakeshoes Cleandrums andotherhardware Releaseha...

Страница 58: ...and apply the actua tor Repeat this procedure until fluid expelled from the bleeder hose is free of air bubbles It is helpful to lower the trailer tongue to promote air bubble movement in the brake t...

Страница 59: ...e forward 8 Make sure the breakaway cable C is in the released position with the indicator bead B touching or resting against the cable spring stop A as shown below DO NOT USE THE BREAKAWAY CABLE AS A...

Страница 60: ...t cuts and worn hoses which may cause failure leaks rupturing under pressure and collapsing Replace defective hoses 3 Check brake fluid level in the master cylinder reservoir Keep filled to within 1 2...

Страница 61: ...1 Locknut 12 NotUsed 13 Spring 14 Bolt 15 Cap 16 Lanyard 17 S Hook 18 Bolt 19 NotUsed 20 Bolt 21 Flatwasher 22 Link 23 Flatwasher 24 Locknut 25 Block 26 Bushing 27 Flatwasher 28 Flatwasher 29 Flatwash...

Страница 62: ...position the lever should be approximately straight up 8 Attempt to rotate the wheels in a forward direction If any wheels rotate the brakes must be adjusted To adjust the brakes release the emergenc...

Страница 63: ...11 Hook 12 EmergencyLeverSpringPlate 13 Bolt 14 Bolt 15 Lockwasher 16 Lanyard 17 S Hook 18 PushRod PistonAssembly 19 Nut 20 Gasket 21 Reservoir 22 Fittingw Orifice 23 EmergencyLeverGuide 24 Boot 25 Pi...

Страница 64: ...o the lanyard itself the entire pushrod assembly will need to be replaced To disengage the breakaway mechanism first release the brake line pressure by briefly opening a bleeder valve Extend the coupl...

Страница 65: ...ic Brake Coupler with Combination 2 In Ball SN 0030002099 through Present 1 Coupler 2 EmergencyLeverGuide 3 EmergencyLeverSpringPlate 4 Cap 5 EmergencyLever 6 CablewithHooks 7 Pin 8 OuterCase 9 Cotter...

Страница 66: ...repairs Failure to do so could result in loss of braking 5 Be sure hydraulic lines and fittings are tight to avoid fluid leaks Coupler Maintenance 1 Maintain a film of automotive grease in the ball p...

Страница 67: ...atically remains in the open position in which the indicator button points to the red field with the large X THE TRAILER MUST NEVER BE DRIVEN IN THIS POSITION NEVER INSERT YOUR FINGERS IN THE OPEN BAL...

Страница 68: ...R THE COUPLING HEIGHTS OF THE TOWING VEHICLE AND THE TRAILER TO MATCH The position of the coupling point on the trailer must be in a range of 430 35 mm above the horizontal tire contact sur face To ch...

Страница 69: ...g itself or the over run mechanism If it proves to be tight remove it and thoroughly clean the shaft inspecting for burrs 8 Fit the bolts washers and secure with NEW locking nuts and torque to 214 ft...

Страница 70: ...the damper in its original position and will therefore need to be removed in the following manner a Undo the self locking nut from the front bolt extract the bolt and remove the head b Replace both b...

Страница 71: ...16 16 20 19 21 11 10 9 4 3 5 6 7 1660283 D MAE30680 Figure 3 16 Hydraulic Brake Coupler CE and CSA Spec Machines 1 CouplingHead 2 GasSpring 3 Bellow 4 DrawTube 5 StopRing 6 Housing 7 GasMountingSprin...

Страница 72: ...eled into a horizontal or storage position In both the vertical and horizontal positions the plunger must be securely positioned in the mating hole in the mounting bracket To place the jack into the h...

Страница 73: ...the wheel spacer using standard automotive grease and insert it into the wheel 2 Place the wheel and spacer into the yoke and align the holes in the wheel with the holes in the yoke 3 Insert the bolt...

Страница 74: ...he body seals from the rotor and housing and discard the seals 7 Remove the drive link pin and drive link from the motor and lay aside 8 Gently tap the shaft upward through the housing and remove thro...

Страница 75: ...re butted Shaft Timing Procedure FOR PROPER OPERATION THE MOTOR DEPENDS ON THE CORRECT ORIENTA TION OF PARTS AS WELL AS THE CORRECT INTERNAL TIMING 1 Turn shaft over so the output end of the shaft fac...

Страница 76: ...e the end of the drive link pin is in the hole in the center of the end cover 16 Insert the four bolts and torque to an initial value of 10 ft lbs 13 5 Nm Using a criss cross pattern apply a final tor...

Страница 77: ...Seal 2 RetainerRing 3 BackupShim 4 HousingSeal 5 BodySeal 6 ShaftSeal 7 ThrustWasher 8 ThrustBearing 9 WearPlate 10 EndCover 11 Ball 12 CoolingPlug 13 Housing 14 DriveLink 15 RotorSet 16 DriveLinkPin...

Страница 78: ...A if applicable IFTHETORQLINK IS NOT FIRMLY HELD IN THE VISE IT COULD BE DISLODGED DURINGTHE SERVICE PROCEDURES CAUSING INJURY 2 Scribe an alignment mark down and across the Torq link components from...

Страница 79: ...CommutatorRing 7 Manifold 8 RotorSet 8A Rotor 8B StatororStatorVane 8C Vane 8D StatorHalf 9 WearPlate 10 DriveLink 12 CouplingShaft 13 Bearing Bushing Inner 14 ThrustWasher 15 ThrustBearing 16 Seal 1...

Страница 80: ...he end cover 2 must not be removed as they are serviced as an integral part of the end cover 6 Thoroughly wash end cover 2 in proper solvent and blow dry Be sure the end cover valve apertures includ i...

Страница 81: ...8 and warplane 9 together to retain the rotor set in its assembled form maintaining the same rotor vane 8C to stator 8B contact surfaces The drive link 10 may come away from the coupling shaft 12 with...

Страница 82: ...clearance replace rotor set NOTE If rotor set 8 has two stator halves 8B 8D and two sets of seven vanes 8C 8E as shown in the alternate con struction TG rotor set assembly view check the rotor lobe t...

Страница 83: ...is permissible If wear exceeds 0 020 inches 0 51 mm diametrically replace coupling shaft NOTE A slight polish is permissible in the shaft bearing areas Anything more would require coupling shaft repla...

Страница 84: ...llers must be firmly retained in the bearing cages but must rotate and orbit freely All rollers and thrust washers must be free of brinelling and corrosion The bushing 19 or 13 to coupling shaft diame...

Страница 85: ...s in clean petroleum based solvents before assembly Blow them dry with compressed air Remove any paint chips from mating surfaces of the end cover commuta tor set manifold rotor set wear plate and hou...

Страница 86: ...E USED TO PRESS IN BEARING BUSHING 13 AND 19 THE BEARING BUSHING DEPTHS SPECIFIED MUST BE ACHIEVED TO INSURE ADE QUATE BEARING SUPPORT AND CORRECT RELATIONSHIP TO ADJACENT COM PONENTS WHEN ASSEMBLED B...

Страница 87: ...d vise with the coupling shaft bore down clamping against the mounting flange 5 On the Torqlinks assemble a new backup washer 17 and new seal 16 with the seal lip facing toward the inside of Torqlink...

Страница 88: ...stall the coupling shaft 12 into housing 18 seating it against the thrust bearing 15 in the housings THE OUTER BEARING 19 IS NOT LUBRICATED BY THE SYSTEM S HYDRAULIC FLUID BE SURE IT IS THOROUGHLY PAC...

Страница 89: ...drive link 10 and alignment studs onto the housing 18 12 Apply a small amount of clean grease to a new seal ring 4 and assemble it into the seal ring groove on the wear plate side of the rotor set sta...

Страница 90: ...nside diameter The polished impression left on the manifold by the rotor set is another indication of which surface must contact the rotor set 15 Assemble the manifold 7 over the alignment studs and d...

Страница 91: ...with the 5 threaded holes in housing 18 The correct 5 bolt end cover bolt hole relationship to housing port bosses NOTE If the end cover has a valve 24 or has five bolt holes use the line you previou...

Страница 92: ...d can be assembled by the following procedures 1 Place stator 8B onto wear plate 9 with seal ring 4 side down after following Torqlink assembly proce dures 1 through 13 Be sure the seal ring is in pla...

Страница 93: ...assembled vanes 8C into stator 8B creating the necessary clearance to assemble the seventh or full complement of seven vanes Assemble the seven vanes using minimum force 6 Remove the two assembled bol...

Страница 94: ...bolts for looseness 1 Check the frame to bearing attach bolts as follows a Fully elevate the main boom b Do a visual inspection of the bolts to see if any bolts are missing c Place a wrench on each o...

Страница 95: ...SECTION 3 CHASSIS TURNTABLE 3121200 3 59 1 InnerRaceBolt 2 OuterRaceBolt 3 InnerBearingCup 4 SwingMotor 5 Bearing 6 SwingArm Figure 3 27 Swing Bearing...

Страница 96: ...OPERATION Swing Bearing Removal HYDRAULIC LINES AND PORTS SHOULD BE CAPPED IMMEDIATELY AFTER DIS CONNECTING LINES TO AVOID THE ENTRY OF CONTAMINANTS INTO THE SYS TEM 1 Remove the boom assembly refer t...

Страница 97: ...8 hex until the soft spot is located as shown JLG INDUSTRIES RECOMMENDS THAT ALL REMOVED BEARING BOLTS BE DIS CARDED AND REPLACED WITH NEW BOLTS SINCE THE SWING BEARING IS THE ONLY STRUCTURAL LINK BET...

Страница 98: ...turnta ble as tagged prior to removal 17 Install the boom assembly Refer to Section 4 3 Boom and Cylinder Assembly 18 Using all applicable safety precautions activate the hydraulic system and check t...

Страница 99: ...00 3 63 1 1 2 2 3 4 3 5 6 6 7 8 9 10 11 12 13 14 16 15 17 18 3 4 5 6 7 8 9 10 11 12 13 14 15 16 MAE30640 0440286 E Figure 3 29 Swing Bearing Torque Sequence NOTE Swing Bearing Torque Sequence is typic...

Страница 100: ...SECTION 3 CHASSIS TURNTABLE 3 64 3121200 MAE31410 Gross Weight 262 lbs 119 kg Upper Works above Turntable Bearing Figure 3 30 Swing Bearing Removal...

Страница 101: ...ground control box Refer to Section 6 2 To Connect the JLG Control System Analyzer 2 Set the Analyzer to Access Level 2 Refer to Section 6 3 Changing Access Level 3 Use the right arrow key to scroll t...

Страница 102: ...vel 3 Remove the valve compartment cover to gain access to the engine 4 Remove the dipstick 5 Wipe the dipstick with non fibrous clean cloth 6 Fully seat the dipstick and remove again 7 Check the oil...

Страница 103: ...hield 4 Starter 5 AirFilter 6 Carburetor 7 Muffler 8 Dipstick 9 ThrottleRelay 10 VoltageRegulator 11 ChokeRelay 12 EngineStopRelay 13 EngineMountingPlate 14 ThrottleSolenoidActuator 15 ChokeSolenoidAc...

Страница 104: ...utrigger cam pin and remove the two pins 4 Lift the outrigger cylinder slightly up out of the frame to gain better access to the hydraulic lines running to the cylinder Tag and disconnect the lines fr...

Страница 105: ...approximately 72 lbs 33 kg 3 Install the bolt and keeper securing the pin at the pad end of the stabilizer and install the pin 4 Lift the outrigger cylinder slightly up out of the frame to gain bette...

Страница 106: ...ION 3 CHASSIS TURNTABLE 3 70 3121200 1 OutriggerPad 2 Stabilizer 3 CylinderCover 4 Cylinder 5 PadRod 6 Bolt 7 Keeper 8 Pin 9 OutriggerPin 10 RetainingCup 11 OutriggerCamPin Figure 3 32 Outrigger Assem...

Страница 107: ...rectional tilt sensor mounted on the ground board The system automatically adjusts the outrig gers until the chassis is level within 1 0 a compound angle prior to allowing operating the boom above ele...

Страница 108: ...lenoid on the control valve 3 21 DRIVE SET The Drive Set Option is used to position the machine after it has been towed to the job site Before the drive function can be operated the machine must be in...

Страница 109: ...ainst the trailer tires The drive motors can turn in either direction for steering and posi tioning the machine In order to use Drive Set the following conditions must be met The machine must be stowe...

Страница 110: ...in some position not fully telescoped 4 Elevation switch Mechanical switch on the lift cylinder that can sense main boom above horizontal 1 9 3 4 5 10 8 11 2 6 7 10 8 1 FlowDivider 2 DriveEnableValve...

Страница 111: ...ementReleaseValve 6 BrakeReleaseCylinder 7 DriveEngageCylinder 8 FrictionDriveWheel 9 DriveDirectionalValve 10 DriveMotor 11 ProximitySensor Figure 3 34 Drive and Set Sheet 2 of 3 Adjustthelimitswitch...

Страница 112: ...WITCH SO CLEARANCE BETWEEN THE SWITCH AND CYLINDER IS 0 125 INCHES 0 063 0 3 175 MM 1 600 0 ADJUST THE SWITCH MOUNTING SO THE CYLINDER BARREL MOVES FORWARD COMPLETELY OFF THE TARGET ZONE OF THE LIMIT...

Страница 113: ...ENGAGE CYLINDER BRAKE RELEASE CYLINDER DRIVE ENGAGEMENT RELEASE VALVE DRIVE ENABLE VALVE BOTTOM TOP RIGHT DRIVE MOTOR LEFT DRIVE MOTOR FLOW DIVIDER DRIVE DIRECTIONAL VALVE POWER UNIT NOTE Right and l...

Страница 114: ...emove drive engage cylinder Refer Section 3 24 Drive Engage Cylinder 6 Remove retaining bolt keeper pin and pin 1 securing drive set assembly Remove drive set assembly from the machine NOTE The drive...

Страница 115: ...SECTION 3 CHASSIS TURNTABLE 3121200 3 79 MAE29600 DRIVE MOTOR SPINDLE 1 Figure 3 37 Wheel Drive Removal and Installation...

Страница 116: ...s the Torq link components from end cover 2 to housing 18 to facilitate reassembly orientation where required Loosen two shuttle or relief valve plugs for disassembly later if included in end cover 3...

Страница 117: ...dCover 3 SealRing Commutator 4 SealRing 5 CommutatorRing 6 Commutator 7 Manifold 8 RotorSet 9 WearPlate 10 DriveLink 11 ThrustBearing 12 CouplingShaft 13 Bearing Bushing Inner 14 ThrustWasher 15 Thrus...

Страница 118: ...over for cracks and the bolt head recesses for good bolt head sealing surfaces Replace end cover as necessary NOTE A polished pattern not scratches on the cover from rota tion of the commutator 5 is n...

Страница 119: ...cracks brinelling or scoring Discard seal ring 4 that is between the rotor set and wear plate NOTE The rotor set 8 components may become disassembled during service procedures Marking the surface of...

Страница 120: ...the seal and bear ing Crocus cloth or fine emery paper may be used 15 Remove coupling shaft 12 by pushing on the output end of shaft Inspect coupling shaft bearing and seal sur faces for spalling nic...

Страница 121: ...in these areas dis card the housing assembly 21 If the housing 18 assembly has passed inspection to this point inspect the housing bearings bushings 19 and 13 and if they are captured in the housing...

Страница 122: ...unter bore should be measured and noted before removing the bearings bushings This will facilitatethe correct reassembly of newbearings bushings 22 If the bearings bushing or thrust washers must be re...

Страница 123: ...omponents were removed for replacement thoroughly coat and pack a new outer bearing bushing 19 with clean corrosion resistant grease recommended in the material section Press the new bearing bushing i...

Страница 124: ...h to 0 03 inch 0 76 mm below the housing wear plate contact face Use the opposite end of the bearing mandrel that was used to press in the outer bearing bushing 19 3 Press a new dirt and water seal 20...

Страница 125: ...SHER 21 WHEN DISASSEMBLED MUST BE ASSEMBLED WITH A NEW BACKUP WASHER 17 NEW BACKUP WASHER 21 AND NEW SEAL 16 6 Assemble thrust washer 14 then thrust bearing 15 that was removed from the Torqlink NOTE...

Страница 126: ...to a new seal ring 4 and insert it into the housing 18 seal ring groove NOTE One or two alignment studs screwed finger tight into hous ing 18 bolt holes approximately 180 degrees apart will facilitat...

Страница 127: ...riginal rotor drive link spline contact A rotor set without a counter bore and that was not etched before disassembly can be reinstalled using the drive link spline pattern on the rotor splines if app...

Страница 128: ...to manifold 7 with seal ring side up 20 If shuttle valve components items 21 were removed from the end cover 2 turn a plug loosely into one end of the valve cavity in the end cover A 3 16 inch Allen w...

Страница 129: ...with bolts after the other bolts are in place Alternately and progressively tighten the bolts to pull the end cover and other components into place with a final torque of 45 55 ft lbs 61 75 Nm for the...

Страница 130: ...ign stator bolt holes with wear plate and housing bolt holes and turn two bolts 1 finger tight into bolt holes approximately 180 degrees apart to retain stator and wear plate stationary 3 Assemble the...

Страница 131: ...urning device and rotate coupling shaft drive link and rotor to seat the rotor and the assembled vanes into stator creating the necessary clearance to assemble the seventh or full complement of seven...

Страница 132: ...he retaining pins and pivot pin from the barrel end of the cylinder and remove the cylinder from the machine Installation 1 Using suitable lifting device lift the drive engage cylin der into position...

Страница 133: ...HARGE BATTERIES UNLESS ELECTROLYTE COVERS THE PLATES NOTE When adding distilled water to batteries non metallic con tainers and or funnels must be used To avoid electrolyte overflow add distilled wate...

Страница 134: ...ASSIS TURNTABLE 3 98 3121200 1 ContactorAssembly 2 Fuse 3 ClampingBar 4 Relay 5 Battery 6 BatteryPad 7 TieDownStrap 8 RubberTape Figure 3 39 Battery and Contactor Installation Prior to SN 0030001804 S...

Страница 135: ...troller 10 Relay 11 GroundControlModule A ApplyDielectricGrease B TorqueM10Boltsto84in lbs 9 5Nm C Torquenutsonfuseto120in lbs 13 5Nm D Torquecontactornutsto45in lbs 5Nm Figure 3 40 Battery and Contac...

Страница 136: ...SECTION 3 CHASSIS TURNTABLE 3 100 3121200 Figure 3 41 Battery Cable Routing Prior to SN 0030001804...

Страница 137: ...R TO SN 0030003105 SN 0030003105 SN 0030003105 MAE29640B 0275709 B TO PRESENT PRIOR TO Figure 3 42 Battery and Contactor Installation SN 0030001804 to Present Sheet 1 of 2 1 Contactor 2 FusetoBatteryC...

Страница 138: ...Figure 3 43 Battery and Contactor Installation SN 0030001804 to Present Sheet 2 of 2 11 SevconController 12 Relay 13 GroundControlModule A ApplyDielectricGrease B TorqueM6Boltsto5ft lbs 1ft lbs 7Nm C...

Страница 139: ...JUMPER CABLE TO ANDERSON CONNECTOR AND THEN TO SEVCON B CONTACTOR POST TO SEVCON B CABLE FROM FUSE TO CONTACTOR MISMATCHING BATTERY SIZE AND OR AMP HR RATING WITHIN THE 4 PACK NOT RECOMMENDED BATTERY...

Страница 140: ...Department Transformer Printed Circuit Board Shunt Assembly Interlock Relay SCR Rectifier AC Circuit Breaker DC Circuit Breaker Replacement and troubleshooting of these components requires removal of...

Страница 141: ...insulator may need to be restrained to keep it from turning while removing the shunt assem bly fasteners Also make note of the position of each washer nut and wire connector when removing for later as...

Страница 142: ...to the chassis screws 3 Remove the breaker from the chassis DC Circuit Breaker Replacement 1 Remove the wiring from the DC breaker terminals 2 To remove the breaker from the front face of the char ge...

Страница 143: ...SECTION 3 CHASSIS TURNTABLE 3121200 3 107 Figure 3 45 Battery Charger Schematic...

Страница 144: ...ASSIS TURNTABLE 3 108 3121200 1 SelectorSwitch 2 ACCircuitBreaker 3 InterlockRelay 4 Varistor 5 ShuntAssembly 6 DCHarness 7 DCCircuitBreaker 8 SCRRectifier 9 Transformer 10 CircuitCard Figure 3 46 Bat...

Страница 145: ...ORG WHITE BLK YELLOW AC BLK AC GREEN AC WHT GROUND SCREW BLK BLK BLK NO COM INTERLO CONNECTOR VARISTOR 120VAC 60HZ TX PRI 1 2 A B C D HEATSINK SCR CAP CAP SCR HEATSINK WHT DC FUSE OR CIRCUIT BREAKER 0...

Страница 146: ...0 3121200 0400164 C 2 3 4 5 6 7 8 9 10 1 MAE29680 1 ACCordAssembly 2 ACCircuitBreaker 3 InterlockRelay 4 Varistor 5 ShuntAssembly 6 DCHarness 7 DCCircuitBreaker 8 SCRRectifier 9 Transformer 10 Circuit...

Страница 147: ...ies are completely charged The charger may now be unplugged from AC power If left plugged in the char ger will automatically restart a complete charge cycle if battery voltage drops below a minimum vo...

Страница 148: ...CTION 3 CHASSIS TURNTABLE 3 112 3121200 0274380 B 2 1 3 4 MAE29700 Figure 3 49 Battery Charger Installation 1 BatteryChargerwithOptionalGenerator 2 BatteryCharger 3 ACExtensionCord 4 ReprogramControll...

Страница 149: ...in securing the platform assembly to boom assembly and then remove the platform assembly NOTE The platform rotator weighs approximately 69 lbs 32 kg 3 Remove hardware securing rotator crank handle to...

Страница 150: ...e with hardware NOTE The platform with console and rotator weighs approxi mately 150 lbs 68 kg 3 Align and install rotator crank handle to platform rotator and secure with hardware 4 Using a suitable...

Страница 151: ...ing push tube on fly boom section 6 Remove hardware 2 securing push tube on base boom section 7 With powertrack support and using all applicable safety precautions remove bolts 3 securing rail to the...

Страница 152: ...enly distributed NOTE The boom and cylinder assemblies weigh approximately 1905 lbs 866 kg 6 Lift the assembly away from the machine and lower it onto proper supporting devices Installation 1 Using an...

Страница 153: ...ccess to the tele cylinder remove the master cylinder Refer Section 4 6 Master Cylinder 3 Tag and disconnect the hydraulic hoses at the rear of the telescope cylinder 4 Place blocking under the lift c...

Страница 154: ...Using an adequate lifting device support the weight of the platform pivot NOTE The pivot weighs approximately 24 lbs 11 kg 4 Remove the pivot from the jib assembly 5 Remove the hardware securing the p...

Страница 155: ...oom NOTE The telescope cylinder weighs approximately 140 2 lbs 63 59 kg 11 Remove the wear pads from the front of the boom base section 12 Using an adequate lifting device support the weight of the fl...

Страница 156: ...stall the fly section into the base section NOTE The boom fly section weighs approximately 238 lbs 108 kg 4 If removed install the wear pads into the front of the boom base section Apply JLG threadloc...

Страница 157: ...l the Platform level cylinder Refer Section 4 7 Plat form Level Cylinder 9 With adequate support position the jib assembly with platform level cylinder and boom 10 Install jib assembly with platform l...

Страница 158: ...o the upright NOTE The main boom weighs approximately 1451 lbs 435 kg 2 Install the pivot pin nut and bolt securing the top of the timing link to the boom 3 Install the pivot pin keeper pin and bolt s...

Страница 159: ...t pin from the rod end of the cylinder 6 Remove the retaining pins and pivot pin from the barrel end of the cylinder and remove the cylinder from the machine Installation 1 Using suitable lifting devi...

Страница 160: ...ining pins and pivot pin from the rod end of the cylinder 6 Remove the retaining pins and pivot pin from the barrel end of the cylinder and remove the cylinder from the machine Installation 1 Using su...

Страница 161: ...from the rod end of the cylinder 6 Remove the retaining pins and pivot pin from the barrel end of the cylinder and remove the cylinder from the machine Installation 1 Using suitable lifting device lif...

Страница 162: ...t fall when the pin is removed 6 Remove the retaining pins and pivot pin from barrel end of the cylinder and remove the cylinder from the machine Installation 1 Using suitable lifting device align th...

Страница 163: ...4 16 Figure 4 2 Boom and Cylinders Assembly 1 Boom CylindersAssembly 2 KeeperBolt 3 RetainingPin 4 PivotPin 5 BoomRest 6 GravityLockPin 7 MainBoom 8 TowerBoom 9 TowerBoomLink 10 MasterCylinder 11 Lift...

Страница 164: ...unted to the side of the upright senses whether the main boom is elevated and is activated by a cam on the lift cylinder bushing Boom Elevation Limit Switch 1 Set the limit switch to trip at 3 8 above...

Страница 165: ...bris toward the nearest exiting point from the boom Make sure all debris is removed no puddling of water has occurred and boom internal components are dry before operating machine Make sure you comply...

Страница 166: ...arrangements are different 1 Clamp bar and poly roller tightly so they do not spin when removing screw With a small ratchet and a T 20 Torx bit remove 8 32 x 0 500 screw from one side 2 Repeat step 1...

Страница 167: ...ur attachment 4 Insert tool into rolled over end of rivet Grind out middle of rivet until rolled over part of rivet falls off Repeat for all rivets to be removed 5 After grinding it may be necessary t...

Страница 168: ...SECTION 4 BOOM PLATFORM 4 20 3121200 6 Insert flat head screwdriver between links Twist and pull links apart 7 Remove link from other section of powertrack using screwdriver...

Страница 169: ...out end of new link into half shear female end of track section 2 Spread half shear female end of new link and slide cut out end of track section into it Use screwdriver if neces sary 3 Round half sh...

Страница 170: ...osi tioned in curve of powertrack Round half shears will rotate into cut outs 5 Parts shown below connect new link to powertrack 6 Push pin through center hole Slide washer on pin 7 Install snap ring...

Страница 171: ...rings are seated in pin groove and closed properly 1 Install new 8 32 x 0 500 self threading Torx head screw in end of new aluminum round bar Torque to 18 20 in lb 2 2 25 Nm 2 Pull up on other end of...

Страница 172: ...to 18 20 in lb 2 2 25 Nm NOTE When tightening screws make sure screw head is seated against link with no space in between link and underside of screw head Replace Fixed End Brackets REPOSITION CABLES...

Страница 173: ...on other bracket if replacing it NOTE Ensure snap rings are seated in pin groove and closed properly Replace Moving End Brackets REPOSITION CABLES AND HOSES KEEP COVERED DURING GRINDING TO PRE VENT D...

Страница 174: ...with snap ring in new bracket 3 Install radius pins and snap rings in original locations Repeat with other moving end if replaced NOTE Ensure snap rings are seated in pin groove and closed properly 4...

Страница 175: ...ssembly Cup and Brush The following is needed to correctly oil the o ring in this man ner A small container for hydraulic oil Small paint brush 1 Hold the fitting in one hand while using the brush wit...

Страница 176: ...p from the bottom of the fitting This should signify an even coating of oil on the fitting 3 O ring Boss type fittings will require more pressure in able to immerse more of the fitting into the satura...

Страница 177: ...SECTION 5 BASIC HYDRAULIC INFORMATION SCHEMATICS 3121200 5 3 5 2 HYDRAULIC CYLINDERS Cylinder Locations MAE30490 1 1 3 2 Figure 5 1 Cylinder Locations Sheet 1 of 2...

Страница 178: ...EMATICS 5 4 3121200 MAE30460 5 6 4 7 8 Figure 5 2 Cylinder Locations Sheet 2 of 2 1 OutriggerCylinder 2 BrakeReleaseCylinder 3 DriveEngageCylinder 4 JibCylinder 5 TelescopeCylinder 6 MasterCylinder 7...

Страница 179: ...bulk of the remaining oil 3 Mark the orientation of the rod gland and barrel with a permanent marker or paint pen Do not apply any paint on the chromed surface of the rod Unscrew the head gland from t...

Страница 180: ...12 10 11 3 8 6 5 7 1 9 2 MAE28830 1684397 C Figure 5 6 Platform Level Cylinder 1 Head 2 Rod 3 Piston 4 Barrel 5 O Ring 6 O Ring 7 RodSeal 8 BackupRing 9 WiperSeal 10 WearRing 11 PistonSeal 12 Locknut...

Страница 181: ...Lift Cylinder 1 Head 2 Rod 3 Piston 4 Barrel 5 O ring 6 O ring 7 BackupRing 8 RodSeal 9 WiperSeal 10 WearRing 11 PistonSeal 12 Locknut 13 Spacer 14 Bushing 15 SolenoidValve 16 CheckValve 17 PilotCheck...

Страница 182: ...17 2 19 19 13 14 9 7 1 12 3 6 6 8 10 11 12 4 5 1 Rod 2 Barrel 3 Piston 4 Head 5 Retainer 6 WearRing 7 O ring 8 O ring 9 Spacer 10 PistonSeal 11 BackupRing 12 WearRing 13 RodSeal 14 WiperSeal 15 Counte...

Страница 183: ...3121200 5 9 13 13 4 12 10 10 10 13 6 1 9 2 13 13 MAE30430 1684398 Figure 5 9 Master Cylinder 1 Head 2 Rod 3 Piston 4 Barrel 5 O ring 6 O ring 7 RodSeal 8 BackupRing 9 WiperSeal 10 WearRing 11 PistonSe...

Страница 184: ...21 21 16 16 19 4 15 14 MAE28810 13 11 3 12 8 6 5 10 7 1 9 2 1684494 B 14 Figure 5 10 Jib Cylinder 1 Head 2 Rod 3 Piston 4 Barrel 5 O ring 6 O ring 7 RodSeal 8 BackupRing 9 WiperRod 10 WearRing 11 Wear...

Страница 185: ...to scratch or otherwise damage the critical sur faces of any component including seal grooves barrel bore rod chrome etc 4 Inspect the piston and head gland for excessive wear cracks scoring or any o...

Страница 186: ...til the piston bottoms out then set in place by hitting the spanner wrench handle with a hammer the piston should rotate slightly 5 For all non threaded pistons install the piston assembly onto the th...

Страница 187: ...o rings 4 Place cylinder barrel in a suitable holding fixture Tap around outside of cylinder head retainer with a suitable hammer to break thread locking compound 5 Mark cylinder head and barrel with...

Страница 188: ...14 6 5 3 8 7 8 13 12 10 9 1 11 2 15 15 1684442 E 1 Head 2 Rod 3 Piston 4 Barrel 5 T Seal 6 WearRing 7 O ring 8 BackupRing 9 RodSeal 10 WearRing 11 WiperSeal 12 O ring 13 BackupRing 14 Locknut 15 Bushi...

Страница 189: ...Inspect threaded portion of rod for excessive damage Dress threads as necessary 4 Inspect inner surface of cylinder barrel tube for scoring or other damage Check inside diameter for tapering or ovalit...

Страница 190: ...kage or presence of dirt or other foreign material Repair as necessary 16 If applicable inspect piston rings for cracks or other damage Replace as necessary ASSEMBLY INCORRECT SEAL INSTALLATION CAN CA...

Страница 191: ...arrel securely and support rod Insert piston end into barrel cylinder Do not damage or dislodge seal 13 Continue pushing rod into barrel until cylinder head gland can be inserted into barrel cylinder...

Страница 192: ...4 Place cylinder barrel in a suitable holding fixture Tap around outside of cylinder head retainer with a suitable hammer to break thread locking compound 5 Mark cylinder head and barrel with a cente...

Страница 193: ...ICS 3121200 5 19 1 10 9 6 4 8 13 7 5 2 3 11 12 MAE28790 14 14 1001193948 B Figure 5 24 Brake Release Cylinder 1 Barrel 2 Rod 3 Head 4 Piston 5 Spring 6 Nut 7 O ring 8 O ring 9 O ring 10 BackupRing 11...

Страница 194: ...ess threads as necessary 6 Inspect piston surface for damage scoring or distortion Dress piston surface or replace piston as necessary 7 Inspect threaded portion of piston for damage Dress threads as...

Страница 195: ...ls 7 Install locknut 6 on the rod 8 Install rod seal 11 and wiper seal 12 inside the cylin der head 9 Remove cylinder rod from holding fixture 10 Position cylinder barrel in suitable holding fixture I...

Страница 196: ...t block Discard o rings 4 Place cylinder barrel in a suitable holding fixture Tap around outside of cylinder head retainer with a suitable hammer to break thread locking compound 5 Mark cylinder head...

Страница 197: ...23 15 15 1 12 3 6 9 7 8 16 5 10 11 14 4 13 2 2 2 1684468 A MAE30510 Figure 5 33 Drive Engage Cylinder 1 Barrel 2 Rod 3 piston 4 Head 5 Spring 6 Locknut 7 WearRing 8 PistonSeal 9 O ring 10 O ring 11 S...

Страница 198: ...ry 3 Inspect threaded portion of rod for excessive damage Dress threads as necessary 4 Inspect inner surface of cylinder barrel tube for scoring or other damage Check inside diameter for tapering or o...

Страница 199: ...ecessary 15 Inspect oil ports for blockage or presence of dirt or other foreign material Repair as necessary 16 If applicable inspect piston rings for cracks or other damage Replace as necessary ASSEM...

Страница 200: ...AND CYLINDER BARREL SURFACES USE EXTREME CARE WHEN INSTALLING CYLINDER ROD HEAD AND PISTON 13 Clamp barrel securely and support rod Insert piston end into barrel cylinder Do not damage or dislodge pis...

Страница 201: ...remove gear pump from the rear piston pump assembly 4 Carefully place the gear pump on the clean working sur face Installation DISASSEMBLY OF THE CYLINDER SHOULD BE PERFORMED ON A CLEAN WORK SURFACE I...

Страница 202: ...ked GA located on the left side of the block right next to the telescope directional valve 2 Both level relief valves are located on top of the valve block The one toward the center is level up 3 Leve...

Страница 203: ...SECTION 5 BASIC HYDRAULIC INFORMATION SCHEMATICS 3121200 5 29 JP SA SB PA PB TB TA EA RA JT GB GA LB LA PP MAE29300 G Figure 5 41 Hydraulic Test Ports...

Страница 204: ...o the boom rest 13 Repeat the lift up and down function using the switch not manual descent 14 Telescope the boom out to full stroke 15 Telescope the boom in to the end of stroke 16 Swing the turn tab...

Страница 205: ...CHEMATICS 3121200 5 31 1 4 6 MAE29440 2 3 5 Figure 5 42 Control Valve Identification 1 PlatformLevelCartridgeValve 2 TelescopeCartridgeValve 3 SwingCartridgeValve 4 LiftCartridgeValve 5 ManualDescentC...

Страница 206: ...8 MAE29280 Table 5 2 Control Valve Torque Values Ft Lbs Nm Ft Lbs Nm Ft Lbs Nm 1 11 14 15 20 4 13 15 17 5 20 7 25 28 34 38 2 154 170 209 230 5 5 17 19 23 26 8 28 33 38 45 3 15 18 5 20 25 6 18 5 22 25...

Страница 207: ...9290 Table 5 3 Control Valve Torque Values Ft Lbs Nm Ft Lbs Nm Ft Lbs Nm 1 11 14 15 20 4 13 15 17 5 20 7 25 28 34 38 2 154 170 209 230 5 5 17 19 23 26 8 28 33 38 45 3 15 18 5 20 25 6 18 5 22 25 30 Fig...

Страница 208: ...0 4 2 6 6 7 1 1 1 7 5 Figure 5 45 Control Valve Torque Values Electric Powered Machines Sheet 1 of 2 Table 5 4 Control Valve Torque Values Ft Lbs Nm Ft Lbs Nm Ft Lbs Nm 1 28 33 38 45 4 13 15 17 5 20 7...

Страница 209: ...1 MAE29470 2 3 Figure 5 46 Control Valve Torque Values Electric Powered Machines Sheet 2 of 2 Table 5 5 Control Valve Torque Values Ft Lbs Nm Ft Lbs Nm Ft Lbs Nm 1 28 33 38 45 4 13 15 17 5 20 7 25 28...

Страница 210: ...N SCHEMATICS 5 36 3121200 1 LeftDriveValve 2 ShuttleValve LS2 3 RightDriveValve 4 EP2 5 EP1 6 PressureCheck 7 ShuttleValve LS1 8 ShuttleValve LS3 9 CounterbalanceValves Figure 5 47 Drive Directional V...

Страница 211: ...SECTION 5 BASIC HYDRAULIC INFORMATION SCHEMATICS 3121200 5 37 Ft Lbs Nm A 18 20 24 27 B 30 35 41 47 C 35 40 47 54 Figure 5 48 Drive Directional Valve Torque Values Drive Set Option...

Страница 212: ...CV1 3 ReliefValve RV1 4 ReliefValve RV2 5 SolenoidValve SV1 6 Filter F1 Figure 5 49 Drive Enable Valve Identification Drive Set Option NOTE All cartridges are torqued 18 20 ft lbs 24 27 Nm The soleno...

Страница 213: ...SECTION 5 BASIC HYDRAULIC INFORMATION SCHEMATICS 3121200 5 39 This page left blank intentionally...

Страница 214: ...SECTION 5 BASIC HYDRAULIC INFORMATION SCHEMATICS 5 40 3121200 5 8 HYDRAULIC SCHEMATICS Figure 5 50 Hydraulic Schematic Electric Machines Sheet 1 of 2 SHEET 1...

Страница 215: ...SECTION 5 BASIC HYDRAULIC INFORMATION SCHEMATICS 3121200 5 41 Figure 5 51 Hydraulic Schematic Electric Machines Sheet 2 of 2 2792642 G SHEET 1...

Страница 216: ...SECTION 5 BASIC HYDRAULIC INFORMATION SCHEMATICS 5 42 3121200 SHEET 2 Figure 5 52 Hydraulic Schematic Gas Machines Sheet 1 of 2...

Страница 217: ...SECTION 5 BASIC HYDRAULIC INFORMATION SCHEMATICS 3121200 5 43 Figure 5 53 Hydraulic Schematic Gas Machines Sheet 2 of 2 2792642 G SHEET 2...

Страница 218: ...SECTION 5 BASIC HYDRAULIC INFORMATION SCHEMATICS 5 44 3121200 Figure 5 54 Hydraulic Schematic Drive Option Gas Sheet 1 of 2 SHEET 3...

Страница 219: ...SECTION 5 BASIC HYDRAULIC INFORMATION SCHEMATICS 3121200 5 45 Figure 5 55 Hydraulic Schematic Drive Option Gas Sheet 2 of 2 2792642 G SHEET 3...

Страница 220: ...SECTION 5 BASIC HYDRAULIC INFORMATION SCHEMATICS 5 46 3121200 Figure 5 56 Hydraulic Schematic Drive Option Electric Motor Sheet 1 of 2 SHEET 4...

Страница 221: ...SECTION 5 BASIC HYDRAULIC INFORMATION SCHEMATICS 3121200 5 47 Figure 5 57 Hydraulic Schematic Drive Option Electric Motor Sheet 2 of 2 2792642 G SHEET 4...

Страница 222: ...IVE SET CIRCUIT GAS 5 DRIVE SET CIRCUIT GAS CE 6 DRIVE SET CIRCUIT ELECTRIC 6 DRIVE SET CIRCUIT ELECTRIC CE MASTER CYLINDER SLAVE CYLINDER BOOM CIRCUIT SEE SHEET 4 V1 V2 JIB CYLINDER V2 V1 V2 V1 V2 V1...

Страница 223: ...CYLINDER P GB X X X CHASSIS CIRCUIT BOOM CIRCUIT SEE SHEET 2 3 SEE SHEET 4 JIB BLOCK JA JB POWER UNIT MOTOR SIDE V1 V2 MD NOTE ALL CYLINDER PORTS MARKED V1 ARE EXTEND ALL CYLINDER PORTS MARKED V2 ARE...

Страница 224: ...V2 V1 V2 V1 V2 V1 OUTRIGGER LEFT FRONT OUTRIGGER RIGHT FRONT OUTRIGGER RIGHT REAR OUTRIGGER LEFT REAR SWING MOTOR 1 2 3 4 5 6 8 10 7 9 11 12 OUTRIGGER MANIFOLD FACING REAR OF TRAILER OUTRIGGER MANIFO...

Страница 225: ...E GB CHASSIS CIRCUIT REFERENCE SHEET 4 REFERENCE SHEET 4 ELECTRIC SEE TOWER BOOM CIR SEE TOWER BOOM CIR JIB BLOCK JA JB POWER UNIT MOTOR SIDE MALE FEMALE CONNECTIONS MALE FEMALE CONNECTIONS V2 V1 V2 V...

Страница 226: ...V1 V2 V1 V2 V1 V2 V1 OUTRIGGER LEFT FRONT OUTRIGGER RIGHT FRONT OUTRIGGER RIGHT REAR OUTRIGGER LEFT REAR SWING MOTOR 1 2 3 4 5 6 8 10 7 9 11 12 OUTRIGGER MANIFOLD FACING REAR OF TRAILER OUTRIGGER MANI...

Страница 227: ...ASSIS CIRCUIT REFERENCE SHEET 4 REFERENCE SHEET 4 GAS SEE TOWER BOOM CIR SEE TOWER BOOM CIR JIB BLOCK JA JB POWER UNIT MOTOR SIDE MALE FEMALE CONNECTIONS MALE FEMALE CONNECTIONS INLET OUTLET GAS VERSI...

Страница 228: ...YDRAULIC INFORMATION SCHEMATICS 5 54 3121200 4 5 6 7 8 G H E F C D A B 8 7 6 5 4 V2 V1 MASTER CYLINDER SLAVE CYLINDER TELE CYLINDER BOOM CIRCUIT V1 V2 V1 V2 JIB CYLINDER SHEET 4 Figure 5 64 Boom Circu...

Страница 229: ...EFERENCE SHEET 2 3 REFERENCE SHEET 2 3 SEE CHASSIS CIR SEE CHASSIS CIR V1 V2 MD MALE FEMALE CONNECTIONS MALE FEMALE CONNECTIONS TA TB PB PA JA JB LA LB PP V2 LA LB TA TB PP PA PB JA JB BULKHEAD PLATE...

Страница 230: ...RIVE VALVE FLOWDIVIDER INSIDE PORT WHEEL ENGAGEMENT RELEASE VALVE NOTE RIGHT AND LEFT MOTORS DESIGNATION ARE DETERMINED BY THE OPERATOR STANDING IN THE PLATFORM DRIVE SET CIRCUIT GAS M2 M4 M3 M1 P1 T...

Страница 231: ...OUTLET P GB JA JB POWER UNIT MOTOR SIDE T2 BRAKE CYLINDER WHEEL ENGAGEMENT CYLINDER ENABLE VALVE WHEEL ENGAGEMENT RELEASE VALVE PUMP DRIVE SET CIRCUIT GAS D T C P G P1 PORT AND ADAPTER LOCATION PORTS...

Страница 232: ...ORT NOTE RIGHT AND LEFT MOTORS DESIGNATION ARE DETERMINED BY THE OPERATOR STANDING IN THE PLATFORM M2 M4 M3 M1 P1 T B P2 WHEEL ENGAGEMENT CYLINDER WHEEL ENGAGEMENT RELEASE VALVE DRIVE SET CIRCUIT ELEC...

Страница 233: ...H 1 2 3 4 5 5 4 3 2 1 BRAKE CYLINDER WHEEL ENGAGEMENT RELEASE VALVE DRIVE SET CIRCUIT ELECTRIC P GB JA JB POWER UNIT MOTOR SIDE T2 ENABLE VALVE D T C P G P1 PORT AND ADAPTER LOCATION PORTS SEQ C D P T...

Страница 234: ...SECTION 5 BASIC HYDRAULIC INFORMATION SCHEMATICS 5 60 3121200 NOTES...

Страница 235: ...rious personality settings for smooth control of acceleration deceleration creep minimum speed and maximum speed for all boom drive and steering functions The control system provides voltage output to...

Страница 236: ...position and pulling the emergency stop button on Using the Analyzer With the machine power on and the analyzer connected prop erly the analyzer will display the following MENU HELP PRESS ENTER Move b...

Страница 237: ...nus will display additional sub menus within the selected menu In some cases such as DRIVE the next level is the parameter or information to be changed Refer to the flow chart for what menus are avail...

Страница 238: ...4 ADJUST PARAMETERS Once you have gained access to level 1 and a personality item is selected press the UP or DOWN arrow keys to adjust its value for example PERSONALITIES LIFT ACCEL 1 0s There will...

Страница 239: ...to match the size of the machine the personality settings will all default to the factory recommended setting NOTE Refer to Table 6 3 Machine Model Adjustments and Speeds ANSI CSA and Table 6 4 Machi...

Страница 240: ...LEVATED TILTED ELEV ELEVATION ENG ENGINE EXT EXTEND F FRONT FL FLOW FNT FRONT FOR FORWARD FWD FORWARD FSW FOOTSWITCH FUNC FUNCTION G GROUND GND GROUND GRN GREEN GM GROUNDMODULE H HOURS HW HARDWARE HWF...

Страница 241: ...ER SPD SPEED STOW STOWED STOWD STOWED SW SWITCHorSOFTWARE TELE TELESCOPE TEMP TEMPERATURE TORQ TORQUE TRN TRANSPORT T T TURNTABLE T TOWER TURNTBL TURNTABLE TWR TOWER U UPPERorUP V VOLT VER VERSION VLV...

Страница 242: ...re 6 2 Analyzer Flow Chart P1 7 NOTE The layout shown includes all possible analyzer screens Please note that some screens may not be available depending upon machine con figuration See Figure 6 3 See...

Страница 243: ...OL SYSTEM 3121200 6 9 Figure 6 3 Analyzer Flow Chart P1 7 Diagnostics NOTE The layout shown includes all possible analyzer screens Please note that some screens may not be available depending upon mac...

Страница 244: ...L SYSTEM 6 10 3121200 Figure 6 4 Analyzer Flow Chart P1 7 Personalties NOTE The layout shown includes all possible analyzer screens Please note that some screens may not be available depending upon ma...

Страница 245: ...h 4 The analyzer screen should read 5 Use the arrow button to reach SYSTEM TEST Hit Enter The analyzer will prompt you asking if you want to acti vate the system test hit Enter again to activate 6 Fol...

Страница 246: ...SECTION 6 JLG CONTROL SYSTEM 6 12 3121200 Figure 6 5 System Test Flow Chart Platform Tests...

Страница 247: ...zer will prompt you asking if you want to acti vate the system test hit Enter again to activate 6 Follow the flow path in Figure 6 6 System Test Flow Chart Ground Station Tests and go through the comp...

Страница 248: ...SECTION 6 JLG CONTROL SYSTEM 6 14 3121200 Figure 6 6 System Test Flow Chart Ground Station Tests...

Страница 249: ...will be for ward of the level 3 If the board has been replaced or the tilt sensor is not calibrated connect an analyzer to the machine at the ground control console and calibrate tilt sensor Enter Le...

Страница 250: ...then the down arrow key once to reach OVERRIDE F L b Arrow down until you reach the desired out rigger Use the outrigger deploy switch on the Ground control to raise or lower the outrigger 2 Verify t...

Страница 251: ...tPrevented Tilted AboveElevation LiftUp TeleOutPrevented Tilted Unset AboveElevation LiftUp TeleOutPrevented Unset AboveElevation LiftUpPrevented CheckOutriggers LiftUpPrevented LiftDownThenSetOutrigg...

Страница 252: ...ON 6 JLG CONTROL SYSTEM 6 18 3121200 INTEGRAL AMBIENT TEMP SENSOR J8 BLACK 4 PIN J1 NATURAL 35 PIN J2 GREY 35 PIN J3 BLACK 14 PIN J4 BLUE 35 PIN J7 BLACK 35 PIN MAE29880 1600370 J Figure 6 7 Ground Mo...

Страница 253: ...J2 Grey 1 N C NOT CONNECTED 2 N C NOT CONNECTED 3 PWRS POWER MODULE LOGIC LINE CONTACTOR COIL SUPPLY Digital Output 4 TELEIN TELESCOPE IN VALVE Digital Output 5 LVLUP LEVEL UP VALVE Digital Output 6...

Страница 254: ...with J4 28 J4 29 Digital Output 28 DO35 DIGITAL OUTPUT 35 High Side 4A Exclusive with J4 26 J4 27 Digital Output 29 FLLJI FRONT LEFT L J INDICATOR Digital Output 30 TELOUTS TELESCOPE OUT SWITCH Digita...

Страница 255: ...0to100 50 50 RREVMIN 0to100 15 15 RREVMAX 0to100 50 50 LIFT ACCEL 0 1to5 0sec 2 5 2 5 DECEL 0 1to3 0sec 0 8 0 8 MINUP 0to25 75 3 56 MAXUP 0to100 85 80 72 40 50 40 50 MINDOWN 0to25 50 14 25 MAXDOWN 0to...

Страница 256: ...ACCEL 0 1to5 0sec 0 5 0 5 DECEL 0 1to3 0sec 0 5 0 5 MINSET 0to25 75 10 65 MAXSET 0to100 85 100 85 MINSTOW 0to25 75 10 65 MAXSTOW 0to100 85 100 85 JOYSTICK FWDIN 0 50 4 50V 2 75 2 75 FWDMAX 0 50 4 50V...

Страница 257: ...0to100 50 50 RREVMIN 0to100 15 15 RREVMAX 0to100 50 50 LIFT ACCEL 0 1to5 0sec 2 5 2 5 DECEL 0 1to3 0sec 1 3 1 3 MINUP 0to25 75 3 56 MAXUP 0to100 85 73 66 40 50 40 50 MINDOWN 0to25 50 14 25 MAXDOWN 0to...

Страница 258: ...0 5 0 5 DECEL 0 1to3 0sec 0 5 0 5 MINSET 0to25 75 10 65 MAXSET 0to100 85 100 85 MINSTOW 0to25 75 10 65 MAXSTOW 0to100 85 100 85 JOYSTICK FWDMIN 0 50 4 50V 2 75 2 75 FWDMAX 0 50 4 50V 4 35 4 35 REVMIN...

Страница 259: ...omtheplatformwithoneoperator Note4 Alltestshouldbedonewiththeoiltempabove65 F 15 5 C Note5 Rangesshownin areexceptionsforGas poweredmachines Note3 WithswingmotorP N3160182optimumperformanceisachievedw...

Страница 260: ...gramming Information Configuration Digit Setting Description Market Default 0 1 2 3 4 1 MODEL 0 1 T350 35ft T500 50ft 0 2 POWER 0 1 Electric 24VBattery Engine HondaGasoline 0 3 DRIVE 3 0 1 NO Driveopt...

Страница 261: ...None 1 LiftUp LiftDown SwingLeft Swing Right TelescopeIn TelescopeOut Jib Up JibDown LevelUp LevelDown FrontLeftL J FrontRightL J RearLeft L J RearRightL J Set ExtendL J Stow RetractL J CHASSISTILTSE...

Страница 262: ...evelDown FrontLeftL J FrontRightL J RearLeft L J RearRightL J Set ExtendL J Stow RetractL J FUNCTIONPROBLEM ENGINE CHOKEPERMANENTLY SELECTED 16 2 2 1 EngineChokePull EngineChokeHold FUNCTIONPROBLEM EN...

Страница 263: ...own FUNCTIONPROBLEM LEVEL INGJACKSETPERMANENTLY SELECTED 32 2 3 1 Set ExtendL J FUNCTIONPROBLEM LEVEL INGJACKSTOWPERMANENTLY SELECTED 33 2 3 1 Stow RetractL J FUNCTIONPROBLEM LIFTUP PERMANENTLYSELECTE...

Страница 264: ...EMS 49 2 5 2 LiftUp LiftDown SwingLeft Swing Right TelescopeIn TelescopeOut Jib Up JibDown LevelUp LevelDown FrontLeftL J FrontRightL J RearLeft L J RearRightL J Set ExtendL J Stow RetractL J LiftUp L...

Страница 265: ...TSOLENOID OPEN CIRCUIT 63 3 3 9 SwingLeft SwingLeft SWINGRIGHTSOLENOID SHORTTOBATTERY 64 3 3 9 SwingRight SwingRight SWINGRIGHTSOLENOID SHORTTOGROUND 65 3 3 9 SwingRight SwingRight SWINGRIGHTSOLENOID...

Страница 266: ...L JSOLENOID OPENCIR CUIT 80 3 3 9 FrontLeftL J FrontLeftL J F RL JSOLENOID SHORTTO BATTERY 81 3 3 9 FrontRightL J FrontRightL J F RL JSOLENOID SHORTTO GROUND 82 3 3 9 FrontRightL J FrontRightL J F RL...

Страница 267: ...D SHORT TOGROUND 94 3 3 9 Stow RetractL J Stow RetractL J RETRACTL JSOLENOID OPEN CIRCUIT 95 3 3 9 Stow RetractL J Stow RetractL J GROUNDALARM SHORTTO BATTERY 96 3 3 9 GROUNDALARM SHORTTO GROUND 97 3...

Страница 268: ...EngineChokePull EngineChokePull CHOKEPULLRELAY OPENCIR CUIT 113 3 3 9 EngineChokePull EngineChokePull CHOKEHOLDSOLENOID SHORTTOBATTERY 114 3 3 9 EngineChokeHold EngineChokeHold CHOKEHOLDSOLENOID SHOR...

Страница 269: ...Swing Right TelescopeIn TelescopeOut Jib Up JibDown LevelUp LevelDown FrontLeftL J FrontRightL J RearLeft L J RearRightL J Set ExtendL J Stow RetractL J DRIVELEFTFWDSOLENOID SHORTTOBATTERY 120 3 3 9...

Страница 270: ...ull EngineThrottleHold EngineChokePull EngineChokeHold LiftUp LiftDown SwingLeft Swing Right TelescopeIn TelescopeOut Jib Up JibDown LevelUp LevelDown FrontLeftL J FrontRightL J RearLeft L J RearRight...

Страница 271: ...SwingRight Tele scopeIn TelescopeOut JibUp LevelUp LevelDown FrontLeftL J FrontRightL J RearLeftL J RearRightL J Set ExtendL J Stow RetractL J POWERMODULEFAILURE CHECKPOWERCIRCUITSOR MOSFETSHORTCIRCUI...

Страница 272: ...old EngineChokePull EngineChokeHold GROUNDMODULEFAILURE VLOWFETFAILURE 153 9 9 9 LiftUp LiftDown SwingLeft Swing Right TelescopeIn TelescopeOut Jib Up JibDown LevelUp LevelDown FrontLeftL J FrontRight...

Страница 273: ...probe tips specifically designed for this technique especially on sealed connectors Whenever possible insert probes into the side of the connec tor such that the test also checks both terminals of th...

Страница 274: ...nging set it to the correct range See multimeter s operation manual Use firm contact with meter leads Continuity Measurement Some meters require a separate button press to enable audible continuity te...

Страница 275: ...not possible keep in mind it may affect readings 3 Access the terminals to the switch 4 If the switch has two terminals a Measure resistance across the terminals b Change the switch position c Measur...

Страница 276: ...object sensed Automatic Switches If the switch is actuated automatically by temperature or pres sure for example find a way to manually actuate the switch to test it Do this either by applying heat or...

Страница 277: ...be sealed NOTE This condition is especially common when machines are pressure washed since the washing solution is much more conductive than water 3 Anderson connectors for the battery boxes and batt...

Страница 278: ...ale terminals If trapped air prevents the connector from latching pierce one of the unused wire seals After assembly install a seal plug JLG 4460905 in that location to prevent moisture ingress Note t...

Страница 279: ...y If dielectric grease is mistakenly applied to this connector system the low force contacts cannot displace the grease to achieve electrical con tact Once contaminated there is no practical way to re...

Страница 280: ...ed by using a syringe to fill the header with silicone dielectric compound to a point just above the top of the male pins inside the header When assem bling the housing to the header it is possible th...

Страница 281: ...ock must be closed to its locked position Release the locking latches by squeezing them inward See Figure 7 14 4 Slide the wedge lock into the housing until it is flush with the housing See Figure 7 1...

Страница 282: ...ward or mating end These slots accommodate circuit testing in the field by using a flat probe such as a pocket knife DO NOT use a sharp point such as an ice pick Service Voltage Reading DO NOT PIERCE...

Страница 283: ...SECTION 7 BASIC ELECTRICAL INFORMATION SCHEMATICS 3121200 7 11 Figure 7 17 Connector Installation...

Страница 284: ...exterior locking mechanism The wedgelock will snap into place Rectangular wedges are not oriented Thy may go in either way NOTE The receptacle is shown use the same procedure for plug DT DTP Series Di...

Страница 285: ...cavities insert sealing plugs for full envi ronmental sealing HD30 HDP20 Series Disassembly 11 With rear insert toward you snap appropriate size extractor tool over the wire of contact to be removed 1...

Страница 286: ...K LIMIT SWITCH TELESCOPE LIMIT SWITCH TRANSPORT ABOVE LEVEL LIMIT SWITCH IGNITION RELAY LIFT DOWN PROP VALVE GROUND CONTROL BOX STROBE LIGHT AC OUTLET BOX DRIVE DIRECTIONAL VALVE OPTIONAL DRIVE PROXIM...

Страница 287: ...E MARKER LIGHT CENTER BRAKE LIGHT BATTERIES BREAKEWAY SWITCH BATTERY CHARGER ELECTRIC BRAKES ELECTRIC BRAKES WHEN EQUIOOED BREAKAWAY SWITCH ELECTRIC BRAKES WITH ELECTRIC BRAKES ON TOW VEHICLE ON TOW V...

Страница 288: ...IGNITION RELAY LIFT DOWN PROP VALVE TRANSPORT ABOVE LEVEL LIMIT SWITCH TELESCOPE LIMIT SWITCH O R JACK LIMIT SWITCH O R JACK VALVE O R JACK VALVE O R JACK LIMIT SWITCH VALVE MOTOR TANK TANK SIDE TANK...

Страница 289: ...CTRIC BRAKES WHEN EQUIPPED BREAKAWAY SWITCH BATTERY CHARGER ELECTRIC BRAKES ELECTRIC BRAKES BREAKAWAY SWITCH WITH ELECTRIC BRAKES ON TOW VEHICLE WITH HYDRAULIC BRAKES ON TOW VEHICLE OR RIGHT SIDE MARK...

Страница 290: ...NK TANK SIDE STARTER ENGINE POWERED BATTERY ENGINE POWERED O R JACK LIMIT SWITCH O R JACK VALVE O R JACK VALVE O R JACK LIMIT SWITCH O R JACK LIMIT SWITCH O R JACK VALVE O R JACK VALVE O R JACK LIMIT...

Страница 291: ...L RECTIFIER THROTTLE COIL MAGNETIC PICKUP ENGINE CHOKE PULL RELAY ENGINE STOP RELAY THROTTLE VALVE ENGINE LEVEL SWITCH OIL LEFT TAILLIGHT REAR FOGLIGHT LEFT TAILIGHT LEFT SIDE MARKER LIGHT LEFT SIDE M...

Страница 292: ...8 SWING RT X077 SWING LF X079 JIB UP T500J ONLY X086 L J SET X086 L J STOW X001 X101 X102 X103 X104 X008 X009 X010 X002 X007 X004 X003 X011 B Electric Pwr Only Main Harness B X115 Pump Negative X114 P...

Страница 293: ...SWING LEFT JIB UP T500J ONLY LIFT UP L J SET L J STOW PUMP PUMP 0275776 F MAE29800 WHITE J1 BLACK J7 GREY J2 BLACK J3 BLUE J4 BATTERY PUMP BATTERY GROUND BOARD BLACK 12 CHARGER PUMP BLACK J8 RELAY Fig...

Страница 294: ...OUT SWING RIGHT SWING LEFT JIB UP T500J ONLY LIFT UP L J SET L J STOW 0273794 F MAE29810 GROUND MODULE MOUNTED AT ALL FIVE MOUNTING POINTS WHITE J1 BLACK J8 BLACK J7 GREY J2 BLACK J3 BLUE J4 DUMP VAL...

Страница 295: ...w X043 F RJackLimitSw X044 R LJackLimitSw X045 R RJackLimitSw X046 F LJackValveCoil X047 F RJackValveCoil X048 R LJackValveCoil X049 R RJackValveCoil X050 MotionAlarm X051 LiftHookHarnesstoX019 X052 L...

Страница 296: ...01 PowerModule Sevcon B X102 PowerModule Sevcon B X103 PowerModule Sevcon M1 X104 PowerModule Sevcon M2 X105 SevconPowerCableIn line X106 6VBatt1 Pos X107 6VBatt1 Neg X108 6VBatt2 Pos X109 6VBatt2 Neg...

Страница 297: ...SECTION 7 BASIC ELECTRICAL INFORMATION SCHEMATICS 3121200 7 25 This page left blank intentionally...

Страница 298: ...BLE YEL RED 2 2 12 YEL RED 2 12 STROBE WHT YEL48 7 WHT YEL48 6 ENGINESTART ENGINESPEEDPICK UP 8 6 2 JIBDOWN PWM 86 85 30 87a 87 86 85 30 87a 87 BLACK YEL RED2 3IGN RELAY87 30 87a 87 THROTTLESOLENOID C...

Страница 299: ...J2 20 F 2 1 3 2 10 11 12 5 6 7 9 8 4 1 3 2 10 11 12 5 6 7 13 14 9 8 4 BLUE RED BLK YELLOW BROWN BLU BLK ORN BLK BRN BLK SHIELD BLACK RED YEL BLK YELLOW BROWN BLU BLK ORN BLK BRN BLK SHIELD BLACK RED Y...

Страница 300: ...SIDE MARKER AMBER BLUE YELLOW GREEN RIGHT TURN SIGNAL RED R TAIL LIGHT RED LEFT TURN SIGNAL RED L TAIL LIGHT RED TAIL LIGHT AND RUNNING LIGHT RED CENTER BRAKE LIGHT RED WHITE JUMPER IS ATTACHED TO CEN...

Страница 301: ...LACK BLUE WHITE BLACK WHITE BROWN YELLOW GREEN RED 12V NOT USED GD TM RT LT BLUE WHITE BROWN YELLOW GREEN RIGHT TURN SIGNAL RED R TAIL LIGHT RED LEFT TURN SIGNAL RED L TAIL LIGHT RED LEFT SIDE MARKER...

Страница 302: ...WILL BE INSTALLED BY AUS AND SA DEALERS 4 5 6 3 7 8 2 LEFT STOP TURN MARKER LIGHT LOCATED AT BACK OF BOOM LICENSE PLATE LIGHT BROWN MARKER RED STOP WHITE GROUND A B C NOT USED 9 NOT USED 10 NOT USED...

Страница 303: ...UND FROM BRAKES 2 BLACK ELECTRIC BRAKES 3 BROWN YELLOW BROWN GREEN TAIL RUNNING LIGHTS 7 NOT USED 6 GREEN RIGHT STOP TURN 5 YELLOW LEFT STOP TURN 4 NOT USED 6 2 1 5 3 4 7 GD TM LT RT BLUE GREEN WHITE...

Страница 304: ...SECTION 7 BASIC ELECTRICAL INFORMATION SCHEMATICS 7 32 3121200 NOTES...

Страница 305: ......

Страница 306: ...orateOffice JLGIndustries Inc 1JLGDrive McConnellsburg PA17233 9533USA 717 485 5161 Corporate 877 554 5438 CustomerSupport 717 485 6417 VisitourwebsiteforJLGWorldwideLocations www jlg com 3121198 3121...

Отзывы: