User’s Manual
13
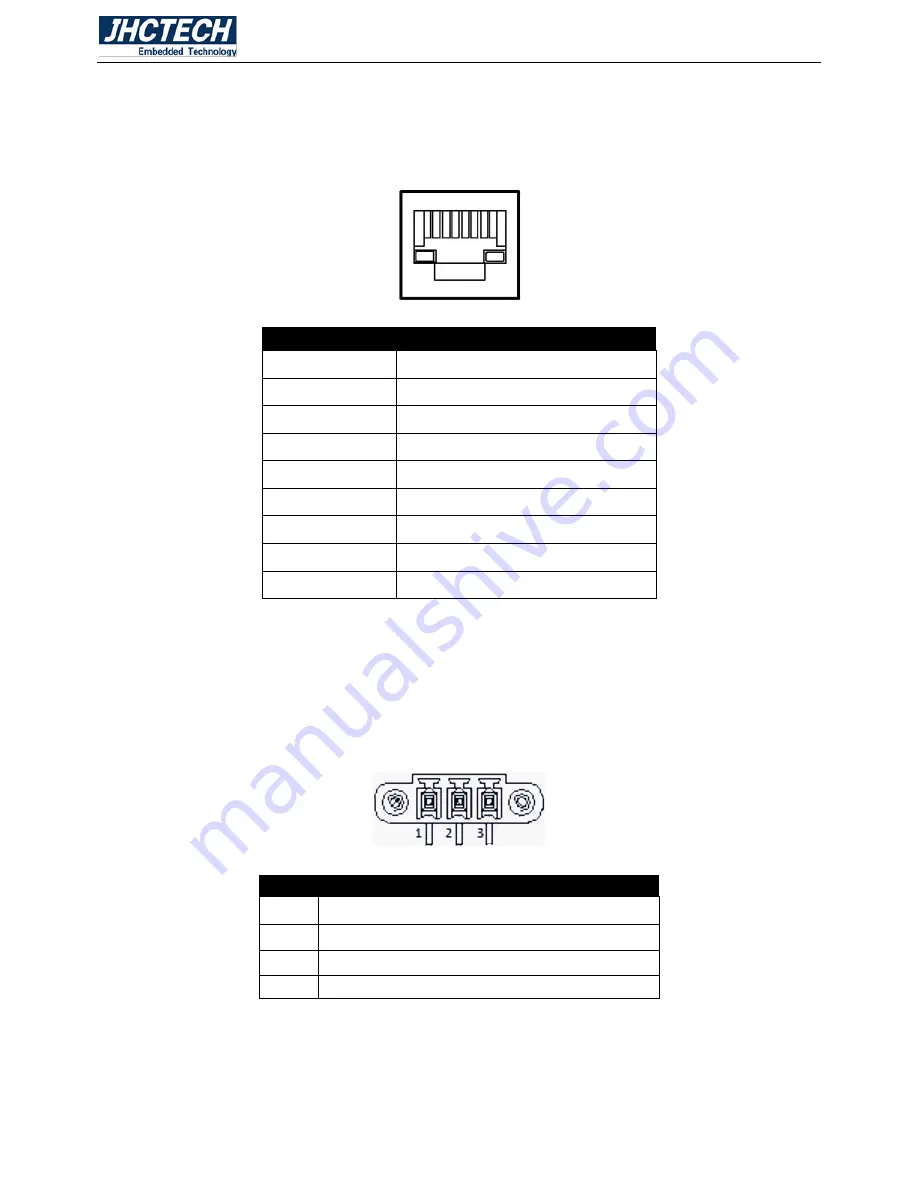
2.4.1 Ethernet Connector (LAN)
The ALAD-A1201T is equipped with two Intel I211AT chip for 10/100/1000Mbps Ethernet controllers.
The Ethernet port provides a standard RJ-45 connector with LED indicators on the front side to show its
Active/Link status (Green LED) and Speed status (white LED). Table 2.1 for pin assignments
Figure 2.12 Ethernet Connector
Table 2.1: RJ-45 Connector pin assignments
Pin
10/100/1000BaseT Signal Name
1
TX+(10/100), BI_DA+(GHz)
2
TX-(10/100), BI_DA-(GHz)
3
RX+(10/100), BI_DB+(GHz)
4
BI_DC+(GHz)
5
BI_DC-(GHz)
6
RX-(10/100), BI_DB-(GHz)
7
BI_DD+(GHz)
8
BI_DD-(GHz)
2.4.2 Power Input Connector (DC-IN)
This
3-pin 3.81mm connector
provides maximum of 60W power and is considered a low power solution.
Connect a DC power cord to this
connector
. Use a power adapter within 12~24V DC output voltage.
Using a voltage out of the range 12~24V may fail to boot the system or cause damage to the system
board.
Figure 2.13 3-pin 3.81 Connector
Table 2.2: Power Connector Pin Assignments
Pin
Signal Name
1
+12~24V
2
NC
3
GND
Содержание ALAD-A1201T
Страница 2: ...User s Manual 2 Version Note No Ver Note Date Writer 1 A1 0 first publish 20160718 Colin Cheng ...
Страница 8: ...User s Manual 1 General Information CHAPTER 1 ...
Страница 11: ...User s Manual 4 EMC CE FCC Class A 1 5 Mechanical Specifications ALAD A1201T Dimensions Uint mm Figure 1 1 ...
Страница 12: ...User s Manual 5 Hardware Installation CHAPTER 2 ...
Страница 19: ...User s Manual 12 2 4 I O indication Front view Rear view Figure 2 11 ...
Страница 25: ...User s Manual 18 Figure 2 22 Figure 2 23 ...
Страница 32: ...User s Manual 25 Figure 2 35 Figure 2 36 ...
Страница 36: ...User s Manual 29 Step 2 Aligning the I O cover at the I O opening note the key holes Figure 2 43 Figure 2 44 ...
Страница 38: ...User s Manual 31 Figure 2 47 Step 2 Plug USB device into the USB type A connector Figure 2 48 ...
Страница 39: ...User s Manual 32 2 5 6 Panel Mounting Step 1 Install the panel PC into the panel opening Figure 2 49 ...
Страница 41: ...User s Manual 34 Step 3 Insert the screws into each clamp and fasten them Figure 2 52 ...
Страница 42: ...User s Manual 35 BIOS Setup CHAPTER 3 ...
Страница 52: ...User s Manual 45 Figure 3 11 PCI Express Configuration Figure 3 12 PCI Express Root Port ...
Страница 58: ...User s Manual 51 Figure 3 20 USB Boot 3 12 Exit Figure 3 21 Exit ...
Страница 60: ...User s Manual 53 Driver Installation CHAPTER 4 ...
Страница 64: ...User s Manual 57 SYSTEM RESOURCE CHAPTER 5 ...
Страница 65: ...User s Manual 58 5 1 WDT Function WDT Set Example See the function WD_SetTimerValue ucResetTime ...


