
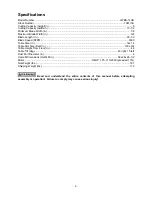


9
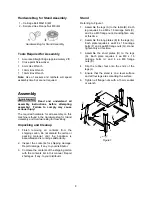
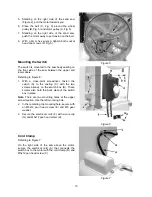
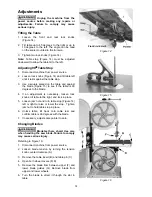
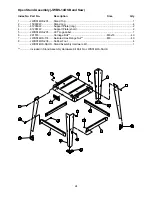
Mounting Bandsaw to Table
The saw body is heavy! Use
caution when lifting! Stabilize until firmly
attached to the stand! Failure to comply may
cause serious injury!
Referring to Figure 2:
1. With the aid of a second person, lift the saw
body (A) and place onto the stand top (B).
Be sure front of saw (with JET logo) faces
stand front (JET logo).
2. Place M8 flat washers (D) on M8x35 hex
cap screws (C) and insert screws through
four mounting holes in the bandsaw and
stand.
3. Secure with four M8 flange
nuts
(E).
Figure 2
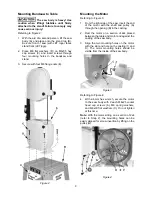
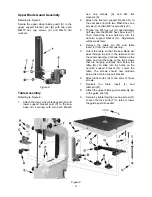
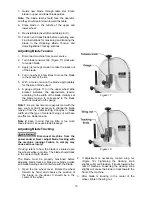
Mounting the Motor
Referring to Figure 3:
1. From the right side of the saw, insert the end
of the motor with the shaft and pulley (A)
through the opening (B) in the casting.
2. Rest the motor on a section of 2x4 placed
between the table and motor and against the
casting of the saw body.
3. Align the two mounting holes on the motor
with the slot and hole on the casting (C and
D). The motor mounting holes should be
visible from the inside of the saw body.
Figure 3
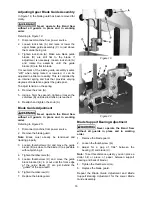
Referring to Figure 4:
4. With a 6mm hex wrench, secure the motor
to the saw body with 2 each M8x25
socket
head cap screws
(A), M8
spring washers,
and M8x30
flat washers
(C).
Do not tighten
at this time.
Note:
With the motor sitting on a section of 2x4
(refer to Step 2), the mounting holes can be
easily aligned for screw insertion by lifting on the
pulley (G).
Figure 4
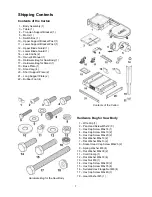
Содержание JWBS-140S
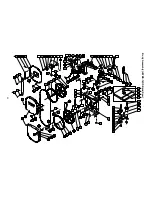
Страница 23: ...23 Body Assembly JWBS 14OS Band Saw...
Страница 25: ...25 Electrical Connections 115 volt...
Страница 26: ...26 230 volt...
Страница 27: ...27 Notes...
Страница 28: ...28 WMH Tool Group 2420 Vantage Drive Elgin Illinois 60123 Phone 800 274 6848 www wmhtoolgroup com...


