11
EHB-1018VM | EHB-1018VMH
12.6 BOW WEIGHT ADJUSTMENT
Bow weight is one of the most important adjustments of
the saw. If the bow weight is not set properly, one can
expect poor performance, crooked cuts, tooth stripping,
stalling, and the blade popping off the blade wheels. The
hydraulic feed rate unit will not compensate for improper
bow weight. Bow weight has been set at the factory and
should not need any adjustment. If adjustment becomes
necessary:
1.
Disconnect machine from power source.
2.
Turn on hydraulic valve (F, Figure 2).
3.
Turn cutting pressure control valve (E, Figure 2)
counterclockwise until it stops.
4.
Place one end of a fi sh-type scale under the blade
tension handle and lift the saw with the other end.
The scale should indicate approximately 22-24 lbs.
for the EHB-1018VM/VMH.
5.
Adjust tension to approximately 22-24 lbs. by turn
ing the adjustable C-bolt found at the end of the coil
spring on the rear of the band saw.
6.
Connect the machine to the power source.
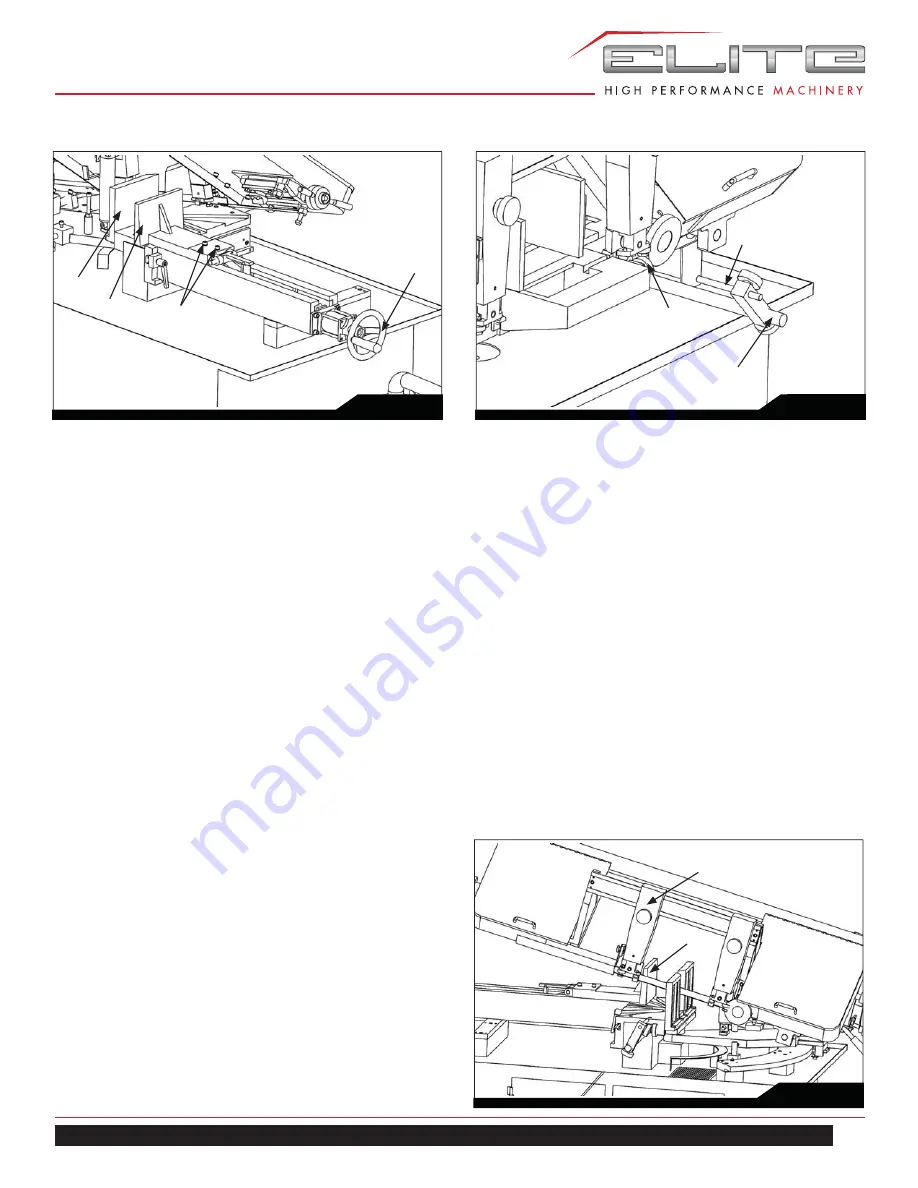
12.7 ADJUSTING STOCK ADVANCE STOP
The Stock Advance Stop is used mainly when more than
one piece is to be cut to the same length. Simply position
the stop block (A) Fig.11, the desired distance away from
the blade.
The stop may be repositioned by loosening screw (B) and
moving the rod (C) accordingly. To move the stop block
(A) out of the way simply push it to the down position.
12.8 SETTING UP THE MACHINE FOR
OPERATION
1.
Select the proper speed and blade for the type of
material you are cutting.
2.
Make sure blade tension is adjusted properly.
3.
Lift the saw frame up and turn the feed rate knob to
zero.
4.
Place the stock between the vise jaws, set the stock
for the desired width of cut and tighten the vise.
5.
Make sure the left blade guide bracket (A) is adjusted
as close as possible to the left vise jaw (B) Fig. 12.
6.
Turn the machine on adjust coolant fl ow by turning
knob (G) Fig. 2.
7.
Turn the feed rate control (K) Fig 2, counterclock
wise until the saw blade begins to lower the desired
rate of speed.
8.
Proceed to cut throughout the workpiece, as shown in
Fig. 12. The machine will turn off at the completion of
the
cut.
Fig. 10
A
D
B
C
Fig. 11
B
C
A
Fig. 12
A
B
Содержание Elite EHB-1018VM
Страница 15: ...15 EHB 1018VM EHB 1018VMH SAW STAND AND BED ASSEMBLY EHB 1018VM 1018VMH...
Страница 20: ...20 Horizontal Band Saw SAW ARM ASSEMBLY EHB 1018VM 1018VMH...
Страница 29: ...29 EHB 1018VM EHB 1018VMH NOTES...
Страница 30: ...30 Horizontal Band Saw NOTES...
Страница 31: ...31 EHB 1018VM EHB 1018VMH NOTES...
Страница 32: ...32 Horizontal Band Saw NOTES...


