4. If the grade is too steep and there will be too much space under the bottom rail of the section, it may be
necessary to cut the section in half and use an extra post to reduce the space beneath the section.
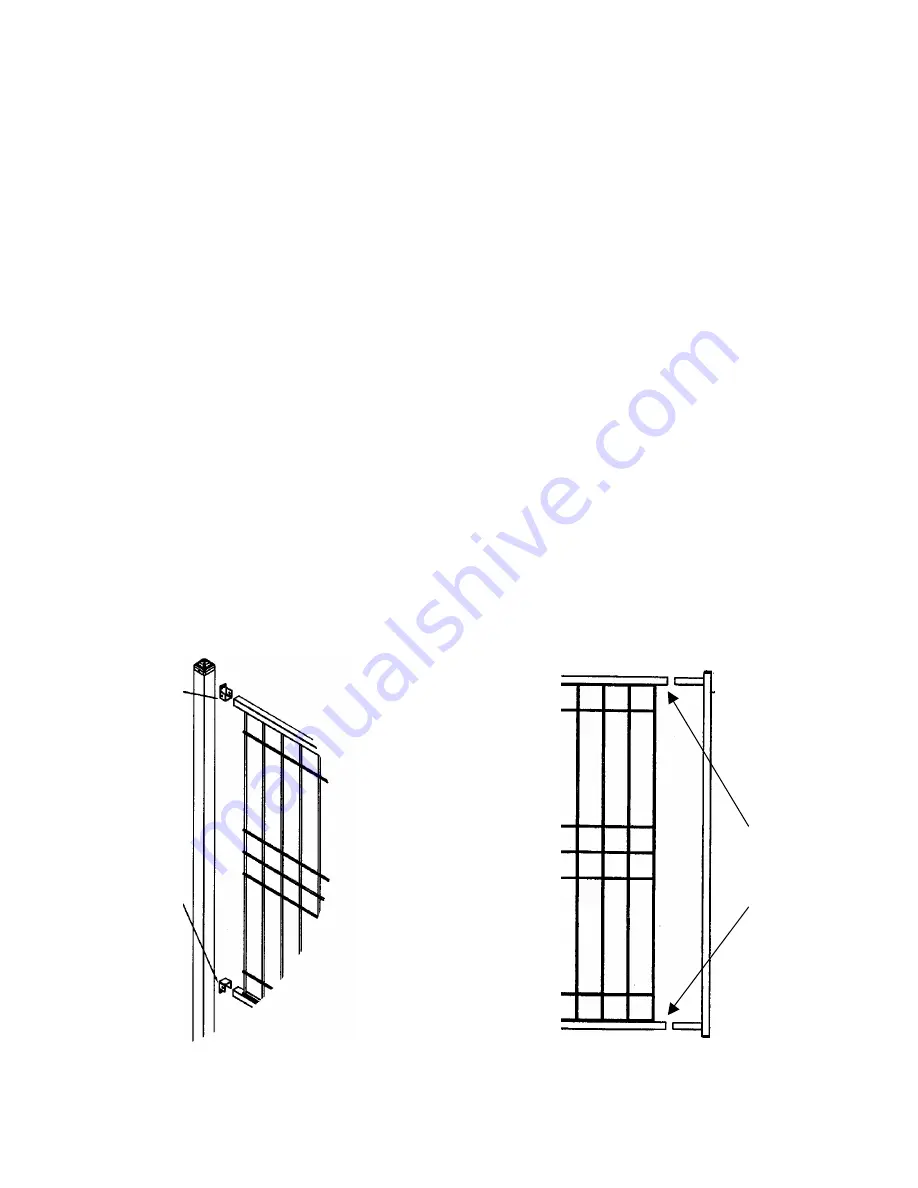
5. After all of the posts are set firmly, attach a bracket near the top of each post using 2 self-drilling hex-
head screws. (See Figure 1). The rails will be level, so adjust the bracket height to take into account any
space under the fence due to the slope of the ground. Place a panel of fence into these brackets.
6. Install the bottom brackets onto the posts facing downward (as shown in Figure 1) around the bottom
horizontal rail of the section. When the top and bottom brackets on a post are installed facing opposite
directions, there is no need to use screws into the rails. Screws can be added if desired, however.
7. Fill in the top of the post holes with dirt and grass so the fence will look like it’s been there for years. Your
fence installation is now complete!
Gate Installation:
Once the concrete has set around the gate posts, you may install the gates. Proper installation will result in
approximately a 2” space between the gate and each of the gate posts. First, you must assemble the gate
using a gate kit as follows:
1. For a single gate, cut a section of fence 6” less than the opening size you want. For a double gate, each
section should be cut 5” less than half of the opening.
2. Attach the verticals of the gate by inserting them into the horizontal rails of the section and fastening with
two self-drilling screws at each corner. (See Figure 2.)
3. Attach hinges to the gate and the gate post using the self-drilling screws provided. Mount one hinge near
the top rail of the gate and the other near the bottom rail to distribute the weight of the gate evenly.
When using self-closing hinges, the offset hinge will be on the bottom. The gate should now swing freely.
4. For double drive gates, the drop rod is installed before the latch. Fasten one of the two “guides” to the
face of one side of a gate frame near the bottom of the latch side. Place the other guide high enough to
ensure ground clearance of the drop rod when the gate is opened. Insert the drop rod through the two
guides and adjust them for smooth operation.
5. Position the latch at a convenient height (or as required by local codes) and fasten the latch on the side
of the gate.
6. Enjoy your Jerith gate!
Screws at top
of the bracket
Screws at bottom
of the bracket
Figure 2
Figure 1
Insert sides of gate
into rails and fasten
with 2 screws at
each corner


