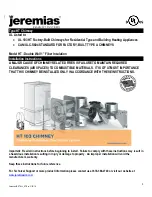


5
Jeremias INSTALL_HT
Rev: 3/26/19
Enclosures
It is recommended that the Chimney be installed within the building
envelope to help reduce condensation, creosote buildup and improve
draft. The chimney should be enclosed where it passes through
occupied spaces, closets, storage areas or any place where the chimney
surface could be contacted by persons or combustible materials. In cold
climates, exterior chimney systems should be enclosed in a chase.
Maintain the 2” clearance to combustibles for all enclosures.
Joint Assembly
–
Locking Band
HT Chimney segments are joined together with a Locking Band (LB) to
create a complete chimney system.
To install (See Fig 3 & 4):
1.
Orient the Chimney so the Flow arrow on the label is pointing
up and away from the appliance.
2.
Slide the female end down over the male end. Apply pressure
and twist the vent to fully engage the sections. The vent
lengths will reach a mechanical stop when fully engaged.
3.
Note: The Locking Band is not symmetrical and must be
oriented correctly. Position the Locking Band so that the
number etching is right-side-up. When viewing the worm gear
straight on, the nut is to the left. With the worm gear rotated to
away from sight, the nut can be accessed with a screw driver
in your right hand.
4.
Position the Locking Band around the joint capturing the beads
from each pipe.
5.
Use either a 5/16” socket or standard screwdriver to t
ighten
the screw on the LB until it is snug, then tighten an additional
1/4 turn.
Joint Assembly - Alternate
HT Chimney segments can be joined together with screws instead of using a
locking band.
To Install (See Fig 5):
1.
Orient the Chimney so the Flow arrow on the label is pointing up and
away from the appliance.
2.
Slide the female end down over the male end. Apply pressure to fully
engage the sections. The vent lengths will reach a mechanical stop when
fully engaged.
3.
Screw #8x1/2 long self-drilling screws, through the overlapping chimney
joint. Only penetrate the outer wall of chimney. Install minimum of 3
screws. Caution: Do not drill more than ½ deep into chimney pipe.
4.
Apply High Temperature (250°F) Silicone sealant over each screw to
eliminate moisture penetration.
Fig 3. HT Joint Installation
Fig 4. HT Joint / Cut-away view
Fig 5. Alternate Screw Joint


