background image


E11 

SETTING THE CLOCK 


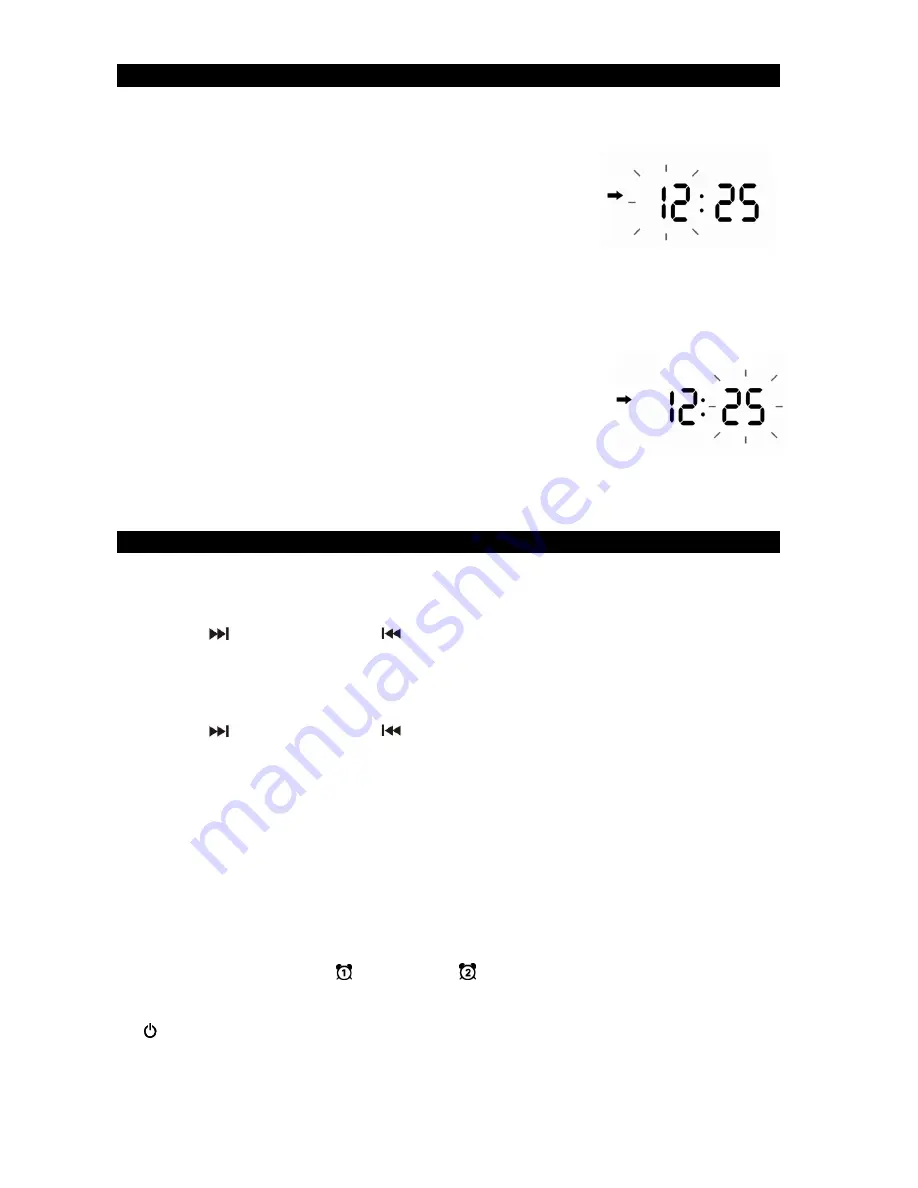
The LCD DISPLAY (#11) will flash when the unit is plugged in for the first time. The unit is 
now in

 standby mode. 


Setting the Time: 

1. 

In standby mode, press and hold the TIME SET 

BUTTON 

(#5)

 until the hour digits of the clock display begin to flash.


2.  Repeatedly tap the 


BUTTON (#24) or 

 BUTTON 

(#22) to set the hour. Press and hold the buttons for fast 
advance/reverse setting. Make sure the correct AM or PM time is selected when 
setting the hour. 


Note:

 The PM ICON is located in the left part of the LCD DISPLAY (#11). 

The PM ICON will light when the hour digits selected are for PM time. The PM ICON 
will be off when the hour digits selected are for AM time. 


3. 

Press the TIME SET 

BUTTON (#5)

 to confirm

 the time and 

the minute digits will 

flash

.   

4. 

Repeatedly 

tap the 


BUTTON (#24) or 

 BUTTON (#22) 

to set the minute. Press and hold the buttons for fast 
reverse/advance setting. 

5. 

Tap the TIME SET 

BUTTON (#5)

 to 

confirm and complete the setting. The display 

will stop 

flashing


ALARM OPERATION 


Setting the alarms:   

1.  In standby mode, press and hold the ALARM 1 BUTTON (#8), the hour of the alarm 

time will flash.   

2.  Tap the 


BUTTON (#22) or 

  BUTTON (#24) to set the hour. Press and hold 

the buttons for fast advance/reverse setting.   
Note: Make sure the correct AM or PM time is selected when setting the hour.   

3.  Tap the ALARM 1 BUTTON (#8) to confirm the hour setting, the minute digits will 

flash to prompt for input.   

4.  Tap the 


BUTTON (#22) or 

  BUTTON (#24) to set the minute. Press and hold 

the button for fast reverse/advance setting.   

5.  Tap the ALARM 1 BUTTON (#8) to confirm the minute setting.   
6.  Tap the ALARM 1 BUTTON repeatedly to select the wake up option (CD, ALARM or 

RADIO) and complete the ALARM 1 setting.   

7.  Setting the ALARM 2 time uses the same steps above, but using the ALARM 2 

BUTTON (#9) in place of the ALARM 1 BUTTON (#8). 


Note: The unit will automatically save the settings and return to Standby mode if 
you do not tap any button within 10 seconds. 


Waking to Alarm - Turning wake to ALARM on:   

1.  A beeping Alarm will automatically turn on when the alarm time is reached. The 

corresponding ALARM 1 

  or ALARM 2 

  icon will flash.   

2.  The volume level of the alarm sound will gradually increase from low to high.   
3.  Press the SNOOZE BUTTON to temporarily turn off the alarm, or press the POWER 

  BUTTON (#7) to turn the alarm off.   

If no buttons are pressed when the alarm is sounding, it will continue sounding for 60 
minutes and then turn off automatically. 
 

Содержание CD-785

Страница 1: ...ble Bluetooth CD Music System with Cassette and Digital AM FM Radio MODEL CD 785 USER MANUAL PLEASE READ THIS USER MANUAL COMPLETELY BEFORE OPERATING THIS UNIT AND RETAIN THIS BOOKLET FOR FUTURE REFER...

Страница 2: ...third grounding prong The wide blade or the third prong is provided for your safety If the provided plug does not fit into your outlet consult an electrician for replacement of the obsolete outlet 10...

Страница 3: ...rating instructions as an improper adjustment of other controls may result in damage and will often require extensive work by a qualified technician to restore the product to its normal operation e If...

Страница 4: ...ect the interference by one or more of the following measures Reorient or relocate the receiving antenna Increase the separation between the equipment and receiver Connect the equipment into an outlet...

Страница 5: ...the player may not operate properly Do not put anything in the safety slot If you do the laser diode will be ON when the CD door is still open If the unit is not to be used for a long period of time...

Страница 6: ...establish a safe level Start your volume control at a low setting Slowly increase the sound until you can hear it comfortably and clearly and without distortion Once you have established a comfortable...

Страница 7: ...E6 LOCATION OF CONTROLS MAIN UNIT...

Страница 8: ...NT 8 ALARM 1 BUTTON 29 CASSETTE CONTROL BUTTONS 9 ALARM 2 BUTTON RECORD BUTTON 10 SLEEP BUTTON PLAY BUTTON 11 LCD DISPLAY REWIND BUTTON 12 MEMORY PROG BUTTON FAST FORWARD BUTTON 13 MODE BUTTON STOP EJ...

Страница 9: ...nstalled correctly The remote will not work if the battery is installed with the wrong polarity WARNING DO NOT INGEST BATTERY CHEMICAL BURN HAZARD The remote control supplied with this product contain...

Страница 10: ...t to back until a click sound is heard indicating that the speaker is locked into position 3 Plug the left speaker cable into the SPEAKER OUT L JACK 35 and the right speaker cable into the SPEAKER OUT...

Страница 11: ...ity may damage the unit Do not mix old and new batteries Do not mix alkaline standard carbon zinc or rechargeable nickel cadmium batteries Only batteries of the same or equivalent type as recommend ar...

Страница 12: ...he BUTTON 22 or BUTTON 24 to set the hour Press and hold the buttons for fast advance reverse setting Note Make sure the correct AM or PM time is selected when setting the hour 3 Tap the ALARM 1 BUTTO...

Страница 13: ...WER BUTTON 7 to turn on the unit 2 Press the FUNCTION BUTTON 18 repeatedly to select FM or AM radio mode FM or AM icon and the tuning frequency appears on the LCD DISPLAY 11 3 Tune to the required rad...

Страница 14: ...ent station by storing another frequency in its place Recalling the Preset Stations In FM or AM radio mode tap the MEMORY BUTTON 12 repeatedly to select the preset stations in order BLUETOOTH OPERATIO...

Страница 15: ...AY 11 and start to read 3 Press the CD door OPEN CLOSE switch to open the CD door OP will show on the LCD DISPLAY 11 4 Place a CD with the printed side facing up inside the tray 5 Press the CD door to...

Страница 16: ...o enter additional programs The display will show FU when all the preset locations are full 6 Press the button to start playback in order 7 Press the button to stop playback and press it twice to clea...

Страница 17: ...M A CD 1 Tap the POWER BUTTON 7 to turn on the unit 2 Tap the FUNCTION BUTTON 18 repeatedly to select CD mode 3 Press the PAUSE BUTTON first and then RECORD PLAY BUTTON at cassette Recording function...

Страница 18: ...ternal device is connected then you only need to adjust the volume control of this system If the Headphone Jack of your external device is connected then you may need to adjust both the volume control...

Страница 19: ...INTENANCE 1 Do not subject the unit to excessive force shock dust or extreme temperature 2 Do not tamper the internal components of the unit 3 Clean your unit with a dry cloth Solvent or detergent sho...

Страница 20: ...r and back again Use only well known brands of tape Avoid use of C 120 cassettes Furthermore do not expose cassettes to direct sunlight dust or oil and do not touch the tape surfaces HEAD CLEANING The...

Страница 21: ...ust should be carefully wiped off the disc s recorded surface with a soft cloth Unlike conventional records compact discs have no grooves to collect dust and microscopic debris so gently wiping with a...

Страница 22: ...another device into the same outlet to confirm the outlet is working The unit does not respond no power No batteries installed or installed batteries are exhausted Install 8 x D batteries or replace t...

Страница 23: ...lure to provide reasonable care and necessary maintenance as outlined in the user manual 3 Warranty of all SPECTRA products applies to residential use only and is void when products are used in nonres...

Отзывы: