background image

9

Ice Dispenser

Ice dispenses from the ice maker storage bin in the freezer when 
the dispenser pad is pressed. The dispensing system will not 
operate when the freezer door is open. To turn off the ice maker, 
see “Ice Maker and Storage Bin.”
Your ice maker can produce both crushed and cubed ice. The 
display screen reads “CRUSHED” or “CUBED”, indicating which 
type is selected. To change the setting, press the ICE button 
before dispensing ice.
For crushed ice, cubes are crushed before being dispensed. This 
may cause a slight delay when dispensing crushed ice. Noise 
from the ice crusher is normal, and pieces of ice may vary in size. 
When changing from crushed to cubed, a few ounces of crushed 
ice will be dispensed along with the first cubes.

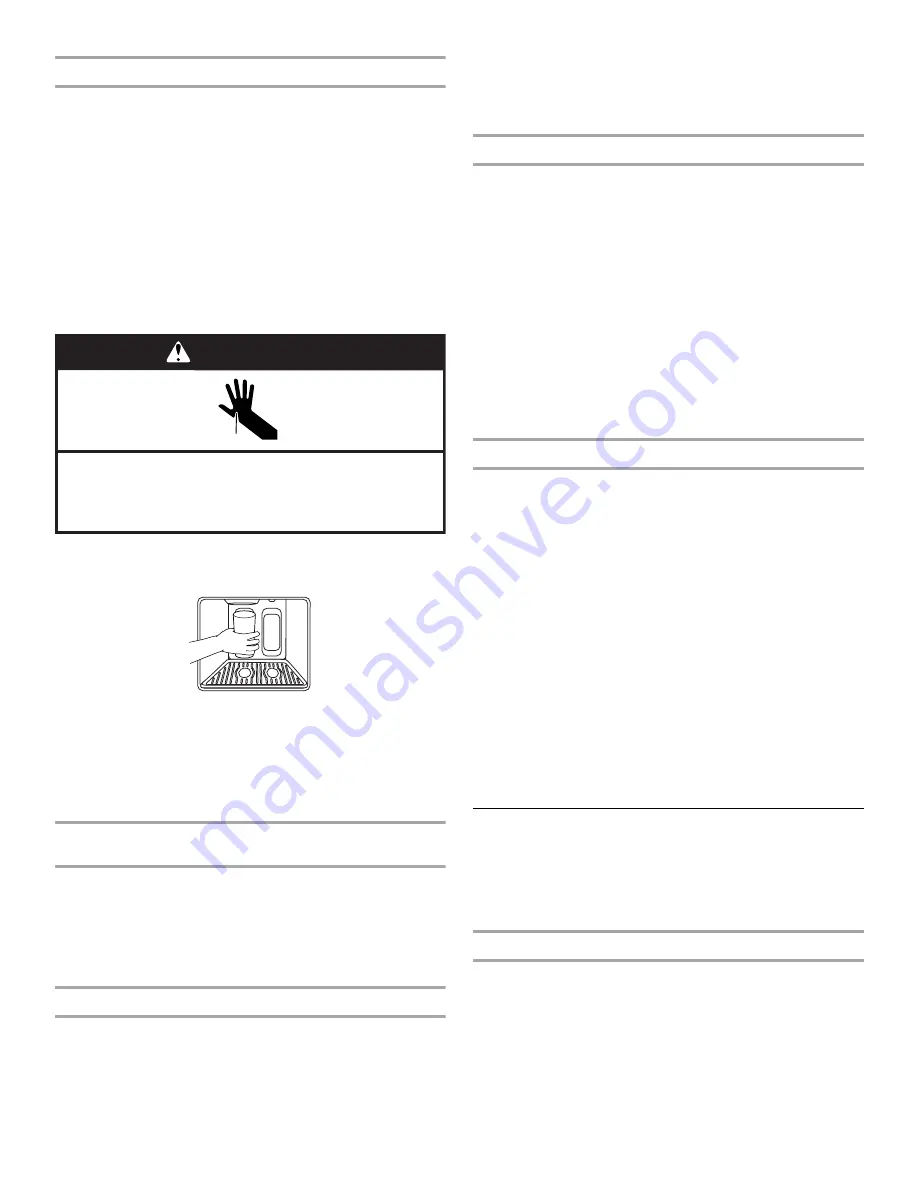
To Dispense Ice:

1. Press the button to select the desired type of ice.

2. Press a sturdy glass against the ice dispenser pad. Hold the 

glass close to the dispenser opening so ice does not fall 
outside of the glass. 

IMPORTANT: You do not need to apply a lot of pressure to the 
pad in order to activate the ice dispenser. Pressing hard will 
not make the ice dispense faster or in greater quantities.

3. Remove the glass to stop dispensing.

NOTE: Ice may continue to dispense for up to 10 seconds 
after removing the glass from the pad. The dispenser may 
continue to make noise for a few seconds after dispensing.

Dispenser Tray with Water Level Indicator 
(on some models)

Your dispenser may include a small tray at the bottom of the 
dispenser. It is designed to catch small spills and allow for easy 
cleaning. The tray can be removed from the dispenser and carried 
to the sink to be emptied or cleaned.
NOTE: There is no drain in the tray. When the tray is full of water 
and needs to be emptied, a small red indicator pops up at the 
back of the tray.

Dispenser Light (on some models)

When you use the dispenser, the light will automatically turn on. 
If you want the light to be on continuously, you may choose either 
ON or AUTO. 
ON: Press LIGHT to turn the dispenser light on. 
AUTO: Press LIGHT a second time to select AUTO mode. The 
dispenser light will automatically adjust to become brighter as the 
room brightens, dimmer as the room darkens.

OFF: Press LIGHT a third time to turn the dispenser light off.
The dispenser lights are LEDs that can not be changed. If it 
appears that your dispenser lights are not working, be sure that 
the light sensor is not blocked (in AUTO mode). See 
“Troubleshooting” for more information. 

Dispenser Lock (on some models)

The dispenser can be turned off for easy cleaning or to avoid 
unintentional dispensing by small children and pets. 
NOTE: The lock feature does not shut off power to the product, to 
the ice maker, or to the dispenser light. It simply deactivates the 
ice and water dispensers. To turn off the ice maker, see “Ice 
Maker and Storage Bin.”

Press and hold LOCK for 3 seconds to lock the dispenser. 
While the dispenser is locking, “LOCKING” will appear on the 
display screen and the blue indicator light around the LOCK 
button will flash. When the dispenser is locked, the indicator 
light will change to red for a few seconds, then turn off. 

Press and hold LOCK a second time to unlock the dispenser. 
While the dispenser is unlocking, “UNLOCKING” will appear 
on the display screen and the red indicator light around the 
LOCK button will flash. When the dispenser is unlocked, the 
indicator light will change to blue for a few seconds, then turn 
off.

Water Filter Status Light (on some models)

The water filter status light and display screen help you know 
when to change your water filter. Press the FILTER button to 
check the status of your water filter.
If the filter is new:
You must press FILTER to view the filter’s status. For a few 
seconds, the status light will be blue and the display screen will 
show what percentage of your filter’s life remains.
If it is almost time to change the filter:
The status light will automatically illuminate and will remain on, 
appearing yellow. The words “ORDER FILTER” will appear on the 
display screen. Press FILTER to see what percentage of your 
filter’s life remains. You should order the appropriate replacement 
filter. See “Accessories.”
If it is time to change the filter:
The status light will remain on, changing to red. The words 
“REPLACE FILTER” and “HOLD BUTTON TO RESET” will appear 
on the display screen until the filter has been changed and the 
status light has been reset.
To reset the water filter status light:
After changing the filter, reset the status light by pressing and 
holding the FILTER button for 3 seconds. The status light will blink 
red and change to blue, then turn off when the system is reset.

Ice Maker and Storage Bin

(on some models - Accessory)

IMPORTANT: Flush the water system before turning on the ice 
maker. See “Water and Ice Dispensers.” Allow 24 hours to 
produce the first batch of ice. Discard the first three batches of ice 
produced. Allow 3 days to completely fill the ice container.   

Style 1

To Turn the Ice Maker On/Off:

The On/Off switch for the ice maker is a wire shutoff arm located 
on the side of the ice maker. 
1. To turn the ice maker on, simply lower the wire shutoff arm.

NOTE: Your ice maker has an automatic shutoff. As ice is 
made, the ice cubes will fill the ice storage bin and the ice 
cubes will raise the wire shutoff arm to the OFF (arm up) 
position.

Cut Hazard

Use a sturdy glass when dispensing ice.

Failure to do so can result in cuts.

WARNING

Содержание W10303988A

Страница 1: ...visit our website at www jennair ca MANUAL DE USO Y CUIDADO Si tiene preguntas respecto a las caracter sticas funcionamiento rendimiento partes accesorios o servicio t cnico llame al 1 800 JENNAIR 1...

Страница 2: ...y hielo en algunos modelos 26 F brica de hielo y dep sito 27 Sistema de filtraci n de agua 28 CUIDADO DE SU REFRIGERADOR 29 Limpieza 29 C mo cambiar los focos 30 Cortes de corriente 30 Cuidado durant...

Страница 3: ...essages This is the safety alert symbol This symbol alerts you to potential hazards that can kill or hurt you and others All safety messages will follow the safety alert symbol and either the word DAN...

Страница 4: ...your refrigerator has a water filter it may further reduce the water pressure when used in conjunction with a reverse osmosis system Remove the water filter See Water Filtration System If you have qu...

Страница 5: ...your refrigerator or changing light bulbs To Remove Top Grille 1 Grasp both ends of the top grille 2 Push the top grille straight up then pull straight out Lay the grille on a soft surface To Replace...

Страница 6: ...oor is open for an extended period of time To Adjust Set Point Temperatures The set point range for the freezer is 5 F to 5 F 21 C to 15 C The set point range for the refrigerator is 33 F to 45 F 0 C...

Страница 7: ...maker will remain off until Rest Mode is pressed again Sabbath Mode on some models The Sabbath Mode feature is designed for the traveler or for those whose religious observances require turning off t...

Страница 8: ...lease it for 5 seconds Repeat until water begins to flow Once water begins to flow continue depressing and releasing the dispenser lever 5 seconds on 5 seconds off until a total of 3 gal 12 L has been...

Страница 9: ...NOTE The lock feature does not shut off power to the product to the ice maker or to the dispenser light It simply deactivates the ice and water dispensers To turn off the ice maker see Ice Maker and S...

Страница 10: ...d as needed To clean the ice storage bin 1 Empty the ice container Use warm water to melt the ice if necessary NOTE Do not use anything sharp to break up the ice in the bin or bucket This can cause da...

Страница 11: ...kwise until it stops IMPORTANT Do not discard the cap It is part of your refrigerator Keep the cap to use with the replacement filter 3 Align the ridge on the cap with the arrow on the new filter and...

Страница 12: ...ocated behind the top grille ventilation panel regularly Coils may need to be cleaned as often as every other month This may help save energy Use a vacuum cleaner with an extended attachment to clean...

Страница 13: ...ator 2 If your refrigerator has an automatic ice maker Turn off the water supply to the ice maker at least one day ahead of time When the last load of ice drops raise the wire shutoff arm to the OFF u...

Страница 14: ...urs following installation for the refrigerator to cool completely Door s opened often or left open Allows warm air to enter refrigerator Minimize door openings and keep doors fully closed Large load...

Страница 15: ...dispenser stalling while dispensing crushed ice Change the ice button from crushed to cubed If cubed ice dispenses correctly depress the button for crushed ice and begin dispensing again Has the dispe...

Страница 16: ...e following information about your appliance to help you obtain assistance or service if you ever need it You will need to know your complete model number and serial number You can find this informati...

Страница 17: ...or cold water use only Do not use with water that is microbiologically unsafe or of unknown quality without adequate disinfection before or after the system Refer to the Warranty section for the Manuf...

Страница 18: ...not use with water that is microbiologically unsafe or of unknown quality without adequate disinfection before or after the system Refer to the Warranty section for the Manufacturer s name address and...

Страница 19: ...unless such damage results from defects in materials or workmanship and is reported to Jenn Air within 30 days from the date of purchase 6 Any food or medicine loss due to refrigerator or freezer pro...

Страница 20: ...que pueden ocasionar la muerte o una lesi n a usted y a los dem s Todos los mensajes de seguridad ir n a continuaci n del s mbolo de advertencia de seguridad y de la palabra PELIGRO o ADVERTENCIA Est...

Страница 21: ...Si su refrigerador tiene un filtro de agua se podr reducir la presi n de agua a n m s si se usa en conjunto con un sistema de smosis inversa Quite el filtro de agua vea Sistema de filtraci n de agua...

Страница 22: ...pagado Para quitar la rejilla superior 1 Tome ambos extremos de la rejilla superior 2 Empuje la rejilla superior directamente hacia arriba y luego jale directamente hacia afuera Coloque la rejilla sob...

Страница 23: ...ntroles est n ajustados correctamente cuando la leche o los jugos est n tan fr os como Ud desea y cuando el helado tiene consistencia firme NOTA Espere por lo menos 24 horas entre ajustes Vuelva a ver...

Страница 24: ...ter stica de Rest Mode Modo de descanso se ha concebido para los viajeros o para aquellas personas que debido a sus creencias religiosas necesitan que se apaguen las luces y la f brica de hielo Al sel...

Страница 25: ...z indicadora de ese ajuste se iluminar para verificar que la bandeja est lista para ser cargada Estilo 1 Modelos con despachador Estilo 2 Modelos sin despachador C mo remover y volver a colocar la tap...

Страница 26: ...stribuci n no funcionar cuando la puerta del congelador est abierta Para apagar la f brica de hielo vea F brica de hielo y dep sito Su f brica de hielo produce hielo picado y en cubos La pantalla mues...

Страница 27: ...ro de reemplazo adecuado Vea Accesorios Si ya es tiempo de cambiar su filtro La luz de estado permanecer encendida y cambiar a rojo Las palabras REPLACE FILTER Reemplazar el filtro y HOLD BUTTON TO RE...

Страница 28: ...a ablandar el agua como la sal pueden da ar ciertos componentes de la f brica de hielo y producir un hielo de muy baja calidad Si no se puede evitar el uso de un suministro de agua blanda aseg rese de...

Страница 29: ...l filtro est seguro en su lugar 8 Enjuague el sistema de agua Vea Despachadores de agua y hielo Uso de la f brica de hielo sin el filtro de agua Puede usar la f brica de hielo sin un filtro de agua El...

Страница 30: ...da de electrodom sticos 1 Quite la rejilla superior Vea la secci n Interruptor de encendido apagado 2 Presione el interruptor en la posici n de OFF Apagado 3 Si se indica quite la pantalla de la luz c...

Страница 31: ...ne el cortacircuitos Si el problema contin a llame a un electricista Est n encendidos los controles Aseg rese de que los controles del refrigerador est n encendidos Vea Uso de los controles Se est des...

Страница 32: ...oco de humedad Est h meda la habitaci n Esto contribuye a la acumulaci n de humedad Se abre n o se deja n la s puerta s abierta s a menudo Esto hace que entre aire h medo al refrigerador Reduzca al m...

Страница 33: ...interrumpe la distribuci n de hielo Espere 3 minutos para que el motor del despachador se reposicione antes de usarlo de nuevo El despachador de agua no funciona debidamente Est completamente cerrada...

Страница 34: ...a siguiente informaci n acerca de su electrodom stico para ayudarle a obtener asistencia o servicio t cnico si alguna vez llegara a necesitarlo Deber tener a mano el n mero completo del modelo y de la...

Страница 35: ...mpe o real puede variar El producto es para uso con agua fr a nicamente No use con agua que no sea microbiol gicamente segura o que sea de calidad desconocida sin desinfectarla adecuadamente antes o d...

Страница 36: ...e variar El producto es para uso con agua fr a nicamente No use con agua que no sea microbiol gicamente segura o que sea de calidad desconocida sin desinfectarla adecuadamente antes o despu s del sist...

Страница 37: ...co principal a menos que el mismo sea debido a defectos en los materiales o la mano de obra y se le informe a Jenn Air en un lapso de 30 d as a partir de la fecha de compra 6 Cualquier p rdida de comi...

Страница 38: ...de s curit vous signale les dangers potentiels de d c s et de blessures graves vous et d autres Tous les messages de s curit suivront le symbole d alerte de s curit et le mot DANGER ou AVERTISSEMENT C...

Страница 39: ...votre r frig rateur a un filtre eau celui ci peut r duire encore plus la pression de l eau lorsqu il est utilis avec un syst me d osmose inverse Retirer le filtre eau Voir Syst me de filtration d eau...

Страница 40: ...u remplacement des ampoules d clairage Pour enlever la grille sup rieure 1 Saisir les deux extr mit s de la grille sup rieure 2 Pousser la grille sup rieure tout droit vers le haut puis le tirer tout...

Страница 41: ...lisation domestique normale Les r glages sont faits correctement lorsque le lait ou le jus sont aussi froids que vous l aimez et lorsque la cr me glac e est ferme REMARQUE Attendre au moins 24 heures...

Страница 42: ...mode repos sur certains mod les La caract ristique Rest Mode mode repos est con ue pour les personnes qui voyagent ou pour celles dont les pratiques religieuses requi rent d teindre les lumi res et l...

Страница 43: ...ineux pour ce r glage s allumera pour v rifier que le tiroir est pr t tre charg Style 1 Mod les avec distributeur Style 2 Mod les sans distributeur D pose et r installation du couvercle du centre de s...

Страница 44: ...ons dans le cong lateur lorsqu on appuie sur la plaque du distributeur Le syst me de distribution ne fonctionne pas lorsque la porte du cong lateur est ouverte Pour teindre la machine gla ons voir Ma...

Страница 45: ...tront sur l cran d affichage Appuyer sur FILTER filtre pour visualiser la dur e de vie r siduelle du filtre pourcentage Vous devez commander le filtre de rechange appropri Voir Accessoires S il est te...

Страница 46: ...mentation d eau adoucie ne peut pas tre vit e s assurer que l adoucisseur d eau fonctionne bien et est bien entretenu Il est normal que les gla ons collent ensemble aux coins Ils se s pareront facilem...

Страница 47: ...uyant sur le bouton d jection et en tirant sur la capsule Voir Remplacement du filtre eau plus haut dans cette section 2 Enlever la capsule en la tournant dans le sens antihoraire jusqu ce qu elle s a...

Страница 48: ...tre l interrupteur d alimentation la position OFF arr t 3 Enlever le prot ge ampoule s il y a lieu comme sur l illustration REMARQUE Pour nettoyer le prot ge ampoule le laver l eau ti de et avec un d...

Страница 49: ...fusible ou r enclencher le disjoncteur Si le probl me persiste appeler un lectricien Les commandes sont elles en marche S assurer que les commandes du r frig rateur sont en marche Voir Utilisation des...

Страница 50: ...ieur REMARQUE Une certaine accumulation d humidit est normale La pi ce est elle humide Ceci contribue l accumulation de l humidit Porte s ouverte s souvent ou laiss e s ouverte s Ceci permet l air hum...

Страница 51: ...il distribue de la glace concass e Changer le r glage crushed glace concass e pour le r glage cubed gla ons Si les gla ons sont correctement distribu s appuyer sur le bouton crushed pour obtenir de la...

Страница 52: ...sissauga Ontario L5N 0B7 Au Canada visitez www jennair ca Dans votre correspondance veuillez indiquer un num ro de t l phone o l on peut vous joindre dans la journ e Conservez ce manuel et votre re u...

Страница 53: ...e rendement r el peut varier Le produit doit tre utilis pour l eau froide seulement Ne pas utiliser pour le filtrage d une eau microbiologiquement pollu e ou de qualit inconnue en l absence d un dispo...

Страница 54: ...peut varier Le produit doit tre utilis pour l eau froide seulement Ne pas utiliser pour le filtrage d une eau microbiologiquement pollu e ou de qualit inconnue en l absence d un dispositif de d sinfec...

Страница 55: ...m nager moins que ces dommages ne r sultent de vices de mat riaux ou de fabrication et ne soient signal s Jenn Air dans les 30 jours suivant la date d achat 6 Toute perte d aliments ou de m dicaments...

Страница 56: ...istered Trademark Trademark of Jenn Air U S A Used under license in Canada Marca registrada Marca de comercio de Jenn Air U S A Usada en Canad bajo licencia Marque d pos e Marque de commerce de Jenn A...

Отзывы: