Jeep Compass 2020, Руководство пользователя
Почитайте о важных деталях и руководствах по эксплуатации для Jeep Compass 2020 владельца. Бесплатно загрузите руководство по эксплуатации нашего веб-сайта manualshive.com, чтобы узнать, как эффективно использовать ваш автомобиль и максимизировать его производительность. Наслаждайтесь каждой поездкой на вашем новом Jeep Compass 2020!
Поделиться
Скачать


Отзывы:
Нет отзывов
Похожие инструкции для Compass 2020

7000
Бренд: Federal Signal Corporation Страницы: 13
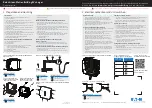
Green Motion Building
Бренд: Eaton Страницы: 12

Yamaha Rhino 660
Бренд: Yamaha Страницы: 3

CAMCOLC1N
Бренд: Velleman Страницы: 6

Focus ST 2018
Бренд: Ford Страницы: 38

1308
Бренд: Thule Страницы: 8

Envoy XUV 2004
Бренд: GMC Страницы: 20

K728W
Бренд: Whispbar Страницы: 85

VTL17LTJ
Бренд: Boyo Страницы: 9

Legacy 2011
Бренд: Subaru Страницы: 19

AXDSPX-TY1
Бренд: Axxess Страницы: 16

928 GTS 1994
Бренд: Porsche Страницы: 127

32-2250
Бренд: Westin Страницы: 3

Civic Hatch 2017
Бренд: Honda Страницы: 687

12H4S140
Бренд: Whelen Engineering Company Страницы: 4

TracVan Double
Бренд: TracRac Страницы: 6

TR-JECOOE
Бренд: Black Horse Off Road Страницы: 3

100SMU
Бренд: EZ-ON Страницы: 2


